| Dobrodošli, gost |
Trebate se registrirati prije nego možete pisati na ovoj stranici.
|
| Korisnici online |
Ovdje je trenutno 10 korisnika online.
» 0 Član(ova) i 10 Gost(iju)
|
|
|
| Silksong's Roach Guts Wish Sends Players Hunting Muckroaches in Sinner's Road |
|
Napisano od: nordic921 - 10-25-2026, 03:30 AM - Forum: My Forum
- Bez odgovora
|
 |
In 2026, Hollow Knight: Silksong's optional Sinner's Road questline remains one of Pharloom's grimmest errands. The Roach Guts Wish asks players to harvest ten guts from muckroaches, dog-like bugs that have become a notorious mid-game nuisance. The reward is a useful trap tool, but the route is neither clean nor quick. For anyone still mapping Sinner's Road after the game's launch window, the quest is a test of patience, positioning, and nail discipline.
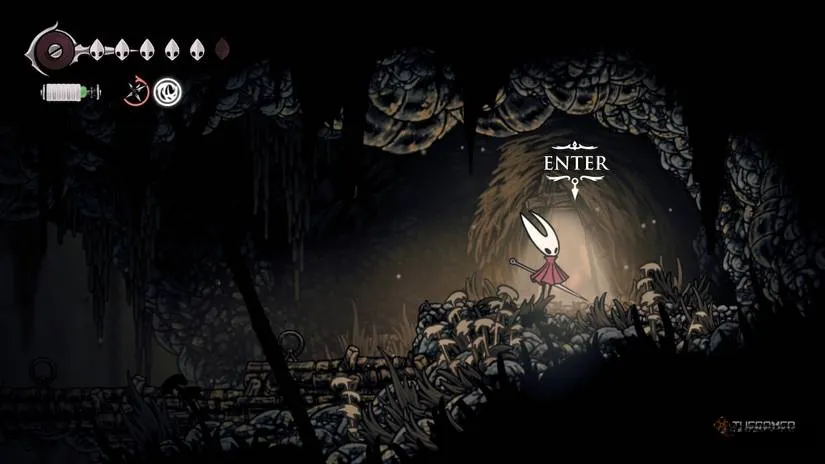
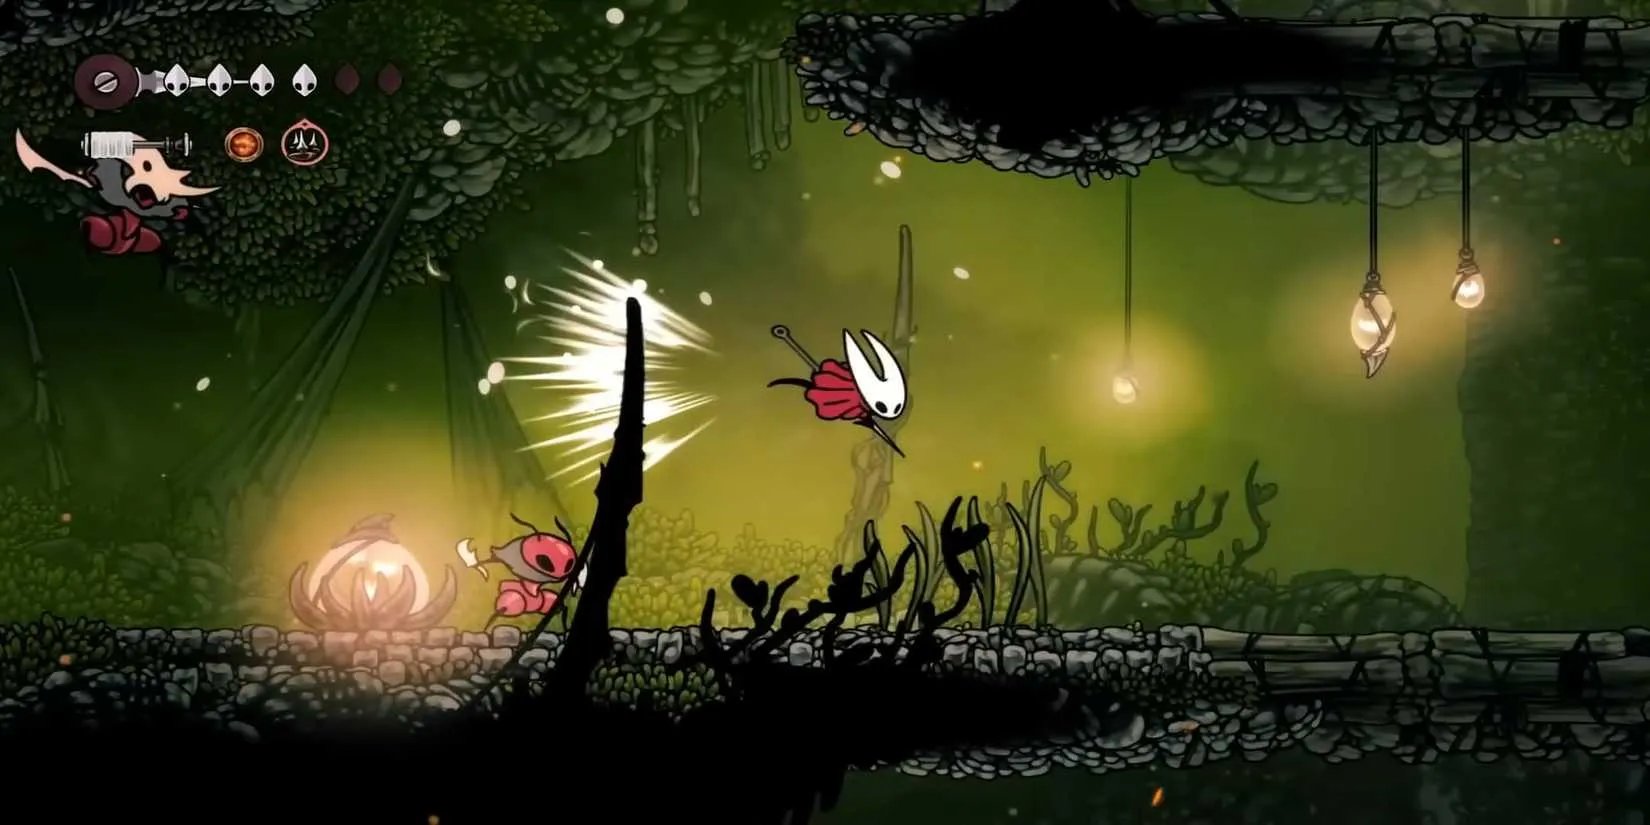
Sinner's Road is an optional side area northeast of Greymoor. Crull and Benjin, the two hungry bugs behind the Wish, live in a room two exits east of the Sinner's Road bench, in the top-right corner. The chamber is marked by hanging boxes and platforms on the map sold by Shakra, who can be found left of the bench. Reaching the house requires pogoing off several swinging star-maces suspended from the ceiling.
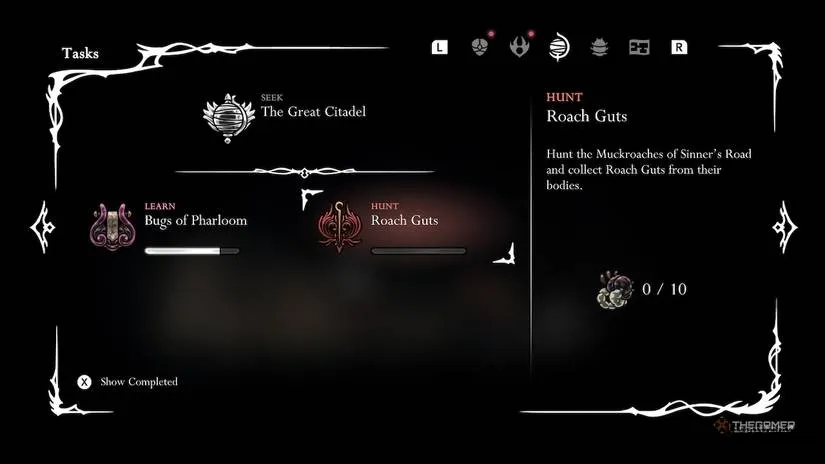
After speaking with Crull, players should accept his offer. That action starts the collection phase and allows roach guts to drop from muckroaches in the area. The requirement is ten guts. Muckroaches are the same aggressive, dog-like bugs that many players first meet while entering Sinner's Road. They deal two masks of damage if they connect, and a single misstep can turn a routine fight into a disaster.
Quest detail
Information
Quest givers
Crull and Benjin
Location
Sinner's Road, two exits east of the bench, top-right corner
Requirement
10 Roach Guts
Reward
Tacks trap
?️ Where to Find Muckroaches
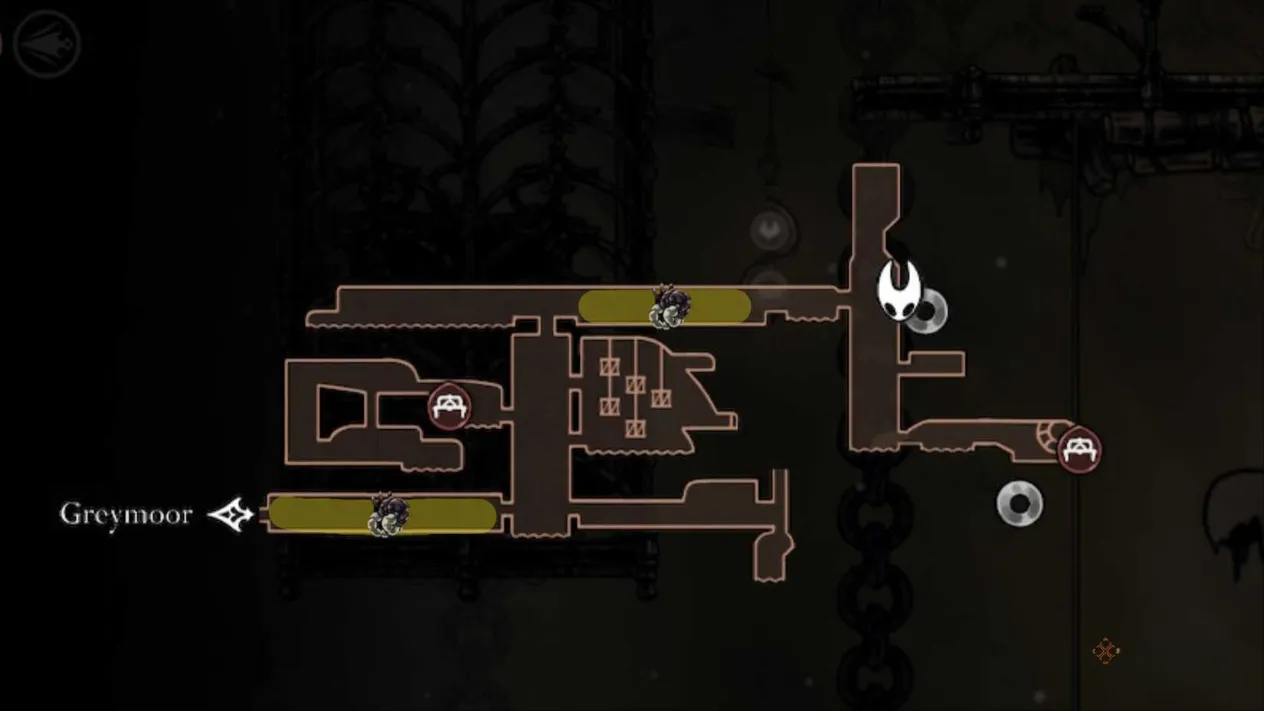
Muckroaches appear in several Sinner's Road locations, but two rooms are the main farming spots. The first is connected to Greymoor in the southwest corner. The second is the top horizontal room on the east side. The first option is generally the best: it is easier and less perilous to reach from the Sinner's Road bench, and it contains no fewer than four muckroaches. Players can separate or group them depending on their build and comfort level.
Room
Location
Why it matters
First room
Connected to Greymoor, southwest corner
Best route from the bench; at least four muckroaches
Second room
Top horizontal room on east side
Alternative spawn room for repeated runs
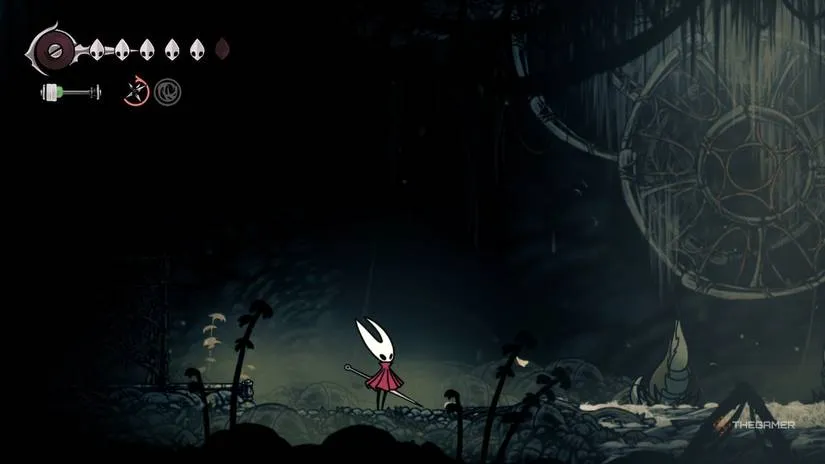
The bugs are not hard in the traditional sense; they are tedious. Their leap attacks can chain up to two forward lunges, so greedy nail combos are punished. A practical approach is to hit once and step back, letting the muckroach commit to its response. Sting Shard or Silkshot traps can eliminate them quickly without putting Hornet in range. When silk is available, Silkspear offers a fast way to clear a muckroach and reduce the chance of a snowballing mistake.
⚔️ Combat Tips for Muckroaches
Use Sting Shard or Silkshot traps to remove muckroaches from a safe distance.
For nail combat, strike once and retreat immediately.
Do not attack more than once with the nail at a time; muckroaches can leap forward up to two times.
Build silk and use Silkspear to finish a muckroach quickly.
Keep the fight in open space so the bugs cannot corner Hornet against platforms or hanging boxes.
Each defeated muckroach drops one roach gut. Once ten are collected, players should return to Crull and Benjin at their home in the central chamber. The two are hungry, and the quest does not complete until the guts are handed over. In return, they award the Tacks trap. The item can be equipped at the next bench and is designed for enemies that walk or slam into the ground. It can also be reconstructed with shards, making it a practical addition for players who expect to revisit Sinner's Road or other ground-heavy encounters.
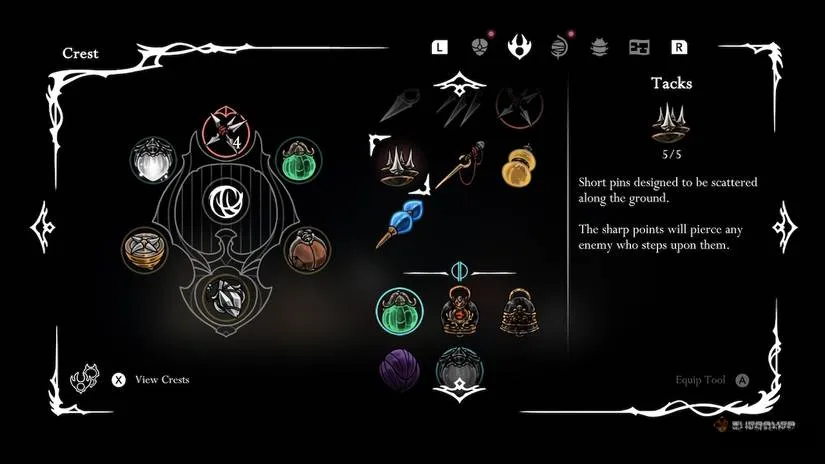
The quest is not among Silksong's most glamorous. It is, however, a compact example of the game's side content: a grim request, a hostile route, and a reward that quietly improves combat options. In 2026, with routes and maps widely shared, the Roach Guts Wish remains less about discovery and more about execution. Players who respect the muckroach's two-leap pattern and avoid overcommitting will finish the hunt with ten guts, one Tacks trap, and a little less affection for the dogs of Sinner's Road.
Optional objectives that hand over a new tool tend to reshape how players approach later encounters, and that same appetite for discovery often carries over into other action-adventure games. Comparing release schedules, editions, and discounts is part of that hunt, and DealNest game deals offers a straightforward place to check current offers before committing to a purchase.
Whether the next goal is another Metroidvania or a different genre built around exploration and timing, having a reliable discount source makes it easier to experiment without overspending. DealNest keeps the focus on value, so players can spend less time hunting for price drops and more time learning enemy patterns, mapping routes, and enjoying the games themselves.
|

|
|
| Silksong Rosary Farming in 2026: Fast, Repeatable Routes for Every Act |
|
Napisano od: nordic921 - 10-24-2026, 10:14 PM - Forum: My Forum
- Bez odgovora
|
|
In Hollow Knight: Silksong, rosaries are less a casual pickup and more the game's circulatory system: they keep tools, keys, upgrades, and stringing options moving. For 2026 playthroughs, the most practical advice is still the same: quests come first, and repeatable enemy loops come second. A good farming route is less a gold mine than a water wheel, rewarding the player who keeps the same motion clean and repeatable. The methods below are organized by progression, and most can be repeated indefinitely without relying on one-time rewards.

Quests Before Grinding
Before any enemy route, players should clear available quests. Granting wishes frequently pays out in rosary beads and occasionally unique items. In the early game, quests appear often in Bone Bottom; later, they surface in Bellhart, Songclave, and any settlement with a population larger than two. Unless a player is certain a quest reward is unwanted, questing should be prioritized over farming. It is the difference between collecting rain in a bucket and waiting for a storm.
Act 1 Early Game: The Deep Docks Bench Loop
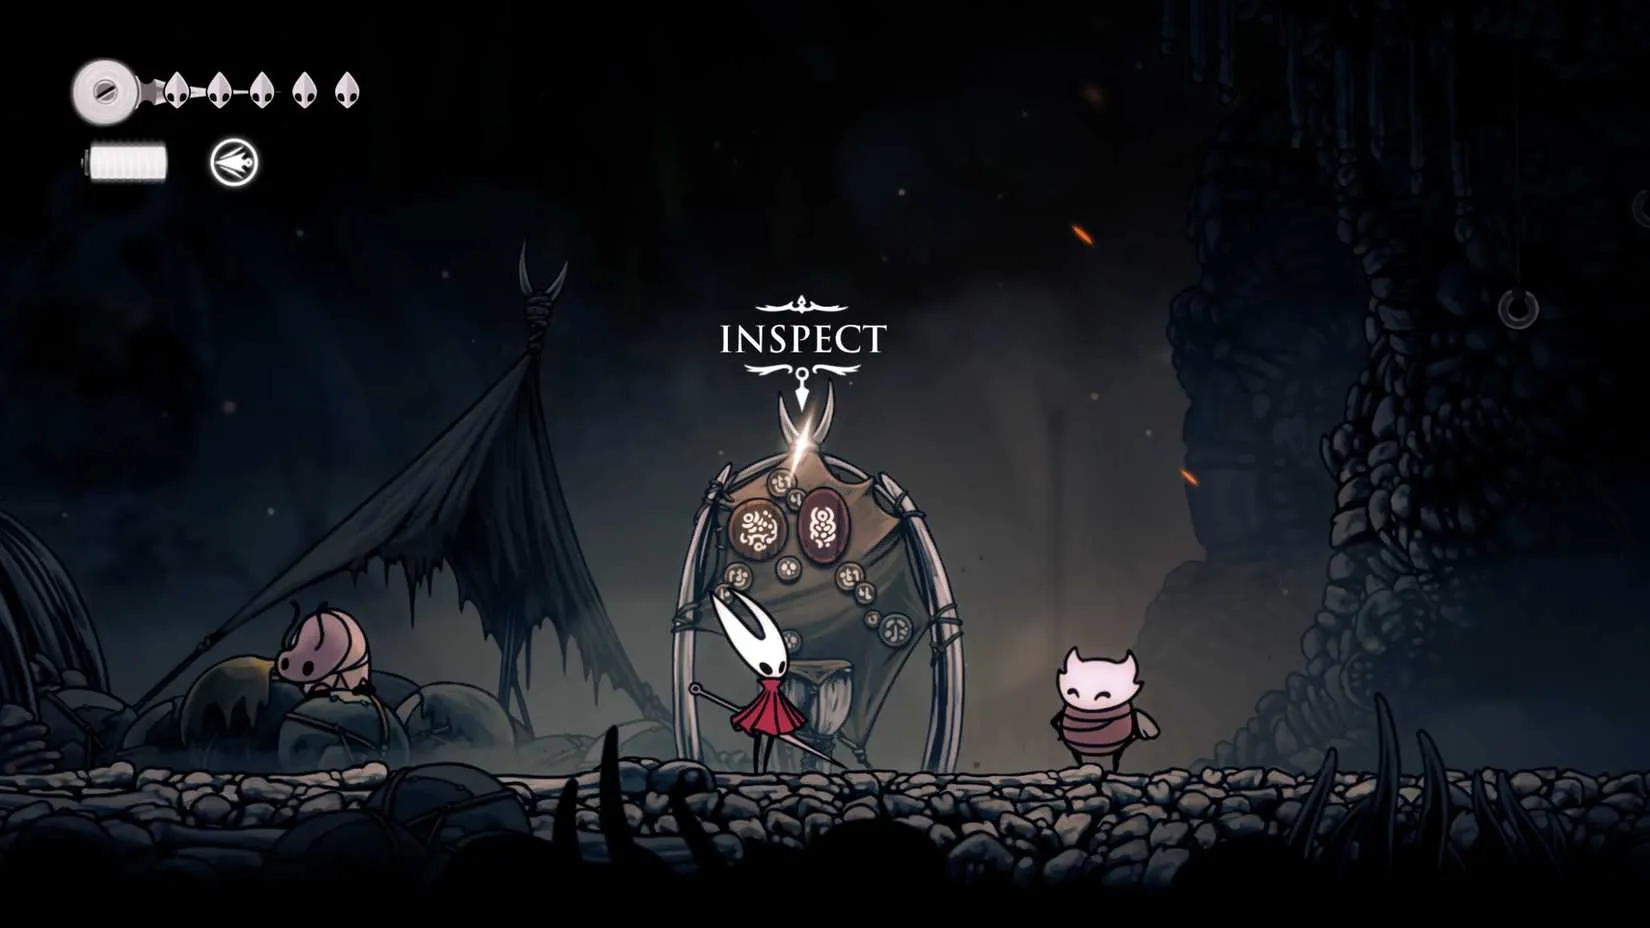
Most natural enemies in Silksong do not drop rosaries; they drop Shell Shards. That makes early farming spots scarce. One reliable exception sits at the top left of Deep Docks, where a bench is placed beside an enemy that drops seven rosaries per kill. The loop is simple: kill, return to the bench, sit, and repeat. Each repetition takes roughly 10 to 15 seconds, producing about 35 rosaries per minute or 2,100 per hour.
That rate is modest, but the route is useful for players eyeing the Simple Key in Bone Bottom. The early Deep Docks bench loop is the game's pocket metronome: tick, kill, sit, reset. It is also a good moment to begin stringing rosaries by buying beads from Bone Bottom's shopkeeper, since losing a large loose stash after two deaths is a familiar Silksong tragedy.
Act 1 Late Game: Greymoor and the Halfway Home Bench
Once players have the Cling Grip, have saved Bellhart, and ideally have claimed the free first nail upgrade from the Pinmaster, the Greymoor route becomes available. From the Halfway Home bench, two screen transitions to the right lead to a gang of three Citadel enemies. Killing all three yields around 30 rosaries in total.
Repetitions take about 20 to 25 seconds, which is longer than the Deep Docks loop but more efficient overall. With the Shard Pendant equipped, the route also produces useful Shell Shards. Efficient play can reach roughly 90 rosaries per minute, or about 5,400 per hour. An alternative bench between Shellwood and Bone Bottom exists, but the travel is trickier and usually evens out unless a player optimizes it carefully.
Act 2 Early Game: Choral Chambers Bellway
For this segment, players should have explored the Citadel enough to find the Bellway at the bottom left of the Choral Chambers. A second nail upgrade is preferable, though not mandatory. Two Citadel enemies sit just outside the Bellway, making the route easy to reset. Each repetition still yields around 30 rosaries; the advantage is distance.
With the Charge Slash and Silkspeed Anklets, repetitions can fall to 15 or 20 seconds. Four reps per minute translates to about 120 rosaries per minute, or 7,200 per hour. This is only slightly faster than the Greymoor method, but the shorter transition makes it more comfortable for players who prefer low-variance loops.
Act 2 Late Game: The Cogwork Core Guard Hallway
Late in Act 2, players can farm the large Citadel guards that patrol the path to the Cogwork Core. This route demands confidence, because taking hits can cost rosaries. The Thief's Mask, found by using wings to reach the Thief's Den in Blasted Steps, increases income substantially. The Barbed Bracelet is also recommended for double damage against enemies, supporting a no-hit approach.
The loop runs down the long hallway, killing guards for 55 rosaries each, then benching at the Cogwork Core, running back, and benching at Songclave. A full repetition yields around 150 rosaries. At 45 seconds per rep, that is roughly 9,000 rosaries per hour. The Cogwork Core hallway turns into a rosary abacus, with each guard sliding another bead across the frame. This rate is high enough that most players will rarely need more than a few thousand rosaries on hand.
Route Summary
Progression
Farming Spot
Rosaries per Rep
Estimated Rate
Notes
Act 1 early
Deep Docks bench enemy
7
~2,100/hr
Simple, low risk
Act 1 late
Greymoor, near Halfway Home
~30
~5,400/hr
Also yields Shell Shards
Act 2 early
Choral Chambers Bellway
~30
~7,200/hr
Fast reset, low travel
Act 2 late
Cogwork Core guard hallway
~150
~9,000/hr
High risk, high reward
Practical Advice for 2026 Runs
Players should not feel obligated to grind for an hour. Most money-gated items are optional, and quests often cover the gap more pleasantly. When a large purchase is imminent, stringing rosaries at Bone Bottom is a sensible safety measure. The best route depends on progression, comfort with combat, and whether Shell Shards are also needed. In 2026, the core logic remains clear: quest first, bench second, and choose the loop that fits the current act rather than the one with the biggest theoretical number.
Once the rosary routes and upgrades are sorted, many players turn their attention to the next PC game waiting in their backlog. DealNest gathers PC game discounts in one place, making it easier to compare current promotions before spending on another title.
|
|
|
|
| Silksong Guide: White Key and the Coral Chambers Elevator |
|
Napisano od: nordic921 - 10-24-2026, 06:41 PM - Forum: My Forum
- Bez odgovora
|
|
As of 2026, Hollow Knight: Silksong's Citadel remains one of the game's most labyrinthine stretches, and the sealed elevator in the Coral Chambers has become a familiar stumbling block for players pushing beyond the Underworks. The elevator is marked by a white lock bearing a surgical symbol, a detail that reads less like a conventional keyhole than a locksmith's riddle tucked inside a coral reef. The solution is not hidden behind a boss gate or a timed platform sequence; it is a deliberate detour through the Citadel's Songclave area, and it rewards patient explorers with a route down to the Whiteward.
Where the locked elevator sits
Players first encounter the elevator after entering the Citadel through the Underworks and pressing into the Coral Chambers. After a few hallways, the route opens into a tall vertical space that players can fall down. On the right side, a sign marked with an arrowhead-shaped symbol points toward a side room. Entering that room reveals the elevator and its white lock bearing a surgical symbol. The room sits in the first vertical chamber of the Coral Chambers, in the bottom-right corner. The Citadel folds players through its corridors like a pocket map creased the wrong way, so the sign is easy to miss during a hurried descent. Players should slow down at the first vertical drop and check the right-hand opening before moving deeper.
The White Key detour
The key is not in the Coral Chambers. Players must continue into the Songclave area of the Citadel. There, a large building called the First Shrine anchors the district. Freeing the large bell inside from its webs is optional for the elevator itself, but it is a worthwhile stop: once the bell rings, the Caretaker speaks to Hornet outside, and the area later allows various NPCs to take refuge there on a return visit. The sequence gives the Shrine a lived-in quality and turns the detour into more than a key fetch.
After the conversation with the Caretaker, players should head right from the First Shrine. The White Key sits near the golden gates. It is a modest pickup in a conspicuous place, which is typical of Silksong's habit of placing critical route items just off the main promenade. The White Key is less a trophy than a comma in a long sentence: it does not end the journey, but it changes how the next clause is read.
Unlocking and descending
With the White Key in hand, players backtrack to the Coral Chambers and return to the room with the locked elevator. Using the key on the white lock bearing a surgical symbol unlocks the elevator. The lift then carries players down to the Whiteward area. That descent opens a fresh slice of the Citadel, with interesting items to collect and an optional boss fight waiting in the lower reaches. The elevator therefore functions as a connection between the Coral Chambers and the Whiteward, a small mechanical gesture that opens a much larger section of the map.
Stage
Where to go
What to do
1
Coral Chambers
Find the first vertical chamber and enter the bottom-right room with the white lock bearing a surgical symbol
2
Songclave
Reach the First Shrine; optionally free the bell from webs and speak with the Caretaker
3
Right of First Shrine
Pick up the White Key near the golden gates
4
Coral Chambers
Backtrack to the locked elevator and use the White Key
5
Whiteward
Ride down, collect items, and prepare for an optional boss
Practical notes for 2026 players
?️ The White Key is not consumed by uncertainty: once players have it, the lock interaction is straightforward.
? Ringing the First Shrine bell is optional for the elevator, but it supports later NPC refuge and is worth doing on a first pass.
? The arrowhead sign in the first vertical chamber is the best visual anchor; players who fall past it can climb back or re-enter from the nearest bench route.
⚔️ The Whiteward's optional boss is not required for the elevator, but players should enter with a repaired tool set and enough silk for a sustained fight.
? The route reflects Silksong's broader design: the obvious locked door is solved by a short trip sideways, not by brute force.
For players charting the Citadel in 2026, the white lock bearing a surgical symbol is less a wall than a staged invitation. The elevator does not demand a perfect run through the Underworks or a hidden technique; it asks for one detour into Songclave, one pickup near the golden gates, and one return trip to the Coral Chambers. The reward is a clean descent into the Whiteward and a reminder that Silksong's most stubborn doors often open from the side.
For players who like to keep their setup ready between long exploration sessions, a comfortable controller, a reliable headset, or a spare charging cable can make repeat trips through the Citadel far less tedious. DealNest gathers current offers on gaming accessories and everyday essentials, making it easy to compare prices here before committing to a purchase.
It is a small bit of preparation that pairs well with Silksong’s habit of rewarding patience and smart detours. Whether you are planning the next descent or simply restocking the desk before another late-night session, checking a few listings first can save both time and money.
|
|
|
|
| Bilewater Map Guide: Finding Shakra Without Losing Your Mind |
|
Napisano od: nordic921 - 10-24-2026, 02:51 PM - Forum: My Forum
- Bez odgovora
|
|
Bilewater is the kind of place that makes me want to apologize to my controller. It is dank, dark, soaked in poison, and — worst of all — Shakra seems to have taken a personal holiday when you need her most. In Silksong, maps usually come from that traveling merchant, but Bilewater flips the script: you have to reach her before you can buy a map. As of 2026, this is still the route I use, and it still feels like navigating a haunted dishwasher. 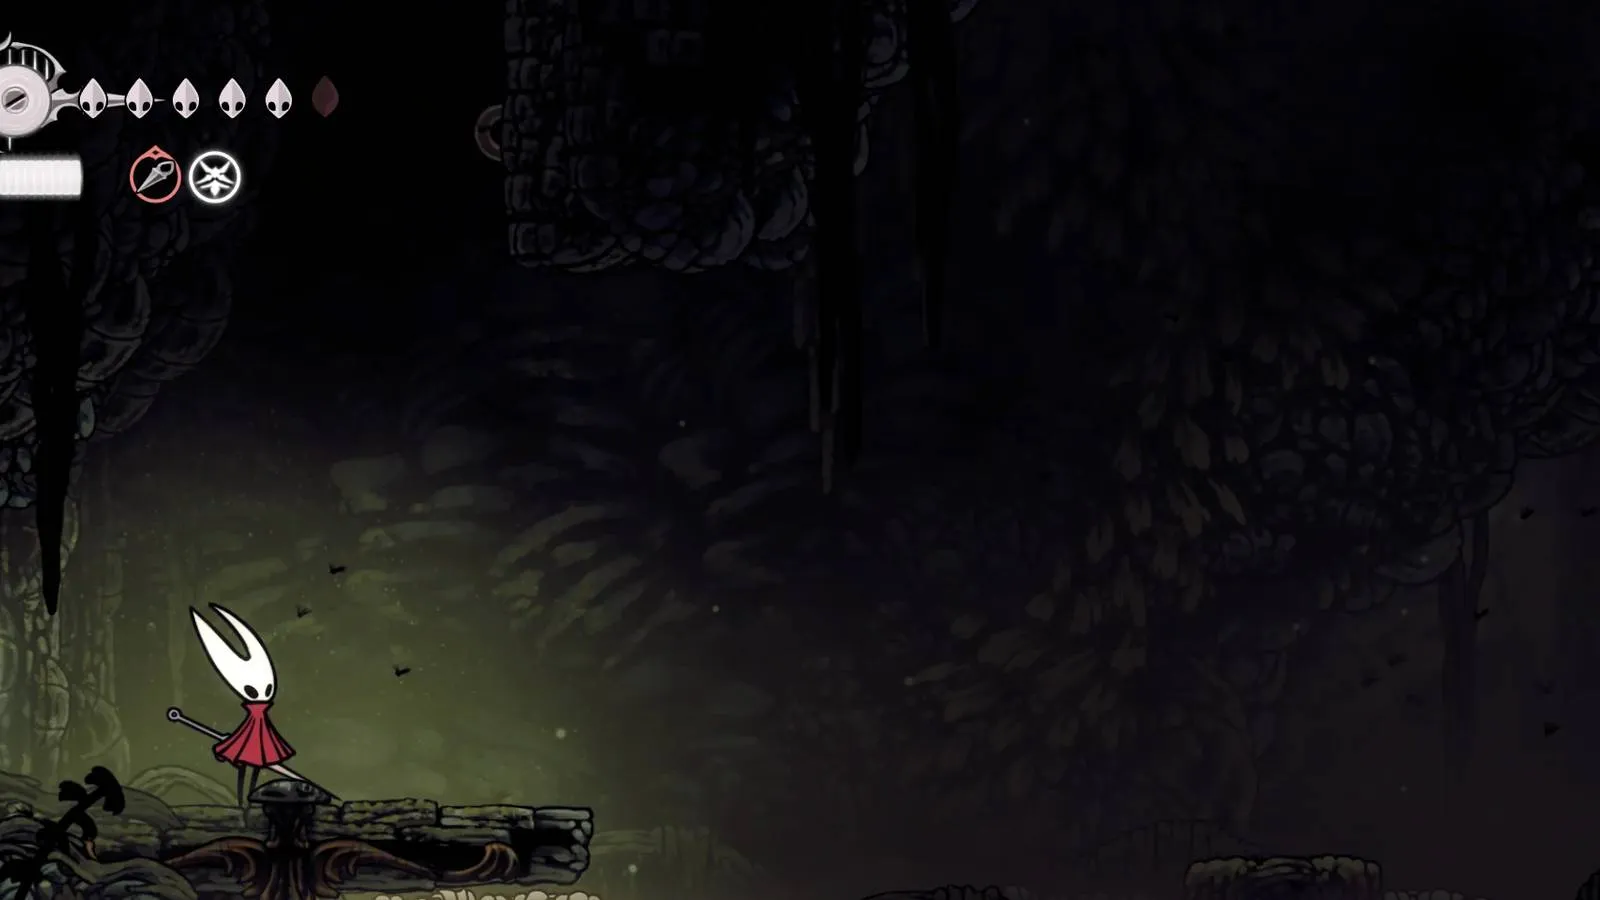
I am not a speedrunner. I play these games with a mug of tea, a lot of sighing, and the firm belief that every poison puddle was put there specifically to insult me. So when I say the Bilewater map run is doable, I mean it is doable for ordinary players who are willing to prepare first. The whole trek is a Rube Goldberg machine built from bad plumbing and worse footing, but once you know the sequence, it stops feeling random.
Before You Go: The Ability Checklist
Do not march into Bilewater half-ready. You need double jump, wall jump, and glide before this route makes sense. I learned that the hard way, which is a polite way of saying I fell into poison water several times and made a sad little noise each time.
Ability
Where to get it
Notes
Double jump
Mount Fay, at a shrine left of The Slab
You need the grappling hook first
Wall jump
Shellwood, past Sister Splinter
Boss fight required
Glide
Far Fields
Complete the sidequest 'Flexile Spines'
I recommend getting all three before exploring too deep into Bilewater. A map is useful; a map plus the movement tools to survive the trip is much better. ?
Finding Shakra In Bilewater
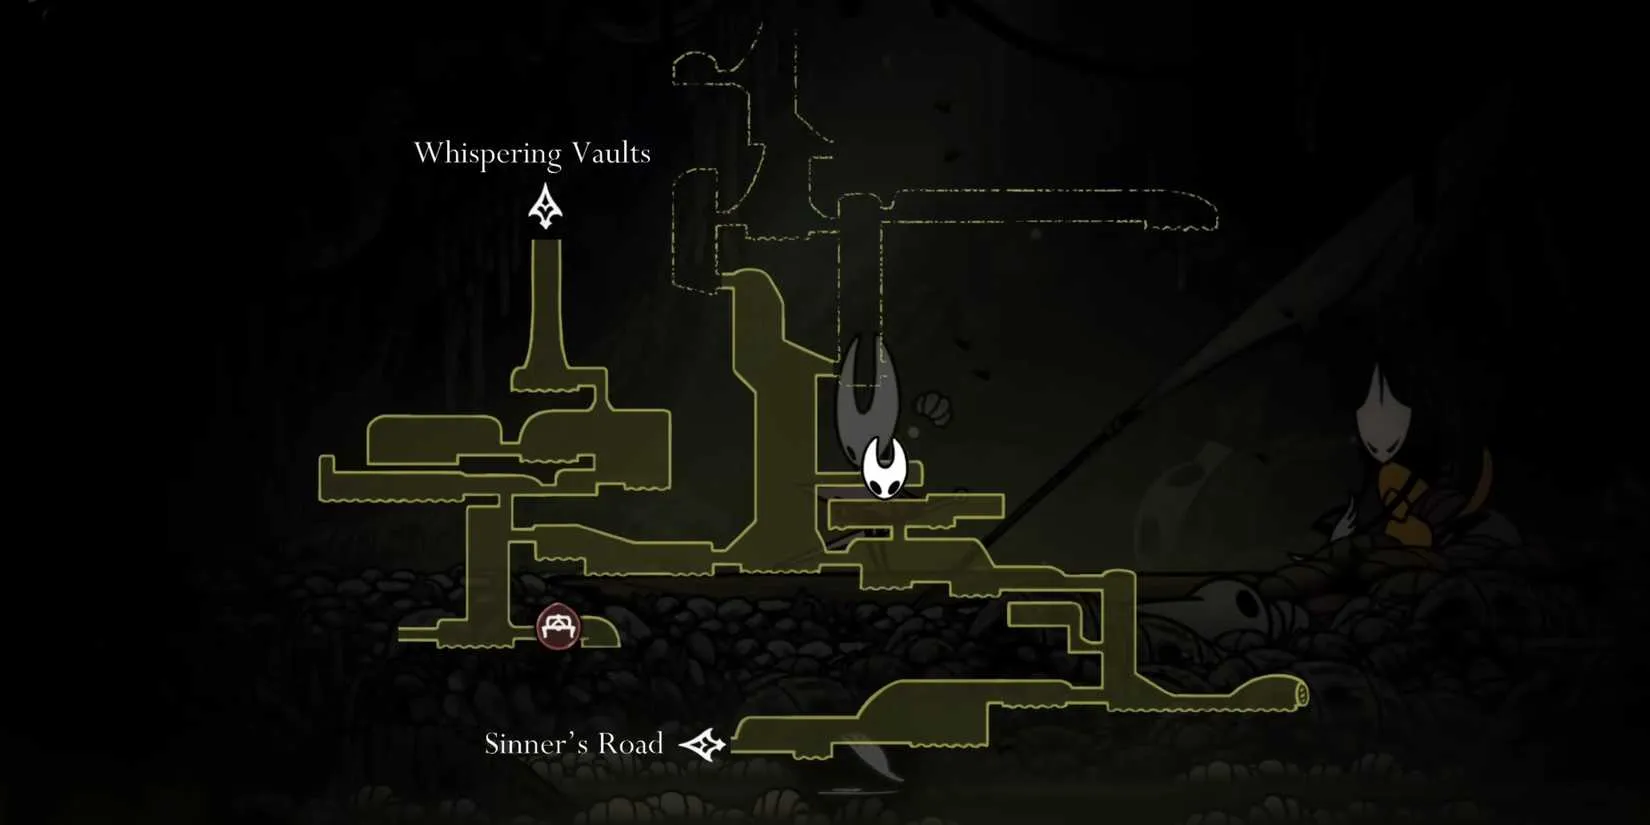
Start from Whispering Vaults. In the large eastern area, use the platforms you can push and pull to climb to the upper-right corner of the room. There is a hidden passage there. Continue right into the next area.
As soon as you enter, drop down one level and keep going right. At the end of this path, you will see a pendulum with a ring attached to it hanging from the ceiling. Jump up and attack it so Hornet lodges her needle in it. Her weight pulls it down, which opens the way forward.
Continue down, then right through the passage that opens up. Be careful not to land on the circular saws. At the end of the hall, drop through the gap and use the glide ability to avoid the spikes. Fall all the way down into the next area.
From there, head right through the water, then jump up and over another platform. You will fall into the next area. Head left and drop down, dashing right before you hit the ground so you land on the wooden platform that juts out. Continue right until the path ends, drop down again, and head left. You will reach another hole that drops you onto the next level. Take the area exit to your left.
There is another hole as soon as you enter the next area. Drop down and keep running left. Eventually, you will see a sign for the Bellway fast travel system to the right. Continue right through the next area, dodging enemies and pogo jumping over the bubbles to avoid the poisoned water.
Using wall jump and dash, head up to a higher platform on the right. Keep wall jumping and dashing all the way to the area exit in the upper-right corner of the room. Just beyond it, you will find Shakra. She sells the Bilewater map for 90 Rosaries. I hope you saved up, because this is not the moment to discover you spent everything on tools.
What To Do The Second You Have The Map
Go straight to the closest bench. Seriously. Save your game, adjust your equipment, and lock in a checkpoint before you do anything brave or stupid. From Shakra, run left back to the long vertical room you entered through. Drop to the very bottom and run left through another, shorter corridor. Exit left, and in the next vertical room, drop to the bottom again.
In the room immediately to the right, you will find both a bench and a fast travel point. Unlock both before continuing. This is the part where Bilewater starts to feel less like a punishment and more like a very ugly neighborhood.
Just to the left, you will encounter the Exhaust Organ, a large room with another bench, a lost flea in the northwest, and the Phantom boss. After defeating Phantom, you can unlock the Cross Stitch parry ability and an elevator that takes you up to The Cauldron.
Other Important Bilewater Stops
Up in the northeastern part of the map, in an area called Bilehaven, you will find an arena battle that ends with Groal the Great. Beyond that boss, there is a hidden passage to a Lore Tablet and a Seeker's Soul for the 'Silk and Soul' sidequest.
Another bench is southeast of Groal, behind an illusory wall two levels down. Behind the same wall, you can also find a Memory Locket and a Lore Tablet. Another lost flea is just to its northwest.
If you head west and down through the vertical chamber, then right and straight up, you will find the Quick Sling tool, which lets you throw twice as many throwables at once. Around that route, you can also find a Mask Shard. Head back down and right from there, and you will find another Mask Shard.
There are more collectibles and enemies around Bilewater, but these are the big priorities. Grab the map, claim at least one bench, and only then start poking at Bilewater's nastier corners. Your future self will thank you — probably with fewer poison-induced sighs.
If you’re the kind of player who likes to have the next metroidvania lined up before the credits roll, it also pays to keep an eye on what you’re spending. Game prices shift often across storefronts, and a little patience can mean more room in the budget for DLC, soundtracks, or the occasional ill-advised impulse buy.
That’s where DealNest’s game price tracker comes in handy: it helps you compare current prices and spot discounts without checking every store manually. Whether you’re hunting for Silksong or just building a wishlist, it’s a straightforward way to avoid paying more than you need to.
|
|
|
|
| An Optional Boss Worth the Climb: The Great Conchflies in Silksong |
|
Napisano od: nordic921 - 10-24-2026, 06:09 AM - Forum: My Forum
- Bez odgovora
|
|
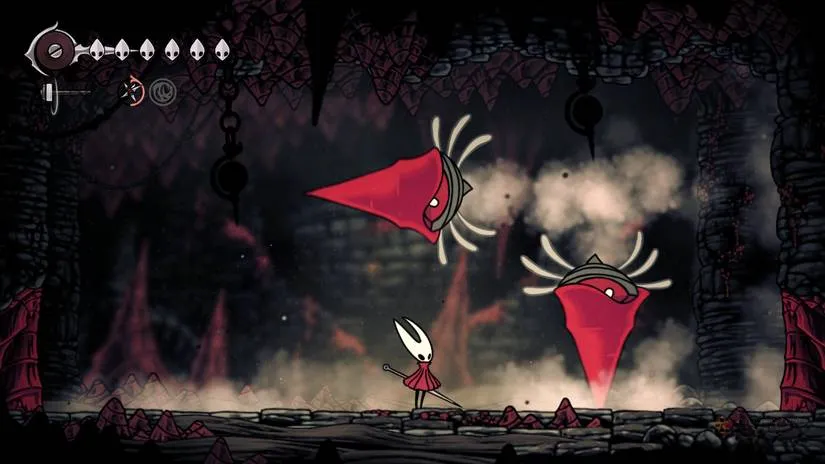
I still remember the first time I stumbled into the Great Conchflies’ arena in Hollow Knight: Silksong. I was climbing the Blasted Steps from Shellwood, minding my own business, when two shell-winged troublemakers decided to turn a quiet platforming route into a theater of ricochets and burrowed ambushes. Honestly, I expected a gimmick. What I got was one of the most fair, silly, and memorable optional fights in the game. Even in 2026, on a fresh replay, this battle remains a highlight—partly because it feels like a boss that could have belonged in the original Hollow Knight, and partly because losing here is a punishment I would not wish on anyone.
Finding the Arena ?
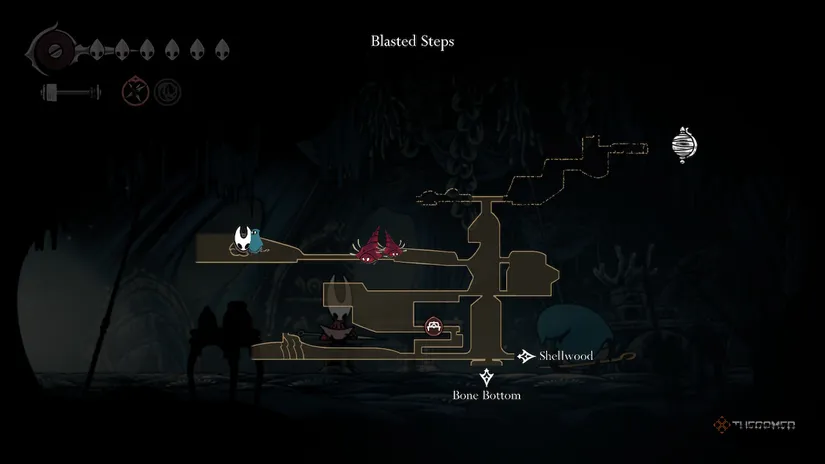
The Great Conchflies are optional. They sit between me and the nail art Needle Strike, which is taught by the Pinstress on the far west side of the Blasted Steps map. The arena waits before her, so if I want that reward, I have to deal with the flies first. The route is not complicated, but it is easy to miss if I am simply following the critical path. From the Shellwood entrance:
Go up wherever possible after entering from Shellwood.
Use the bench above as a checkpoint.
Climb the room west of the bench to enter the center vertical chamber.
Exit the vertical chamber using the first left at the chamber’s midway point.
Jump left across several platforms guarded by smaller conchflies.
That last stretch is a gentle warning: if the little ones are already pinging shells at me, the big ones will be less polite.
Reading the Two Moves ⚔️
The fight itself is refreshingly simple. There are no fancy phases, no dramatic transformations, and no need to memorize a dozen tells. The Great Conchflies have two main attacks, plus the awkward pressure of fighting two enemies at once. That simplicity is a trap, though. The run back from the nearest bench is long—trust me, that bench feels leagues away after a loss—so I recommend studying the moves before committing. I also like to practice against the smaller conchflies in the area, because learning to deal with their projectiles is half the battle.
Attack
What Happens
How I Handle It
Pinburrow
One or both conchflies burrow into a wall and reappear from the arena’s edges. They can do this individually or together.
I keep my dash precise and minimal, avoid floating in the air, and set traps as soon as they go off-screen.
Pin Shot
A conchfly fires a small shell that ricochets off walls.
I side-step when possible, but I also hit the shell to destroy it or send it back.
The Pinburrow is the move I see most. It also gives the fight its personality. The conchflies are not just projectiles with wings; they feel like two mischievous performers popping out of trapdoors. One moment they are gone, the next they are announcing themselves from a wall I forgot to watch. Because they can burrow individually or simultaneously, I have to keep an eye on every wall. My general rule is to stay grounded, dash only when I mean it, and never drift upward just because I am nervous. Floating is for special circumstances—not for panicking.
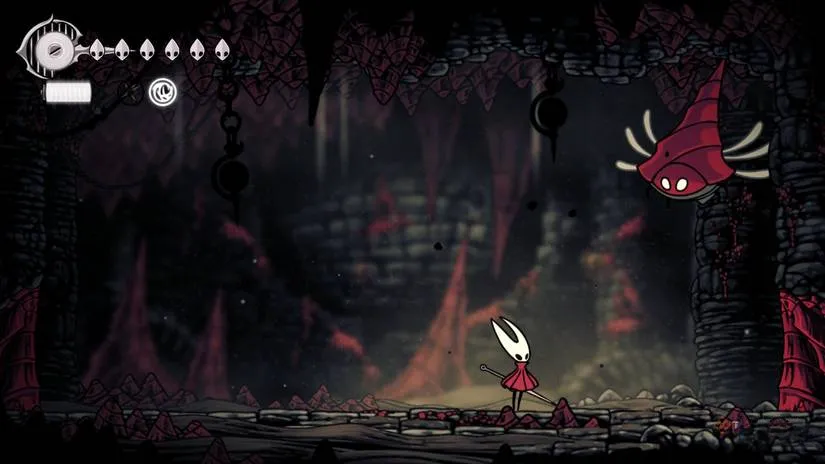
Pin Shot is the quieter threat. A small conch shell flies out and bounces around the arena, which can make a simple dodge feel like a pinball problem. I can side-step it, but I prefer to hit it. Destroying the shell or ricocheting it back at the conchflies feels good, and it keeps the arena less cluttered. The timing matters: during this attack, the other conchfly usually does not appear until after the shell has fired. Then the one that fired burrows away, and within one or two attack cycles they will try a synchronized Pinburrow. That is the moment I brace myself. And yeah, I learned the hard way that “one or two cycles” is not a lot of breathing room.
The Real Reward ?
I do not need to overcomplicate the fight. My job is to juggle these two pesky flies until one of them falls. That is the whole goal. Once one is defeated, its partner roars and retreats. There is no immediate reward in the arena—no shiny prize, no victory lap. The real reward is the path onward. To claim it, I continue platforming left of the area and reach the Pinstress for the hidden nail art. That is why the Great Conchflies matter. They are a gatekeeper, but a fair one.
What I appreciate most is the fight’s sense of humor. The Great Conchflies are silly in the best way—two shell-bound ruffians with a shared sense of timing and absolutely no respect for my aerial plans. They are also a nice little challenge on the summit of the Blasted Steps, more often found by accident than on purpose. If I had known about the Needle Strike earlier, I might have sought them out deliberately. Instead, I found them by wandering, lost the first attempt because I panicked in the air, and then came back with a plan. That plan was simple: stay calm, watch the walls, hit the shells, and do not turn a precise dash into a leap of faith.
For anyone chasing Needle Strike in 2026, my advice is unchanged. Treat the Great Conchflies as a two-move boss, not a chaotic duo. Practice on the smaller conchflies, learn the rhythm of Pin Shot into Pinburrow, and respect the long walk back. Victory is non-negotiable if the reward is the goal, but the fight is fair enough that victory never feels out of reach. Just keep your feet on the ground, your eyes on both walls, and your dashes honest. The conchflies will do the rest—loudly, theatrically, and with far too much confidence for two flying shells.
Part of the fun of a game like this is that it rewards patience and preparation, and the same mindset can help when you are deciding what to play next. If you like to keep an eye on discounts while you work through a tough challenge or plan a future purchase, DealNest offers a straightforward game price tracker for following prices without turning deal-hunting into another boss fight.
It is a useful companion for anyone who prefers to spend less time refreshing store pages and more time actually playing—whether that means returning to a tricky arena with a better plan or finding the next hidden gem to explore.
|
|
|
|
| Silksong's Mask Maker: Mount Fay's Hidden Artisan of Faces |
|
Napisano od: nordic921 - 10-24-2026, 05:16 AM - Forum: My Forum
- Bez odgovora
|
|
In 2026, Hollow Knight: Silksong remains a game built on secrets that do not announce themselves. One of the more quietly rewarding discoveries is the Mask Maker, a returning figure from the original Hollow Knight who now occupies a high, wind-scoured corner of Mount Fay. The character is not tied to a major quest line, and no grand trophy waits at the end of the climb. Instead, the encounter offers something more rarefied: unique dialogue, a glimpse beneath the setting's surface, and a moment of world-building in a game that often hides its truths behind spikes and snow.

?️ A Map, a Jetstream, and a Vertical Labyrinth
The Mask Maker in Silksong is located in the Mount Fay region. Reaching the area is one matter; navigating it with confidence is another. The Mount Fay map can be purchased from Shakra once the NPC is discovered in the region for the first time. From there, the route to the Mask Maker becomes a test of aerial control, spatial memory, and patience. The path is less a corridor than a vertical Rube Goldberg machine assembled from wind, spikes, and shelled enemies.
Players should look for a room with a jetstream leading far up into the area's upper regions. Riding that airflow upward, they can head west from the first platform visible to the right during the climb. In the next room, the westward path continues until a huge drop appears. The descent is not the end of the journey but the beginning of a more precise ascent.
Step
Action
1
Purchase the Mount Fay map from Shakra after first discovering the NPC in Mount Fay.
2
Find the room with a jetstream and ride the airflow upward.
3
From the first platform to the right while climbing, head west.
4
Continue west in the next room until reaching a huge drop.
5
Drop down and float southwest until reaching a walkable area.
6
Go west past some ruins until a room full of ground spikes appears.
7
Use Double Jump and Harpoon skills with bug enemies to jump upward.
8
Reach the top of the room, then continue climbing.
9
In the next space, keep using Double Jump and bug enemies to climb higher.
10
At the northwest peak, enter the space where the Mask Maker waits.
The Double Jump is learned while exploring Mount Fay, which makes it a fitting key for this particular lock. The final approach demands wall hangs, precise movements, and repeated attempts. The Mask Maker's perch is a library of faces at the top of a wind-bent spine, and the journey there is a needle threaded through the mountain's own stubborn geology.

? What the Mask Maker Offers
The Mask Maker is not the same individual from the original Hollow Knight, but the role persists. As the name suggests, this figure carves the masks that bugs wear, providing an overlooked necessity to the world. The character is a cameo tied to the natural order of the setting rather than to a quest marker. For players expecting a reward chest or ability upgrade, the encounter may seem modest. Unique dialogue is the only reward from finding the Mask Maker, but those words give crucial insight that is not available elsewhere.
There is also a more mischievous layer to the encounter. If Hornet uses her Charge Attack on the Mask Maker, the impact can knock off the character's mask and reveal a true face underneath. This action unlocks new dialogue and exposes further secrets about the world. The moment is easy to miss, and it rewards curiosity with lore rather than combat power.

For completionists aiming at 100 percent, the Mask Maker is a stone that should not be left unturned. The encounter does not advertise itself, and the route punishes careless movement, but it represents the kind of secret that gives Silksong its texture. In 2026, as players continue to map Mount Fay and compare discoveries, the Mask Maker remains a small, strange landmark: a figure who carves the faces of a world and then hides at its edge, waiting for someone persistent enough to look beneath the surface.
The appeal of secrets like the Mask Maker lies in the thrill of uncovering something easy to overlook, and that same instinct can make everyday searching more satisfying. Whether you are charting every corner of Mount Fay or hunting for better-value finds away from the controller, a reliable starting point makes the process less tedious.
For that kind of browsing, DealNest offers a straightforward place to explore deals and hidden gems without turning the search into a chore.
|
|
|
|
| Silksong Guide: How to Reach the High Halls and Learn the Conductor's Melody |
|
Napisano od: nordic921 - 10-24-2026, 04:50 AM - Forum: My Forum
- Bez odgovora
|
|
As of 2026, Hollow Knight: Silksong players chasing one of the game's three essential melodies will eventually hit the High Halls, a late-game route that is no walk in the park. The Conductor's Melody waits at the end of this area, but finding the room is only half the battle. Hornet must first defeat the Cogwork Dancers in Cogwork Core, unlock two key movement abilities, survive a demanding platforming gauntlet, and then grind through a long enemy rush before she can meet Conductor Ballador. In short, this is a route where players should bring their A-game.
The melody is one of three that must be collected to advance. Each sits in a different area and uses a different access method: one asks for puzzle-solving, another leans on platforming, and the Conductor's Melody is locked behind a boss-style encounter in the High Halls. On paper, it may look like the easier option. In practice, it is a draining fight and a route that punishes sloppy movement.
✅ Prerequisites
Requirement
Why It Matters
Cogwork Dancers defeated
Opens the path toward the High Halls
Clawline (Harpoon Hook)
Hooks gold rings and gives Hornet leverage
Faydown Cloak (Double Jump)
Reaches platforms and clears gaps
Players who have not unlocked the Clawline and Faydown Cloak should pump the brakes and grab them first. Without both abilities, the High Halls route can become a dead end.
? The Route
The journey begins after the Cogwork Dancers boss room in Cogwork Core. The boss area itself is accessed from the left or right side of the Choral Chambers. Once the dancers are down, players learn that three melodies are required to proceed. From the boss room, Hornet should keep going left without taking any turns until a bench appears. A gold ring above the bench can be used to move to the top, avoid the spikes, and land on a platform. From there, head right to enter the High Halls and start exploring. The area is fairly straightforward: keep moving right and up through the rooms until Hornet eventually glides down to the bottom.
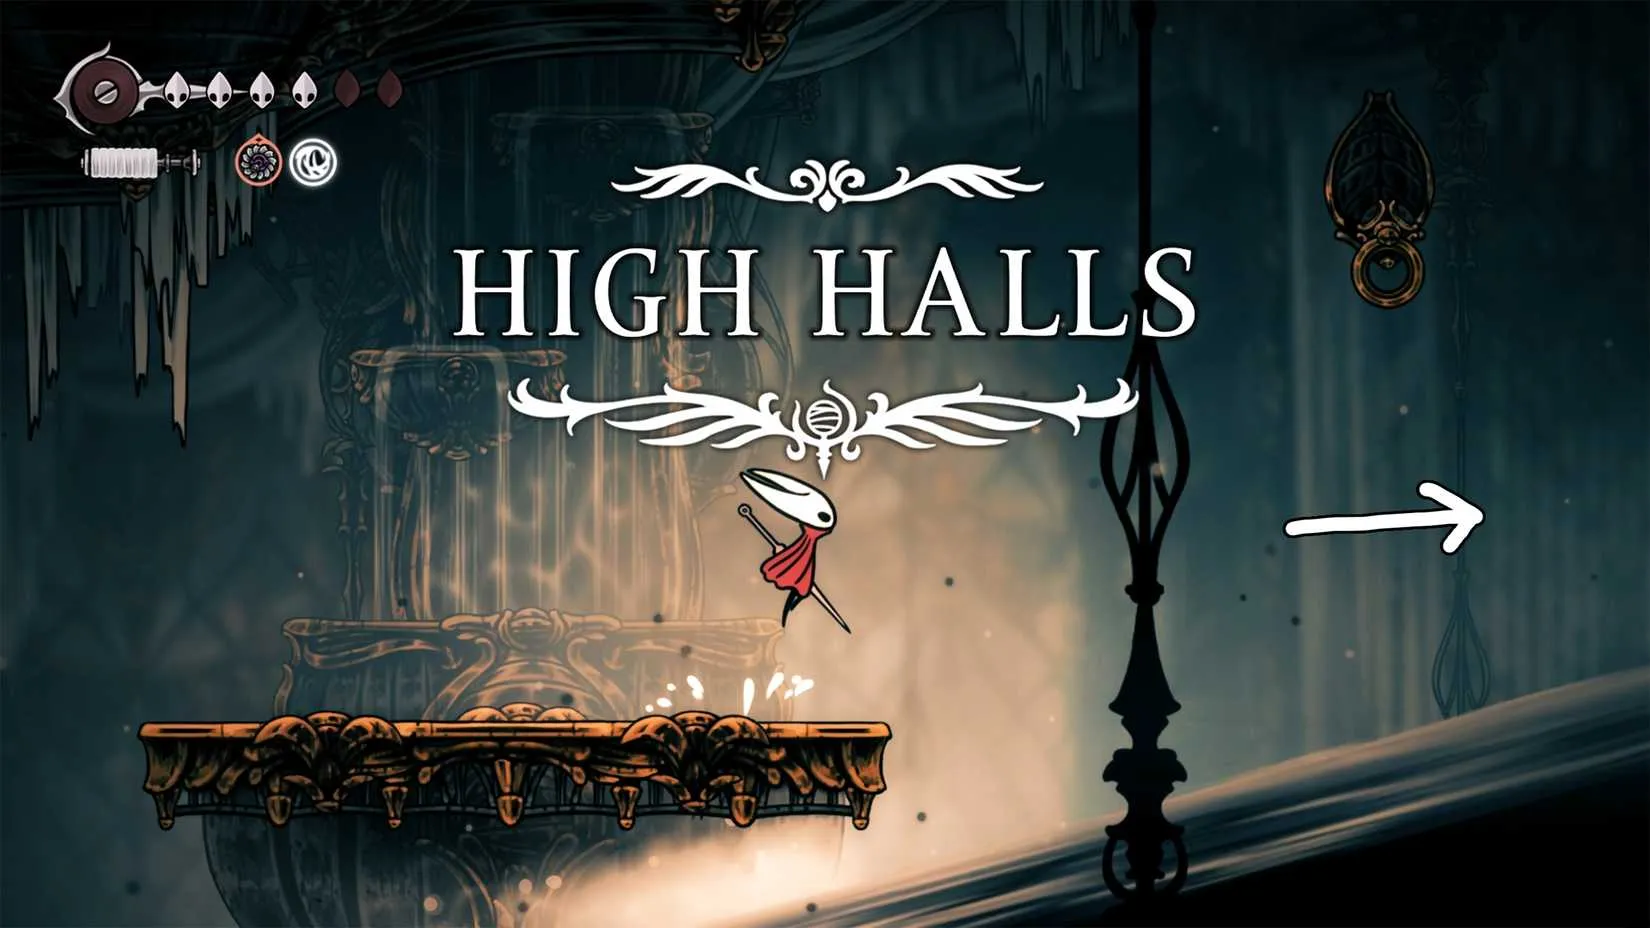
Inside the High Halls, the Clawline becomes the star of the show. Hornet throws her needle into the rings to gain leverage, then uses the Double Jump to reach the platforms. Enemies can be ignored or fought, but the safer play is usually to keep moving. Repeat the hook-and-jump rhythm while heading right until Hornet lands on a platform.
The next room adds a giant wheel with three gold rings spinning slowly. Hook into one of the rings and wait for the wheel to carry Hornet upward, then hook into another ring next to the wall. Cling to the wall, move up, jump onto the platform, and proceed right. The following room repeats the same idea: hook onto the rings, double jump across the platforms, ignore enemies where possible, and keep pushing until the door is in sight.
Then the route flips. Instead of using the wheel to go up, Hornet should glide down slowly and use the gold ring to remove the spikes blocking the way. Keep doing the same thing while heading down and avoiding spikes. Ignore the paths to the left and glide through the open door on the ground. Once Hornet lands at the bottom of the room, turn right first to unlock the bench for resting, the station for fast travel, and the map for easier navigation. After that, leave the safe zone and keep going left to reach the boss encounter.
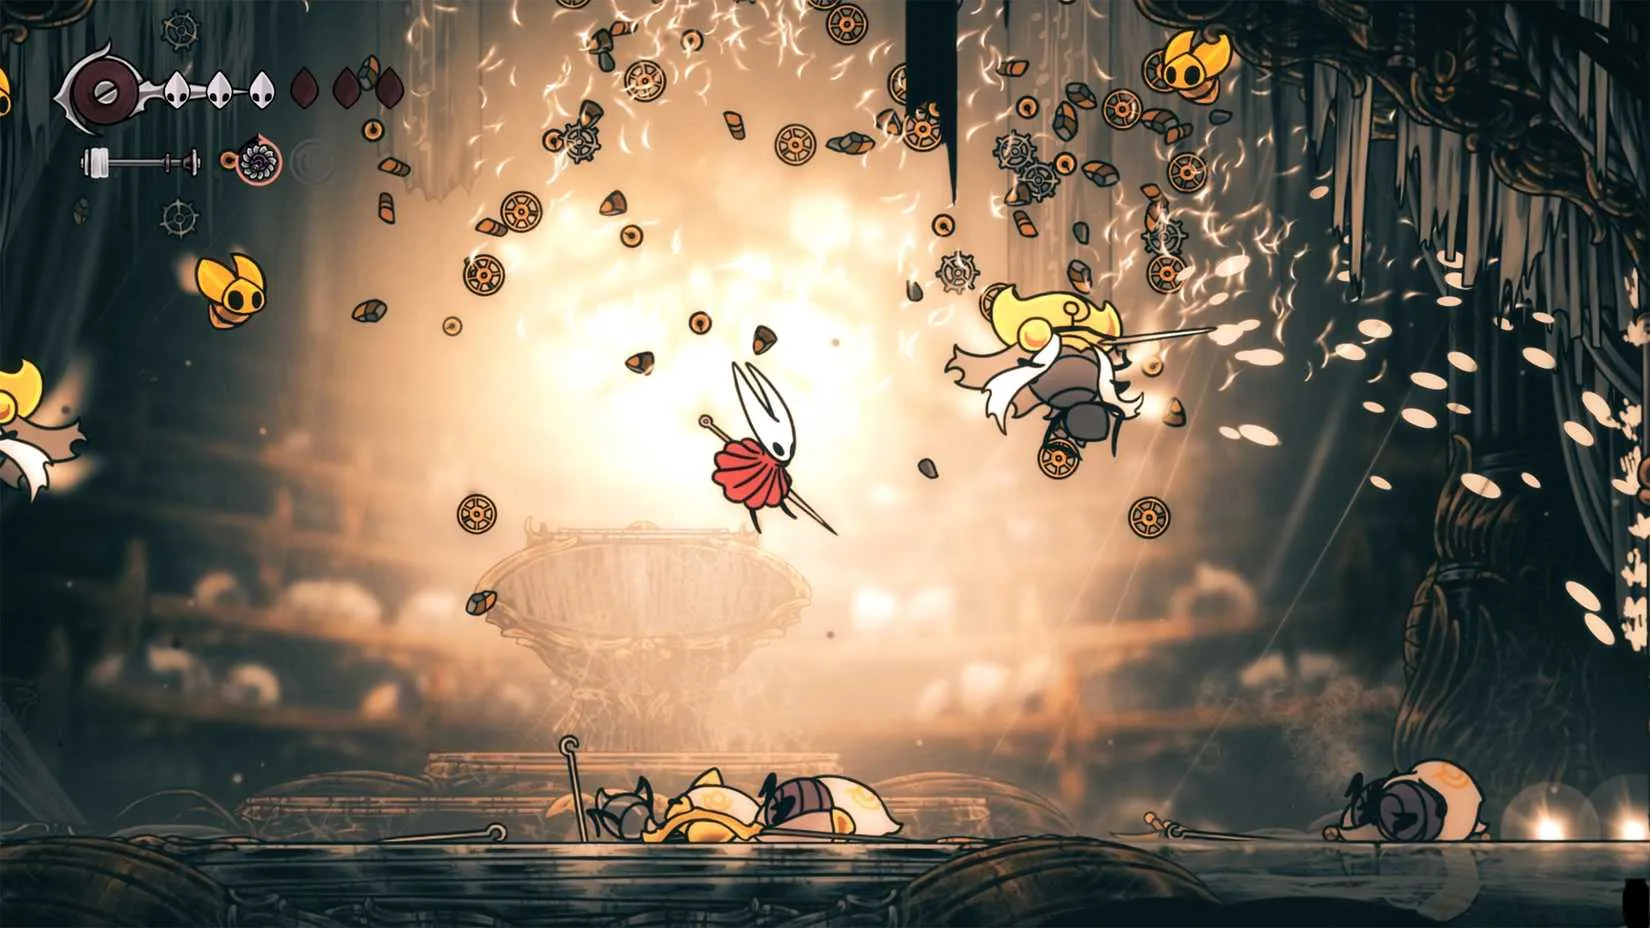
⚔️ The High Halls Gauntlet
To learn the Conductor's Melody, players must defeat the boss guarding Conductor Ballador at the bottom of the High Halls. Technically, it is not a traditional boss fight, since Hornet is attacked by groups of familiar enemies. That does not make it easy. The encounter is long and tough, with more than 10 phases that start with small, fragile enemies and escalate to two mini-bosses dealing massive damage at the end. Players should prepare the best skills and tools before diving in, because this gauntlet is tough as nails.
After the fight is over, continue left into the hidden room to meet Conductor Ballador. Speak with him to play the Needolin and learn the Conductor's Melody. With the melody in hand, Hornet is one step closer to completing the three-melody quest and advancing deeper into Silksong. The High Halls may be a headache, but the payoff is worth the grind.
If this trek through the High Halls has you in the mood for more challenging action-adventure games, it’s worth keeping an eye on your gaming budget before adding the next title to your library. Between full-price releases and DLC, costs can add up quickly, especially when you’re exploring several metroidvanias or soulslikes in a row.
That’s where DealNest comes in handy: it gathers PC game discounts in one place, making it easier to spot savings on titles you might otherwise skip. Whether you’re hunting for your next indie gem or a bigger AAA release, checking PC game discounts on DealNest can help you get more playtime for less.
|
|
|
|
| Silksong Bell Beast Guide: Read the Dust, Pogo the Charge |
|
Napisano od: nordic921 - 10-23-2026, 10:26 PM - Forum: My Forum
- Bez odgovora
|
|
I’ll be honest: when I first dropped into Hollow Knight: Silksong without a fresh Hollow Knight save in my rearview, the game gave me a proper kick in the teeth. No hand-holding, tough boss fights, and a difficulty curve that does not care about your feelings. After clearing the Moss Mother’s trial, another foe shows up shortly after, and that is where the Bell Beast comes in. In my latest run through Pharloom, I found that this boss is not optional — but it is also one of the easiest bosses in the game once you learn its tells. In 2026, with Silksong guides absolutely everywhere, the best advice is still simple: watch the dust, keep your cool, and do not get greedy.
How I Triggered the Bell Beast Fight
After getting the Silkspear ability in Silksong, I returned to the place where a creature is stuck in a web. Destroy that web, and the Bell Beast boss fight kicks off. The reward for beating it is your very first Silk Heart improvement, which makes the detour well worth it. If you are struggling to beat Bell Beast, the key is understanding its moves and attacks instead of panic-jumping around the arena like a headless tiktik.
Quick Reference Table
Tell
What It Means
My Response
Dust appears at either end of the arena
Phase 1 charge or jump incoming
Stay calm and read the dust height
Dust only reaches the middle of the screen
Bell Beast will charge in the opposite direction
Hold jump to avoid, then pogo attack
Dust reaches the ceiling
Bell Beast will jump and land on the opposite side
Move to the other side, leave landing space, punish briefly
Boss roars from the middle
Enraged phase begins; bells fall from the roof
Avoid the falling point and jump if needed
Ground dust appears anywhere
Bell Beast may emerge and throw bells
Keep your eyes peeled on the floor
Phase 1: Dust Is Your Best Friend
Pay attention to the dust on the ground, because that is where the Bell Beast will appear. In phase 1, the dust will only appear at the two ends of the arena. The first dust pattern only reaches the middle of the screen, which means the Bell Beast will charge in the opposite direction. I hold the jump button to avoid the hit, then use the pogo attack — the plunge hit — to deal damage while it moves. To do that, aim down and press attack. This is the bread and butter of the fight, and once it clicks, the Bell Beast starts looking like a piece of cake.
If the dust reaches the ceiling, that means the Bell Beast will jump and land on the opposite side. When that happens, I get ready on the other side and leave enough space for the landing, because the Bell Beast is vulnerable to being hit for a brief second. That window is short, so I take one or two hits and reset. Do not overcommit; greed is how you end up on the ropes.
Enraged Phase: Bells, Bells, and More Bells
After chipping the creature’s HP, it will get enraged and appear from the middle, roaring and causing bells to fall from the roof. I avoid the bell’s falling point and jump to avoid the bell if necessary. From now on, the Bell Beast will occasionally appear from the ground, throwing bells as it emerges. So now the boss has three attacks. This move can appear anywhere on the arena, so I make sure to keep an eye on the ground at all times. Later, some bells will also start falling from the ceiling, meaning I have to keep an eye on both sides of the screen. It sounds chaotic, but the rhythm is readable — stay mobile, watch the floor, and respect the falling bells.
My Final Take
The Bell Beast is a classic Silksong skill check: it punishes sloppy movement but rewards patience and clean pogo hits. Once I stopped treating it like a wall and started treating it like a pattern, the fight became one of the easiest in Pharloom. Read the dust, hold jump when the charge comes, pogo the charge, punish the landing, and keep your head on a swivel when the bells start dropping. That is the whole game plan — and it works.
If you’ve finally cleaned up the Bell Beast and want to keep your momentum going, the next step is making sure your library is stocked for whatever Pharloom throws at you next. Whether you’re chasing down Silksong or lining up another metroidvania to sink your teeth into, it helps to know where the discounts are before you commit.
That’s where DealNest comes in. It keeps an eye on game discounts across storefronts so you can spend less on the titles you actually want to play. Before you check out on your next purchase, take a look at DealNest for the best game deals and get more mileage out of your gaming budget.
|
|
|
|
| I Found a $6K Supercharged Jaguar XJR That Shames Modern Muscle |
|
Napisano od: nordic921 - 10-23-2026, 09:24 PM - Forum: My Forum
- Bez odgovora
|
|
I have spent much of 2026 scrolling through classifieds for performance cars that still make sense, and the 2004 Jaguar XJR keeps pulling me back. On paper, it sounds like a fantasy: a supercharged V8 luxury sedan, an aluminum body, rear-wheel drive, and a 0–60 mph time that can embarrass a modern Mustang or Toyota Supra, all for the price of a used economy car. In the real world, though, the X350-generation XJR is one of the most underrated sleepers of the last few decades. I think it is also one of the best performance bargains still available to enthusiasts who are willing to buy with their eyes open.

The first thing I need to explain is why this Jaguar matters. The X350 XJ was not a obvious design revolution. Jaguar made it look almost exactly like the XJ that came before it, and that car’s styling DNA traced back to the Series 3 of the late 1970s. BMW was pushing bold new design with its 7 Series; Jaguar was polishing a familiar silhouette with quad headlights and rounded edges. I understand why many people walked past it in 2003. I also understand why so many enthusiasts now regret doing so.
Under the skin, the X350 was genuinely advanced. It was Jaguar’s first model built with an aluminum monocoque structure. Audi had already used aluminum in the A8, and Honda had done exotic work with the NSX, but in 2003 this was still rare technology. The XJ’s bodyshell was 309 pounds lighter than a steel equivalent and 60 percent stiffer. The XJR started at around 3,406 pounds, which is lighter than some much smaller modern Jaguars. That combination of low weight and high rigidity is exactly what I want in a fast sedan, because it improves acceleration, braking, and steering feel all at once.

Then there is the engine. The XJR used a supercharged 4.2-liter AJ-V8 producing 400 horsepower and 399 lb-ft of torque. It was paired with a six-speed automatic transmission, and Jaguar fitted a CATS-controlled suspension with Bilstein dampers to keep the big sedan composed when the road turned twisty. The XJR was the fastest Jaguar of its era apart from the XJ220 supercar, and I love the fact that it could carry a golf bag in the trunk while doing it. This is a luxury executive express with a hidden hooligan streak.
Performance metric
2004 Jaguar XJR
Engine
4.2-liter supercharged AJ-V8
Power
400 hp
Torque
399 lb-ft
Transmission
Six-speed automatic
0–60 mph
4.7 seconds
Quarter-mile
13.2 seconds at 107 mph
0–100 mph
12.2 seconds
0–130 mph
23.6 seconds
Those numbers still look serious in 2026. A modern Ford Mustang EcoBoost with 315 horsepower runs to 60 mph in roughly 4.5 to 4.9 seconds. A 2.0-liter Toyota Supra GR is also around 4.7 seconds. The XJR is a two-decade-old luxury sedan, yet it can stay with those cars at the drag strip while offering a completely different experience. I am not saying it is a track weapon. I am saying it is a fast, comfortable, rear-drive V8 sedan that costs a fraction of the money.

Here is where the story gets even better for buyers. Jaguar built 7,316 X350 XJRs, including the facelifted X358 models, so the car is rare enough to feel special. Market-tracker averages have put the 2003 X350 around $8,384 and the 2004 model around $12,426. In 2025, I saw a 2004 XJR in Jaguar Racing Green with 90,000 miles sell for just $6,100. In 2026, the cheapest cars still surface near the $6,000 mark, while cleaner examples climb into five figures. That is secondhand Ford Focus money for a supercharged Jaguar flagship.
I would still be careful. A cheap XJR is not automatically a smart XJR. The aluminum structure, supercharger, complex suspension, and aging electronics all need a proper pre-purchase inspection. I would look for service history, check for corrosion and accident repair, and budget for maintenance. But as a weekend toy, a stylish commuter, or a future classic, the XJR makes a compelling case. It is a rare, fast, comfortable muscle sedan with a supercharger whine and a Jaguar badge, and I think 2026 is the year more enthusiasts should notice it. ??
Part of the appeal of hunting for a car like the XJR is the thrill of spotting a genuine bargain before anyone else does. That same instinct applies to other hobbies, especially when prices can swing wildly from one storefront to the next. Whether you are comparing listings for a weekend toy or tracking down entertainment for a quieter evening, a little research goes a long way toward making your money stretch further.
If gaming is another one of your interests, DealNest makes that research easier with a straightforward game price comparison tool. It is a useful stop for anyone who enjoys the hunt for a good deal and wants to see how prices stack up before committing.
|
|
|
|
| Silksong’s Berry Picking Quest: A Mossberry Hunt for Cheerful Hoarders |
|
Napisano od: nordic921 - 10-23-2026, 12:46 PM - Forum: My Forum
- Bez odgovora
|
|
As of 2026, Hollow Knight: Silksong still greets curious players with a sidequest so wholesome it practically wears a tiny gardening hat. The quest is Berry Picking, and its premise is exactly what the name promises: the Moss Druid needs Mossberries, Hornet needs a reason to poke around Mosshome, and the player needs an excuse to turn every glowing green object into a personal treasure. The Druid is less a pharmacist and more a botanist with a mysterious potion habit, but the request is simple: bring three Mossberries, receive a useful accessory, and optionally keep hunting for extra pocket money. The first three berries are the practical target; every additional berry after that pays out in Rosaries. In other words, the quest is a berry-themed loyalty program, and Hornet is the suspiciously well-armed customer.

Where the Berry Bureaucracy Begins ?
The quest starts in northeastern Mosshome, in the room where Hornet learns the Silkspear ability. That first ranged attack is not just a shiny new toy; it is also the key to cutting through silk strands to the east. A bench sits nearby for equipment fiddling, healing, and the ancient ritual of saving the game before doing something slightly reckless. Once the silk is sliced, the player continues east and meets the Moss Druid, an NPC who appears to be concocting a ritual rather than a beverage. Talk until the quest appears, and the berry hunt is officially open for business.
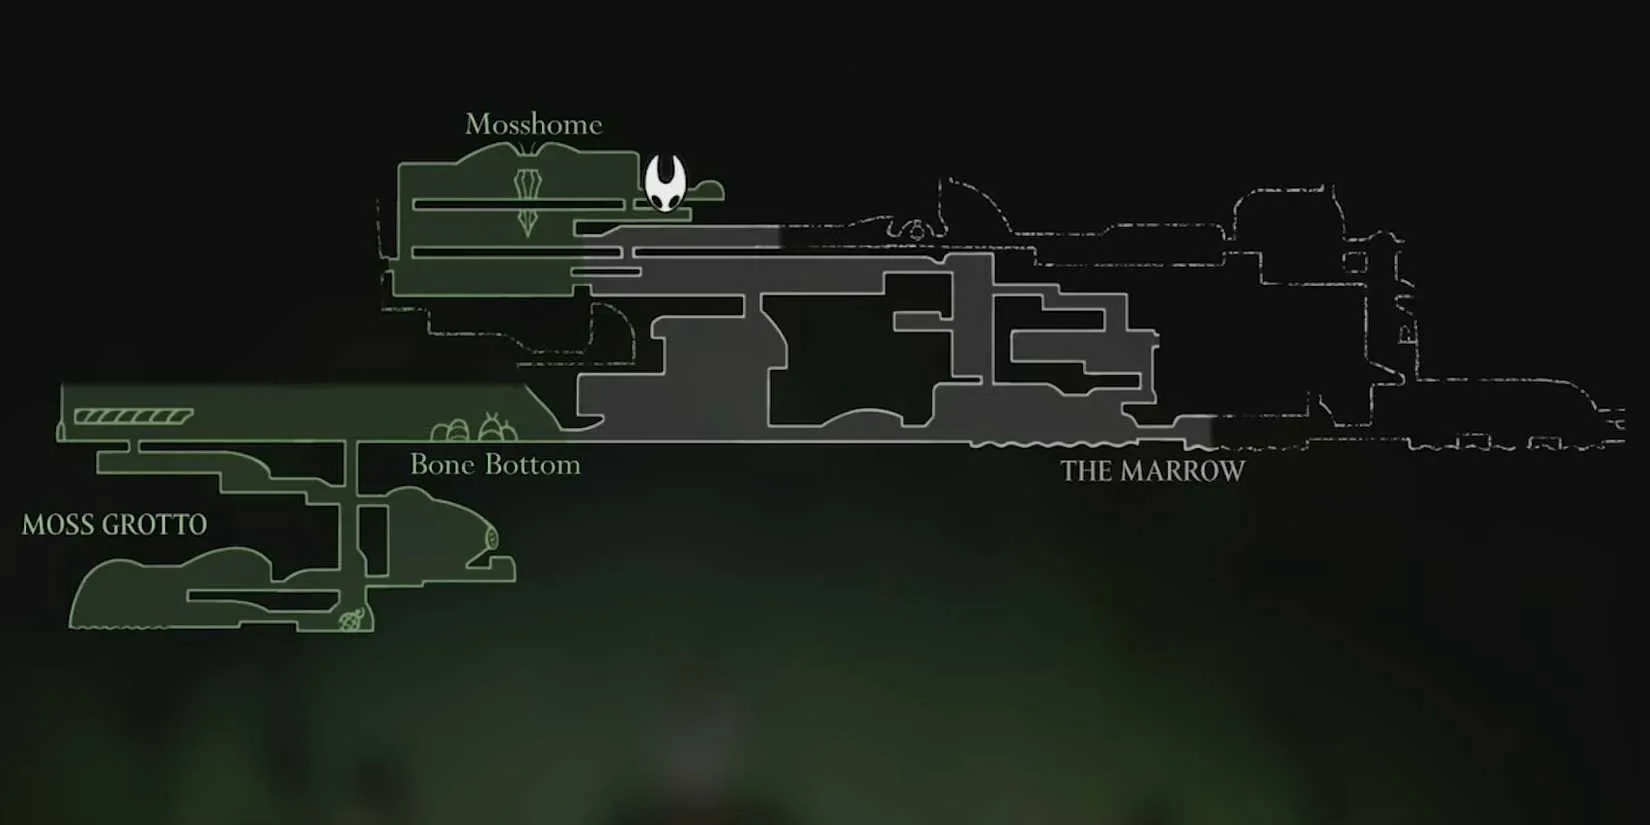
Only three Mossberries are required, but more than three exist in the game. The extra berries are not wasted; each one beyond the first three earns 50 Rosaries, which is a surprisingly hefty sum for an early-game wallet. A player with a berry basket and questionable self-control may therefore collect all four known berries and feel very smug about it.
Every Mossberry Location, Renumbered for Sanity ?
The original field notes had two entries labeled #3; this guide renumbers them so the filing cabinet does not collapse. The first three are the easiest to reach, while the fourth is best saved for after the elevator between Mosshome and Bone Bottom is unlocked.
Berry
Area
Quick directions
Risk level
#1
Mosshome
Go left from the Druid’s lair, drop through the gap, head down and right, then defeat the flying bug carrying a glowing green item.
Low
#2
Moss Grotto, northeast
On the route from the starting point to Bone Bottom. If missed, drop through the hole between Bone Bottom and the Ruined Chapel, hold right to land on the upper ledge, then follow the route to the large eastern chamber.
Medium, because pogo jumping is involved
#3
Moss Grotto, southwest
Drop to the bottom, wrap left, turn back up and right, then platform to the upper-right corner. The berry hangs from a vine, so cut it down.
Low to medium
#4
Bone Bottom and Mosshome
Unlock the elevator by attacking the lever in southwest Mosshome. Stand on the right ledge, look down, and defeat the flying enemy with the green glow.
Medium, with a long fall as the penalty
The Mossberry Tour, With Extra Moss ?
The first Mossberry is almost embarrassingly close to the Druid. Head left, drop through the gap, continue down and right, and look for a flying bug carrying something green and luminous. Defeat the bug, collect the berry, and enjoy the brief feeling of being an efficient professional.
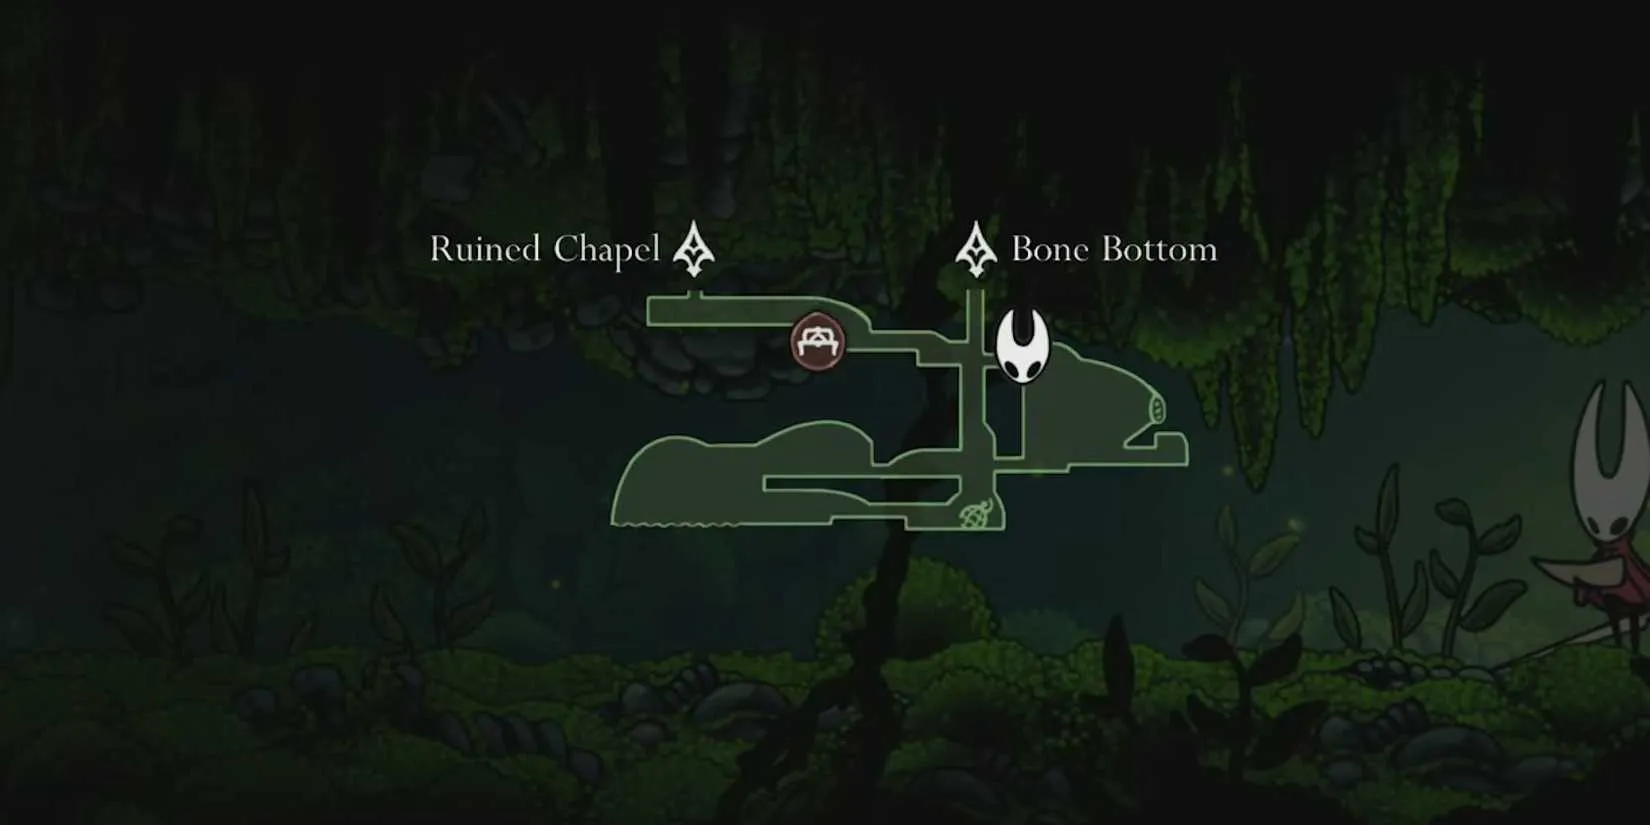
The second Mossberry lives in northeastern Moss Grotto and sits on the natural path from the starting point to Bone Bottom. Players who miss it can return later by dropping through the hole between Bone Bottom and the Ruined Chapel. While falling, hold the thumbstick right and try to land on the upper ledge. From there, head right into the next area and jump to the lower platform immediately to the right. A missed upper ledge sends the player near the starting point, which is not a disaster, just an unplanned cardio session. The berry itself hangs from the ceiling, guarded by a flying bug, and this is where the game introduces pogo jumping. The trick is to jump, then attack while the thumbstick points down at a 45° angle. If Hornet hits an enemy, she gets another jump. Wait until the bug is roughly halfway between Hornet and the berry along an imaginary diagonal line, jump, and attack at that angle. A successful pogo launches Hornet toward the berry; attack it, chase it down, and pick it up. This may take a few tries, but the technique matters later, so the room doubles as a low-stakes practice arena.
The third Mossberry sits in southwestern Moss Grotto, close to the starting point. Drop to the bottom, wrap around to the left, turn back up and right, then platform to the upper-right corner. The berry hangs from a vine, so cut it down and collect it. No drama, no complicated geometry, just a pleasant little platforming errand.
The fourth Mossberry is the one that rewards preparation. First, explore southwest Mosshome and attack the lever to activate the elevator to Bone Bottom. Then stand on the right ledge at the indicated spot and look down. A flying enemy with a green glowing item occasionally floats past; defeat it with the Silkspear or repeated aerial attacks. Falling means plummeting all the way to Bone Bottom, which is fine with the elevator and a tedious runback without it. The berry also falls into Bone Bottom, so grab it there and return to the Moss Druid.
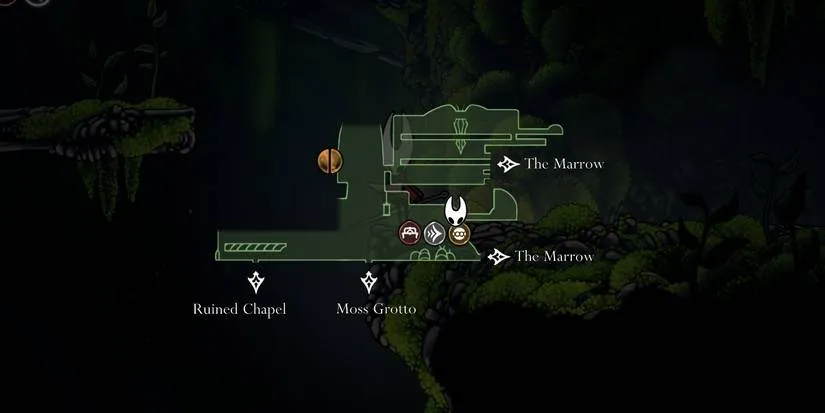
Rewards: The Druid Pays in Accessories and Rosaries ?
Handing over the first three Mossberries earns the Druid’s Eye, an accessory that fits a blue slot on the crest. While equipped, any damage taken adds to the silk meter, which can then be spent on healing or special moves. For an early-game charm-like item, that is a tidy little safety net with a side of offensive potential. Every additional Mossberry after the first three earns 50 Rosaries, a meaningful pile of currency for buying useful early-game items. The quest is optional, but the rewards are practical, the route is compact, and the Moss Druid is memorable in the way that only a potion-brewing botanist can be. Hornet may not look like a berry courier, but in 2026, even legendary hunters have to fund their equipment somehow. ?
That same budgeting mindset applies outside the game, too. Whether you're saving Rosaries for an early-game item or stretching a real-world gaming budget, a little preparation goes a long way. DealNest helps with the latter by rounding up game deals today, so you can spot discounts without hopping between storefronts.
If you're planning your next purchase after wrapping up a quest like this one, it's worth a look before you pay full price.
|
|
|
|
|


