| Dobrodošli, gost |
Trebate se registrirati prije nego možete pisati na ovoj stranici.
|
| Korisnici online |
Ovdje je trenutno 14 korisnika online.
» 0 Član(ova) i 14 Gost(iju)
|
|
|
| Lies of P: A Soulslike Phenomenon That Redefined Voice Acting and Stole Our Hearts |
|
Napisano od: nordic921 - 09-27-2026, 08:25 AM - Forum: My Forum
- Bez odgovora
|
 |
You know that feeling when a game comes out of nowhere and just grabs you by the collar? That was Lies of P for me. Back in 2023, I remember seeing the trailer and thinking, 'Another Pinocchio-inspired Soulslike? Sure, why not.' But then I played it, and wow. It wasn't just another clone; it had soul—pun intended. Fast forward to 2026, and the game, along with its DLC Overture, has cemented itself as a titan in the genre. And recently, I had the chance to chat with four of the actors who brought this world to life: Aliona Baranova (Veronique), Alix Wilton Regan (Lea), Rasmus Hardiker (Gemini), and Joseph Balderrama (Arlecchino). Let me tell you, it was a ride.

When Lies of P first launched, it was a gamble. A new IP from a relatively unknown studio, Neowiz, and a dark twist on a children's tale. But the buzz was immediate. Steam player counts climbed for five straight days, and critics couldn't stop praising its tight combat and haunting atmosphere. It became the most beloved non-FromSoftware Soulslike, and its DLC, Overture, which dropped in 2025, smashed records within hours. An 85 on Metacritic? That's top-tier. And the actors? They saw it coming.
The Phenomenon That Is Lies Of P
"I'm never normally sure if something is going to be successful," Rasmus Hardiker admits, "but I had so much fun doing this, I could tell it was going to be a really good game." Joseph Balderrama echoes that: "It felt like the whole package. The creative team was so good: the visuals, the sound, all of it. Everyone was just at the races with it." That kind of confidence is infectious, and it's why Aliona Baranova and Alix Wilton Regan jumped at the chance to join the DLC. "I don't really say no to many auditions," Baranova laughs, "but this one was a no-brainer." Wilton Regan, a veteran of Mass Effect and Dragon Age, was equally hooked. "She was described as tough on the outside, soft on the inside, but what I loved was she was called a lazy genius," she says. "I was like, 'I've got this.' Well, I'm lazy, and a mild genius."
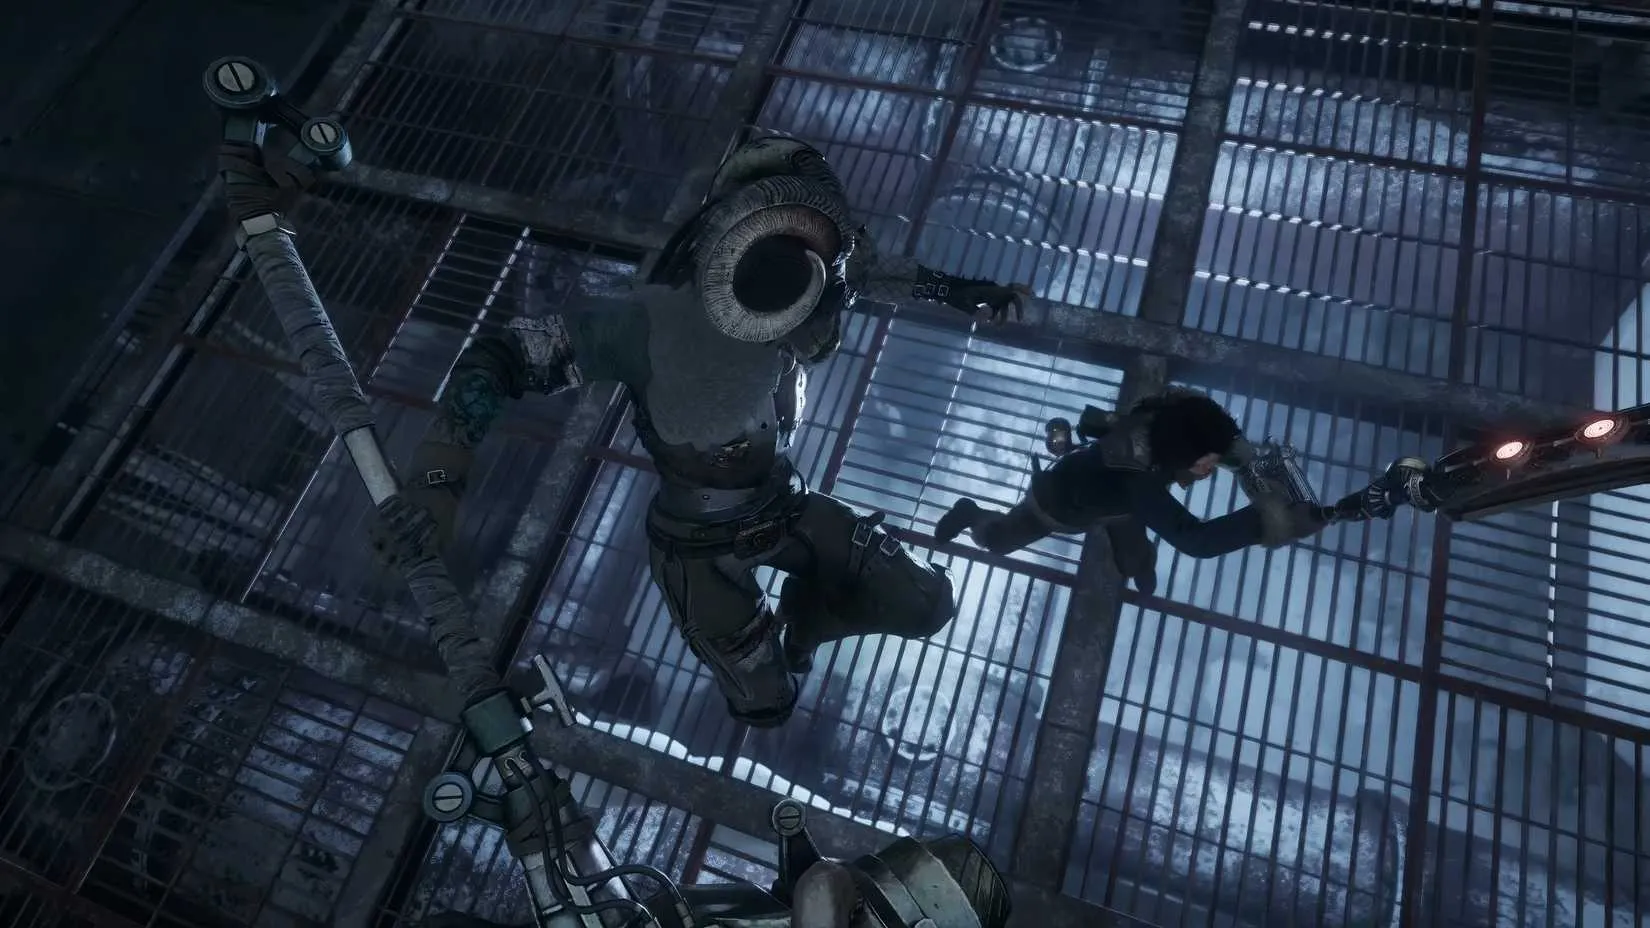
Baranova actually auditioned for Wilton Regan's role first, losing out to the more experienced actor, before finding Veronique. "I just remember thinking, 'Wow, what an incredible character.' I haven't had a chance to play someone like that. And her scenes are so intense. You can't go half-hearted. I knew I had to really commit, and sound like I'm 6'6". I think I'm believably that tall," she jokes. The character descriptions were detailed, with rich histories and psychology, which helped the actors "learn to love the character." But that depth can be a double-edged sword. "You can't distill two pages of notes," Wilton Regan says. "You have to cherry-pick your moments, constantly adapt and refocus your energy."
Getting Into Character
The preparation for video game acting is unique. Often, scripts arrive the day of recording, or the day before at the earliest. For Balderrama, that's freeing. "I've got a new habit with TV and film where I don't look at the script until the week before. That's what make-up is for." Hardiker takes it further: "I prefer not even having the script and just going in the booth on the day. You'll only ever have one chance to do that. I'm reacting as I'm learning what's happening—that's about as real as it gets." Baranova, however, admits she has "a lot to learn" from the others, but she has a secret weapon at home: her partner, Jennifer English (Baldur's Gate 3, Clair Obscur: Expedition 33). "If you had someone at home who was known for brilliant performances, you would be silly not to ask them. I definitely did that for Veronique."
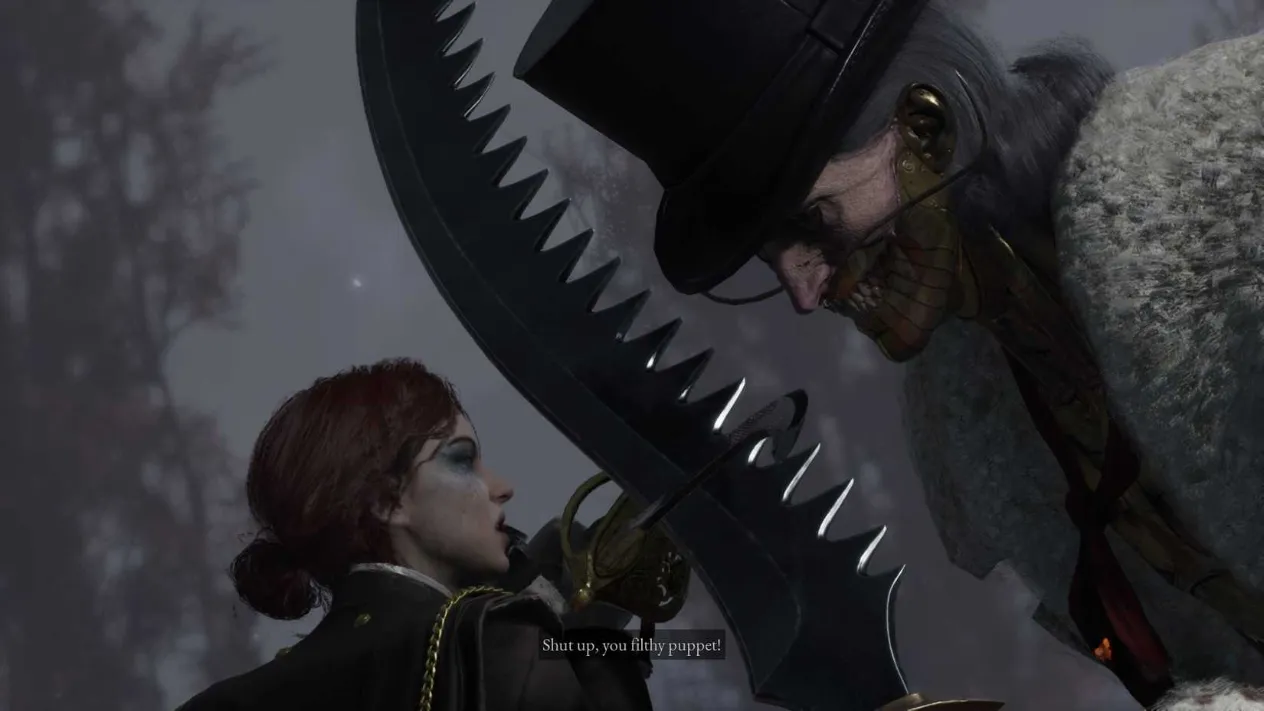
For Baranova, the jump from Baldur's Gate 3 NPCs to a 6'6" warrior was jarring. "On Baldur's Gate, I played a comic relief squirrel for 40 minutes. This was the most physical role I've ever done. I lost my voice afterwards, as you can imagine." Wilton Regan, on the other hand, is no stranger to strong leading women—she's voiced the Female Inquisitor in Dragon Age: Inquisition, Alt Cunningham in Cyberpunk 2077, and Aya in Assassin's Creed Origins. But Lea offered something new: "They wanted a lot of rage from me, a lot of very deep, primal emotion. That's what I like to explore as an actor. That's kind of what I get off on, I guess." Balderrama, returning as Arlecchino, was just happy to be more than a voice: "I was just psyched that I wasn't disembodied anymore. That was a big plus for me."
A Shift In The Gaming Landscape
The industry is changing. Smaller studios are producing some of the best games, from Baldur's Gate 3 to Clair Obscur: Expedition 33 to Lies of P itself. "These big franchise stories are saturated," Balderrama says. "People are desperate to experience something they haven't done 150 times. That's only going to come from underdog devs, because they're the ones that don't have the constraints." Baranova agrees: "Audiences are definitely becoming fatigued. Unique visions that games like Lies of P have brought are important. It's a Korean game, Kingdom Come: Deliverance 2 is Czech, Clair Obscur is French; it's exciting to get stories from parts of the world we're not necessarily used to."
But there's still a long way to go for female representation. Wilton Regan praises games like Baldur's Gate 3 and Dragon Age: The Veilguard for their inclusive leads, but behind the scenes, change is slow. "If you have a male character and a female character, very often the man will do the full performance capture and the woman will be brought in simply to replace his lines. That's a terrible choice. A woman would not fight a 7-foot-5 man the same way a male counterpart would." She recalls pre-Covid days where she was given exactly 4.2 seconds to say a line, with no room to make it her own. "The talent comes when you make it your own, but we're constrained. You have to find a way to prove your brilliance within these constraints."

Baranova adds, "You're not treating your players as observant enough. They think that when a male actor records mo-cap, then it's just replaced with a female voice that the audience isn't going to notice. It's so obvious when a woman is walking with her shoulders locked and her hips not moving. It really irks me." Wilton Regan also calls out marketing: "The male character choice will still often be the default on the poster, or the man's voice in the trailer. We need to get women's voices in there. It's not that complicated to have one pass with the female voice, and one with the male voice."
We've come a long way from when the industry was reluctant to cast powerful leading women, but there's still work to do. With actors like Wilton Regan, Baranova, and English proving their worth, it's hopefully only a matter of time. As for Lies of P, it's more than a game—it's a testament to what happens when you take risks, trust your instincts, and let a puppet sing. And I, for one, can't wait to see what Neowiz does next. ?
For players who care about the direction the industry takes, the act of choosing what to play is never neutral. Every purchase signals what kind of stories, performances, and risks are worth funding. That doesn't mean every game has to be a full-price leap of faith, though—finding a good deal can make it easier to explore beyond the familiar.
That's where DealNest game deals can help. It gathers discounts on a wide range of titles, making it simpler to take a chance on something unexpected and, in turn, support the kind of creative work that keeps the medium moving forward.
|

|
|
| How I Reached the Memorium in Silksong: Map Location and Route Guide |
|
Napisano od: nordic921 - 09-27-2026, 08:23 AM - Forum: My Forum
- Bez odgovora
|
|
Hey, fellow Hornet fans! If you are lost in the Citadel and keep hearing about a mysterious place called the Memorium, I have got you covered. I spent way too many hours wandering the lower corridors of Hollow Knight: Silksong before I finally figured out the exact route, and I want to save you from that same headache. In 2026, with the current version of the game, the path is still the same, and the map is still sold by the same machine for 70 Rosaries. So grab your Needle, make sure your Pins, Quill, and Compass are ready, and let us get you to the Memorium.
Prerequisites Before You Start
Before you even think about reaching the Memorium, you need three key movement tools: the Clawline, the Double Jump, and the Faydown Cloak. Without them, you will hit a wall, literally.
Tool
Where to Get It
Why You Need It
Clawline
Eastern side of the Underworks
Required to climb Mount Fay and reach the peak
Double Jump
Peak of Mount Fay
Needed to reach the upper ledge near Songclave and the Memorium
Faydown Cloak
Late-game Citadel area
Lets you float and reach the final entrance above Songclave
I know that sounds like a lot, but trust me, each ability opens up the Citadel in a big way. If you are missing any of these, go back and grab them first. The Memorium is not going anywhere, but your patience might.
Step 1: Climb Mount Fay for the Double Jump
Start by making your way to Mount Fay. The climb to the peak is no joke. You will face tough platforming, aggressive enemies, and a few moments where you will question your timing. That is why the Clawline from the eastern side of the Underworks is mandatory. Once you have it, use it to grapple and pull yourself up the mountain.
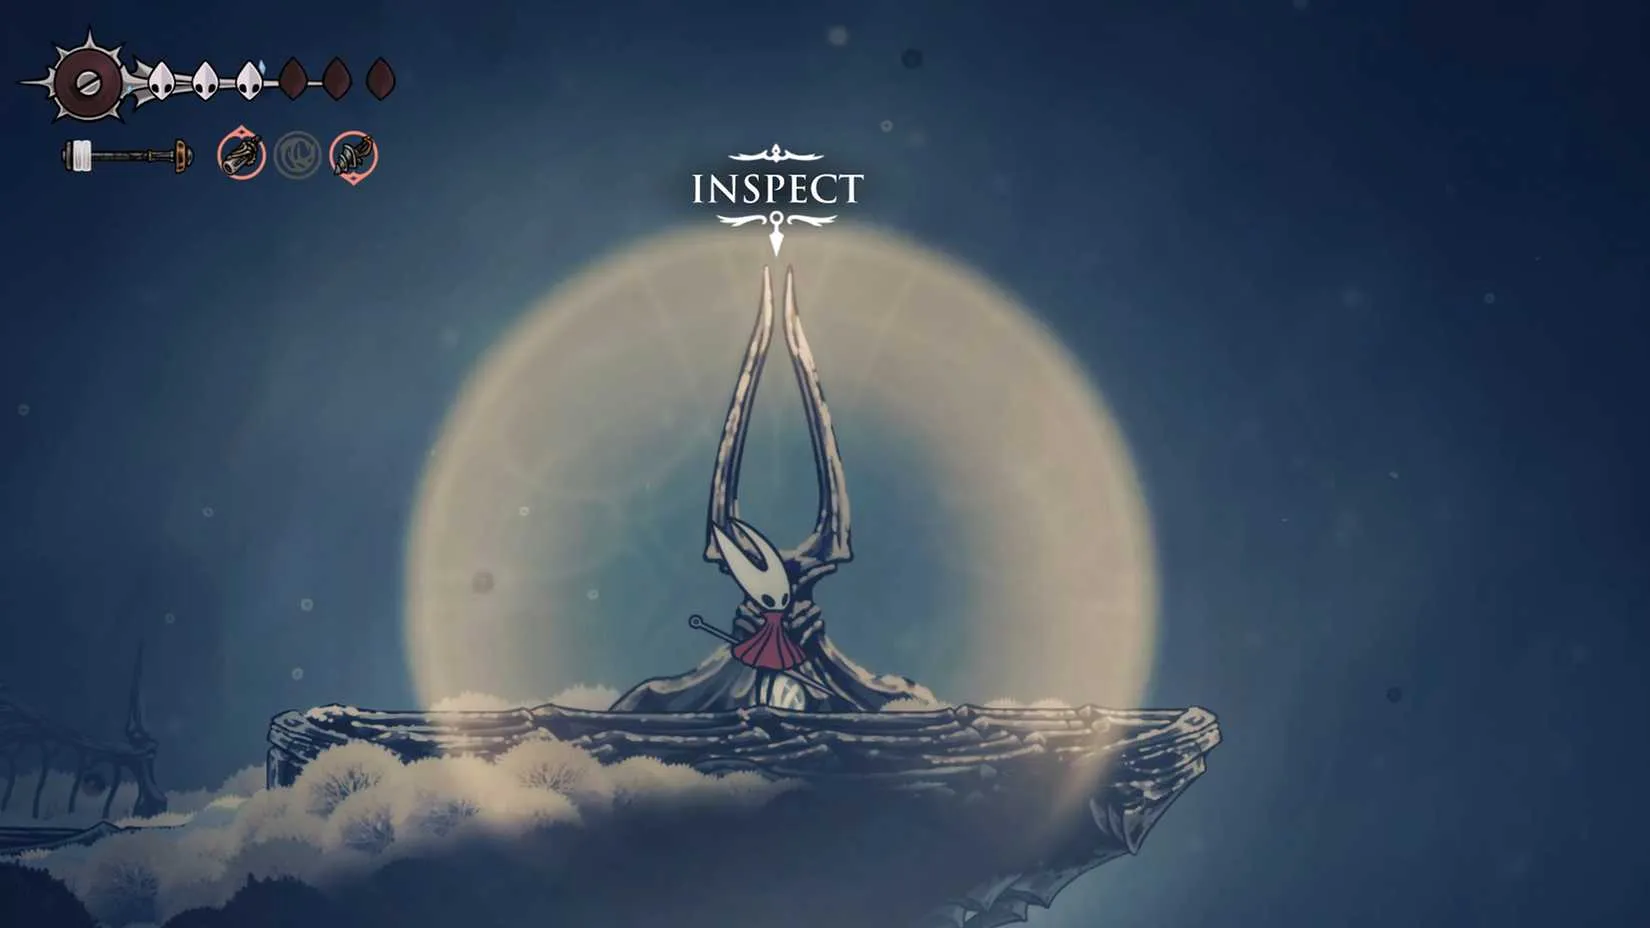
At the very top, you will earn the Double Jump ability. This is the game-changer. With Double Jump in your possession, you can finally reach the upper areas of the Citadel that were previously out of reach.
Step 2: Head to Songclave in the Top Left of the Citadel
Once you have Double Jump, travel to the top left of the Citadel to reach the Songclave. If that name sounds familiar, it is because this is the same location where you would have acquired the White Key needed to access Whiteward. From Songclave, head left. You will pass two powerful enemies. They are not pushovers, so either fight them carefully or run past if you are confident in your dodging.
After you get past them, look above you. There will be an area that is only accessible with the Faydown Cloak. Use your Double Jump and the Faydown Cloak to go up. That is your entrance to the Memorium. Congratulations, you made it!
Step 3: Find the Memorium Map for 70 Rosaries
Reaching the Memorium is only half the battle. The map for this area is not hard to find, but it is easy to miss if you take the wrong path. From the entrance of the Memorium, head right first to access the Bench. Rest there if you need to. Then go outside the room and head up to make your way through the passage on the right. This area has multiple enemies, and at the end you will run into a Rhinoguard. That big guy can hit hard, so be ready to dodge or burst him down.
Once the Rhinoguard is dealt with, head left through the passage. Now go down and to the right when you spot the sign. You will find a machine that sells the Memorium map for 70 Rosaries. Buy it, and your map will be updated. I cannot stress enough how useful this is, especially if you plan to explore every corner of the Memorium and the areas it connects to.
What If You Do Not Have 70 Rosaries?
We have all been there. You reach the map seller and realize your wallet is empty. Do not panic. If you do not have any Rosaries on you, your best option is to go left of the map to the Bench, rest, and then head down. To your right will be two powerful enemies. They are tough, but you can kill them to farm the Rosaries needed for the map. It might take a few runs, but it is a reliable way to get the 70 Rosaries without wandering too far.
After You Buy the Map
After acquiring the map, you have a couple of choices. You can head right through the secret passage to reach Putrified Ducts, or you can head left, which leads to multiple breakable walls and ultimately the Bench. I recommend buying the map first, then exploring. That way you will not get lost when you push deeper into the Memorium or into Putrified Ducts.
Quick Tips for Navigating the Memorium
? Always equip your Compass so you can see your position on the map.
? Use Pins to mark the map seller, the Bench, and the secret passage to Putrified Ducts.
? Update your map with the Quill whenever you enter a new room.
? Farm Rosaries from the two enemies near the Bench if you are short on currency.
⚔️ Do not ignore the Rhinoguard. It guards the route to the map seller, and it can catch you off guard.
? Rest at Benches often. The Memorium can be punishing if you rush in without full health.
Final Thoughts
Reaching the Memorium in Hollow Knight: Silksong is a rite of passage. It requires you to conquer Mount Fay, earn the Double Jump, navigate the top left of the Citadel, and use the Faydown Cloak to reach the hidden entrance above Songclave. The map itself costs 70 Rosaries, but it is worth every single one. I hope this guide saves you from the aimless wandering I went through. Now go out there, Hornet, and make the Citadel your own. Happy exploring! ?
If you are the kind of player who likes to map every corner before committing, you probably apply that same mindset to buying games. Hollow Knight: Silksong and its inspirations rarely stay full price forever, and waiting for a good discount can stretch your gaming budget further. That is where a reliable steam sale tracker like DealNest comes in handy — it helps you watch for price drops without refreshing the store page every day.
Whether you are stocking up on metroidvanias or keeping an eye on the next big indie release, a little patience can save you real money. DealNest keeps things simple by collecting current Steam deals in one place, so you can spend less time checking prices and more time exploring places like the Memorium.
|
|
|
|
| Silksong Guide: How to Open the Ornate Lock and Beat The Unravelled |
|
Napisano od: nordic921 - 09-27-2026, 06:29 AM - Forum: My Forum
- Bez odgovora
|
|
As of 2026, Hollow Knight: Silksong continues to reward curious players who stray from the critical path, and few optional secrets are as easy to miss as the ornate lock mechanism hidden inside Whiteward. The device sits behind a keyhole, silent and unexplained, during Act 2. Because it is not tied to the main story, the game offers no tutorial, no marker, and no obvious hint about what lies beneath. So how does a traveler turn that stubborn lock into a doorway? The answer requires a return trip, a late-game movement ability, and a key that most players will overlook on their first pass through the Citadel.
A Locked Door in Whiteward
The journey begins during the climb to the top of the Citadel. To enter Whiteward, players need the White Key, which is found in the top-right part of the Citadel in Songclave. After collecting it, they can ring the bell in the First Shrine if they wish, then return to the elevator and ride it down. Once inside Whiteward, they should take the left passage. There, the ornate lock mechanism waits, demanding a keyhole item that is not yet in the inventory. At this point, the correct move is simple: ignore it and continue the main story.
Progression eventually leads to the Underworks, where players earn the Clawline ability on the eastern side. This tool is the missing piece. Without it, the Surgical Key cannot be reached, and the lock remains a decorative mystery. With it, the optional boss arena becomes accessible.
Finding the Surgical Key ?
After acquiring Clawline, players should return to Whiteward. The route is specific. They need to make their way to the right, just before the drop into the lava pit that leads into the Underworks. Up above that area, a secret passage is hidden on the top level. Going left from there reveals an enemy and a grapple point. By using Clawline on that point, players can trigger an item drop: the Surgical Key.
It is a small detour with a large payoff. The key must then be carried back to the ornate lock mechanism. Inserting it causes the floor underneath to open, dropping the player directly into The Unravelled's boss arena.

The Unravelled Boss Fight
The Unravelled does not begin as a solo duel. The encounter opens with a single enemy. Once that enemy is defeated, two more spawn. Only after those additional foes are dealt with does the actual boss make his appearance. It is a layered fight, and players who waste resources on the first wave may find themselves struggling before the main event even starts.
The boss has only three attacks in his arsenal, but each one punishes careless positioning. He deals two mask damage, so contact is costly. Players should avoid standing on the ground where he emerges. The Unravelled usually opens with a charge attack. The good news is that he can be attacked during this move. The safer response is to jump and dash out of the way, then strike him from behind before he dives into the ground.
After reemerging, he will either perform another charge or launch projectiles that can be hit. As he takes enough damage, he begins summoning spears from the ground before diving back down. In the later stages, he can start a charge attack while the spears are still active. That overlap is the real threat. Keeping calm, maintaining distance, and punishing only safe openings will carry the fight.
Phase
What Happens
Player Response
Opening
One enemy appears
Clear it quickly
Second Wave
Two enemies spawn
Manage spacing and silk
Boss Intro
The Unravelled enters
Avoid his emergence point
Charge
Boss rushes across arena
Jump, dash, hit from behind
Projectiles
Boss fires hittable shots
Strike them or dodge
Spears
Ground spears appear
Stay mobile, avoid charging boss
Reward
Silk Heart
Collect and exit
Why the Reward Matters
Defeating The Unravelled grants a Silk Heart. For completionists and players chasing every upgrade, this makes the ornate lock worth opening. It is not required for the main story, but it is another example of Silksong hiding meaningful rewards behind environmental puzzles and ability gates.
So is the detour worth it? For anyone who enjoys the game's exploration, yes. The lock mechanism is a reminder that not every secret announces itself. Sometimes the only hint is a keyhole, a hidden passage, and the patience to come back later with the right tool.
Quick Recap ✅
Reach Whiteward in Act 2.
Get the White Key from Songclave in the Citadel.
Ride the elevator down and find the ornate lock on the left passage.
Continue the story until Clawline is obtained in eastern Underworks.
Return to Whiteward and go right before the lava pit drop.
Find the top secret passage, go left, and use Clawline on the grapple point.
Collect the Surgical Key and unlock the mechanism.
Defeat The Unravelled's waves and boss.
Claim the Silk Heart.
In 2026, this remains one of the more satisfying optional secrets in Silksong. The path is obscure, the boss is dangerous, and the reward is permanent. For players who thrive on discovery, that combination is exactly what makes the hunt worthwhile.
That same patience — checking back later, keeping a mental note of something worth returning for — translates surprisingly well outside the game. Plenty of players who enjoy hunting down obscure secrets also enjoy hunting down a good price, and the two mindsets aren't so different: you watch for the right moment, you avoid impulse purchases, and you accept that the best opportunities rarely announce themselves up front.
If that sounds familiar, it's worth keeping a deals hub bookmarked alongside your usual gaming stops. Sites like DealNest round up discounts and offers in one place, which saves you from refreshing a dozen store pages during sale season. Whether you're restocking on accessories or picking up something new to play once the credits roll, a little browsing beforehand can be the difference between paying full price and walking away satisfied — the same feeling as finally opening that ornate lock.
|
|
|
|
| Hollow Knight: Silksong Fine Pins Quest: My Fast Farming Guide |
|
Napisano od: nordic921 - 09-27-2026, 03:55 AM - Forum: My Forum
- Bez odgovora
|
|
Have you ever spent an entire evening chasing a random drop in Hollow Knight: Silksong, only to watch your prize tumble into a spike pit? That was me with the Fine Pins quest in 2026. As a wanderer in Pharloom, I thought I had seen every annoying enemy the Citadel could throw at me. Then I met the pin-wielding choirbugs, and I learned that patience is not just a virtue here. It is a farming strategy.

The Fine Pins quest is technically a Hunt, and it asks you to collect 10 Fine Pins from some of the most irritating enemies in the Choral Chambers. The drop is random, so luck matters. But after several failed runs, I found a loop that let me finish the whole thing in about 10 minutes. Here is exactly how I did it.
How I Started the Fine Pins Quest
First, you cannot even see this quest until you have defeated the Cogwork Dancers boss. This double boss waits in the Cog Core area of the Choral Chambers region. If you are following the main story, you will naturally run into them. I still remember the clanking rhythm of that fight. Once the Cogwork Dancers fall, do not leave the arena immediately. Keep walking to the right until you reach Songclave.
Songclave is a small village that feels similar to Bone Bottom and Bellhart, but when I first arrived, it was almost empty. The only NPC there was the Caretaker, who explained that this place used to be a safe haven. To bring it back to life, you need to enter the large and only building in the area. Inside, interact with the machine and provide 80 Rosaries. That activates the First Shrine bell.
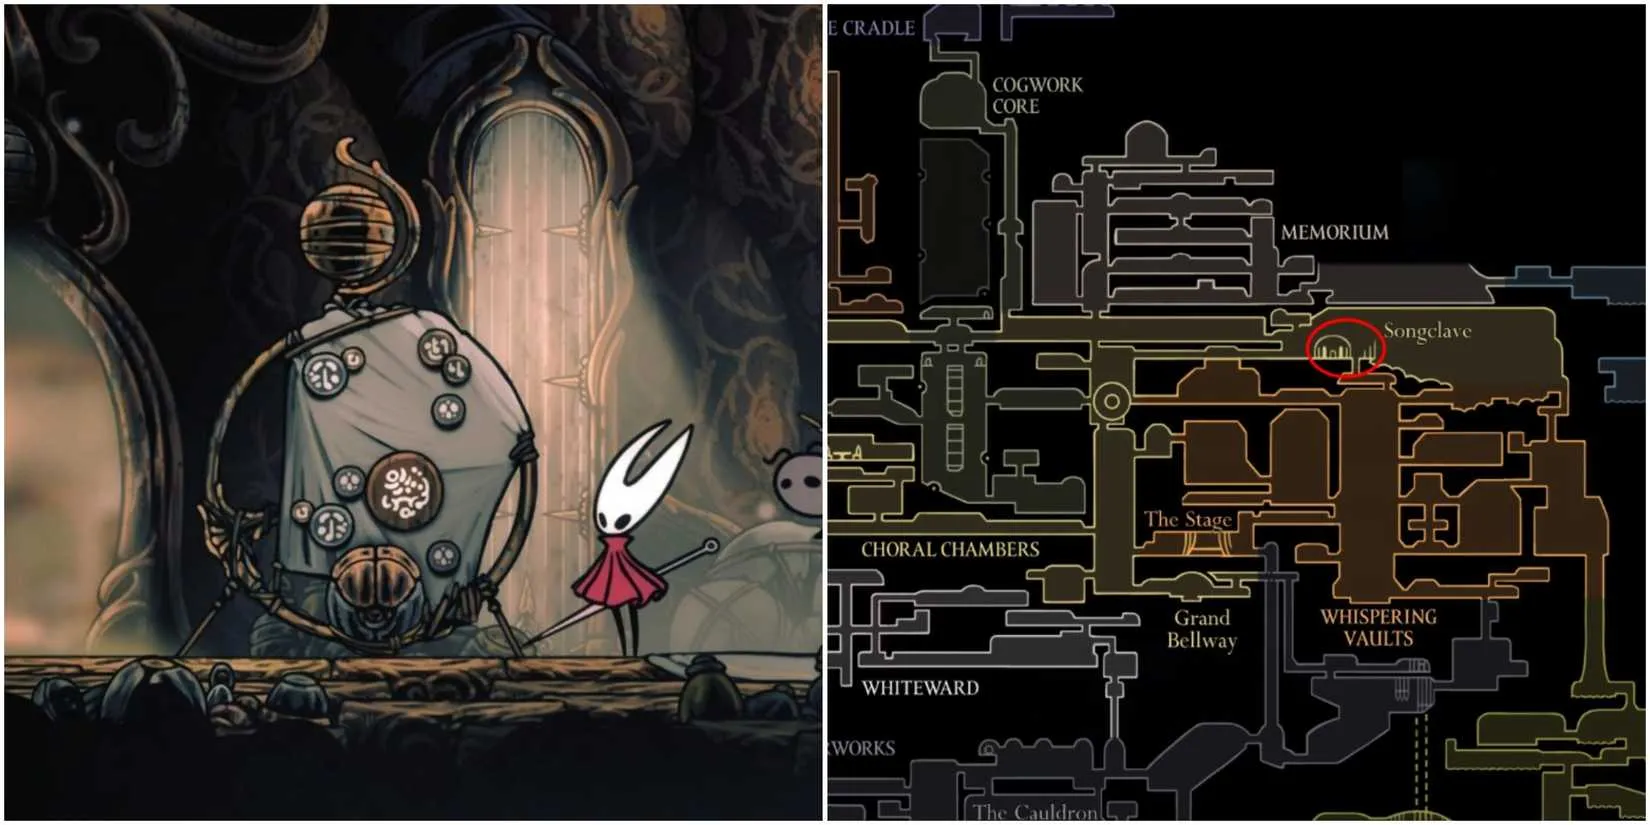
After that, leave Songclave, rest at the nearest Bench, and return. The village will finally have more people, and a brand-new Wish Board will appear with fresh quests. One of them is the Fine Pins quest. I accepted it immediately. I also strongly recommend taking the Wandering Merchant quest while you are there, because it is another useful side objective in the region.
Where to Find Choristor and Reed
Fine Pins drop from two specific enemies: the Choristor and the Reed. Both use a pin as their main weapon, and both can take up to seven or eight hits to kill. They are not boss-level threats, but they are fast, aggressive, and usually surrounded by buddies. That combination makes them very, very annoying.
You can find Choristor and Reed while exploring the Choral Chambers, especially in rooms with a vertical structure. They almost never fight alone. Your goal is simple on paper: defeat them and hope they drop a glowing Fine Pin. You need 10 in total, so random exploration can waste a lot of time.
Enemy
Movement
Main Threat
My Strategy
Choristor
Walks
Quick pin attacks and nearby allies
Kill first
Reed
Flies
Erratic aerial pressure
Kill second
My Best Farming Spot
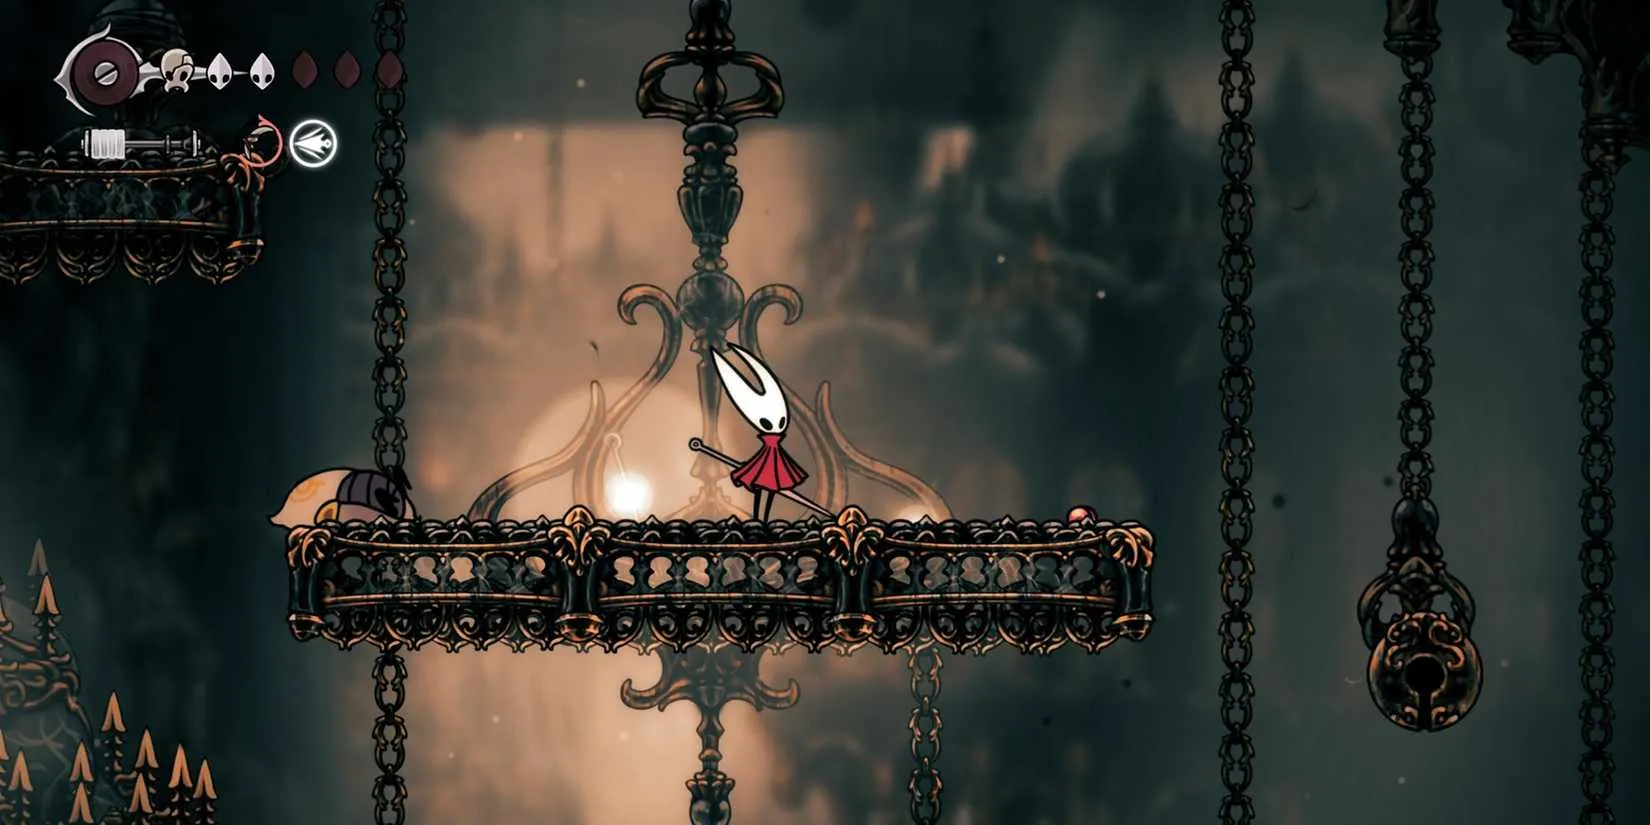
Instead of running randomly around the Choral Chambers, I used one perfect room. It is the vertical chamber at the far right of the map, near two Benches and east of the Citadel Spa. This room has a bunch of chained platforms and several Choir enemies that get in your way while you climb up or down. It also contains our two wanted buddies: the Choristor and the Reed.
My strategy was to stay at the top of this room, near the Bench, and defeat the Choristor and Reed hanging around the upper platforms. The tricky part is that you do not want them, or the Fine Pin, to fall to the ground or onto the side spikes. If that happens, the loot disappears. I learned that the hard way.
So, what is the fix? Lure them to the center of the platform while hitting them. Jump and strike their heads sequentially. I recommend defeating the Choristor first because he walks, then leaving the flying Reed for later. It sounds difficult, but it becomes a piece of cake once you get the rhythm.
After defeating them, check if they dropped anything. If not, head right to the Bench, rest a little, and come back. The enemies in this specific area respawn endlessly, so you can repeat the loop without traveling across the map. I found all 10 Fine Pins in 10 minutes tops using this method.
The Fine Pins Quest Rewards
Once you have 10 Fine Pins, go back to Songclave and interact with the Wish Board to deliver the loot. Your prize is a Rosary Necklace, which immediately gives you 120 Rosaries. If you are in need of more Rosaries to spend in Pharloom, this is a pretty lucky reward.
Is the Fine Pins quest worth the frustration? In my opinion, yes. The drop rate can be cruel, and the Choristor and Reed are not fun to fight in crowded rooms. But with the right vertical chamber and a Bench nearby, the grind becomes short and almost relaxing. Just remember: keep the enemies centered, protect the loot, and never let a shiny pin fall into the spikes. If I can do it in 10 minutes, so can you. ?
If there is one thing this quest teaches, it is that patience plus the right tool beats blind effort every time. That same mindset is worth applying beyond the game: instead of buying a title the moment it catches your eye, you can wait for the price to drop and let someone else do the watching for you. That is exactly where a steam sale tracker like DealNest comes in handy, keeping an eye on discounts so you never miss the moment a wishlisted game finally hits the number you were hoping for.
Whether you are saving up for the next big metroidvania or just want to stretch your gaming budget a little further, DealNest makes that part of the hobby effortless. A few extra seconds spent checking current deals can save you the same kind of time you just saved by farming in one smart room instead of wandering the whole Citadel.
|
|
|
|
| How I Found and Used the Snare Setter in Hollow Knight: Silksong |
|
Napisano od: nordic921 - 09-26-2026, 04:41 PM - Forum: My Forum
- Bez odgovora
|
|
I almost missed the Snare Setter on my first journey through Hollow Knight: Silksong. It is a Red Tool hidden inside Weavenest Atla, an area east of Moss Grotto, and the route only opens after you have the Needolin and the Faydown Cloak. Because that means backtracking with a mid-game double jump, many players skip it entirely. In 2026, with Pharloom's secrets widely discussed, I still think this trap tool deserves a permanent slot for boss fights.
?️ What the Snare Setter Actually Is
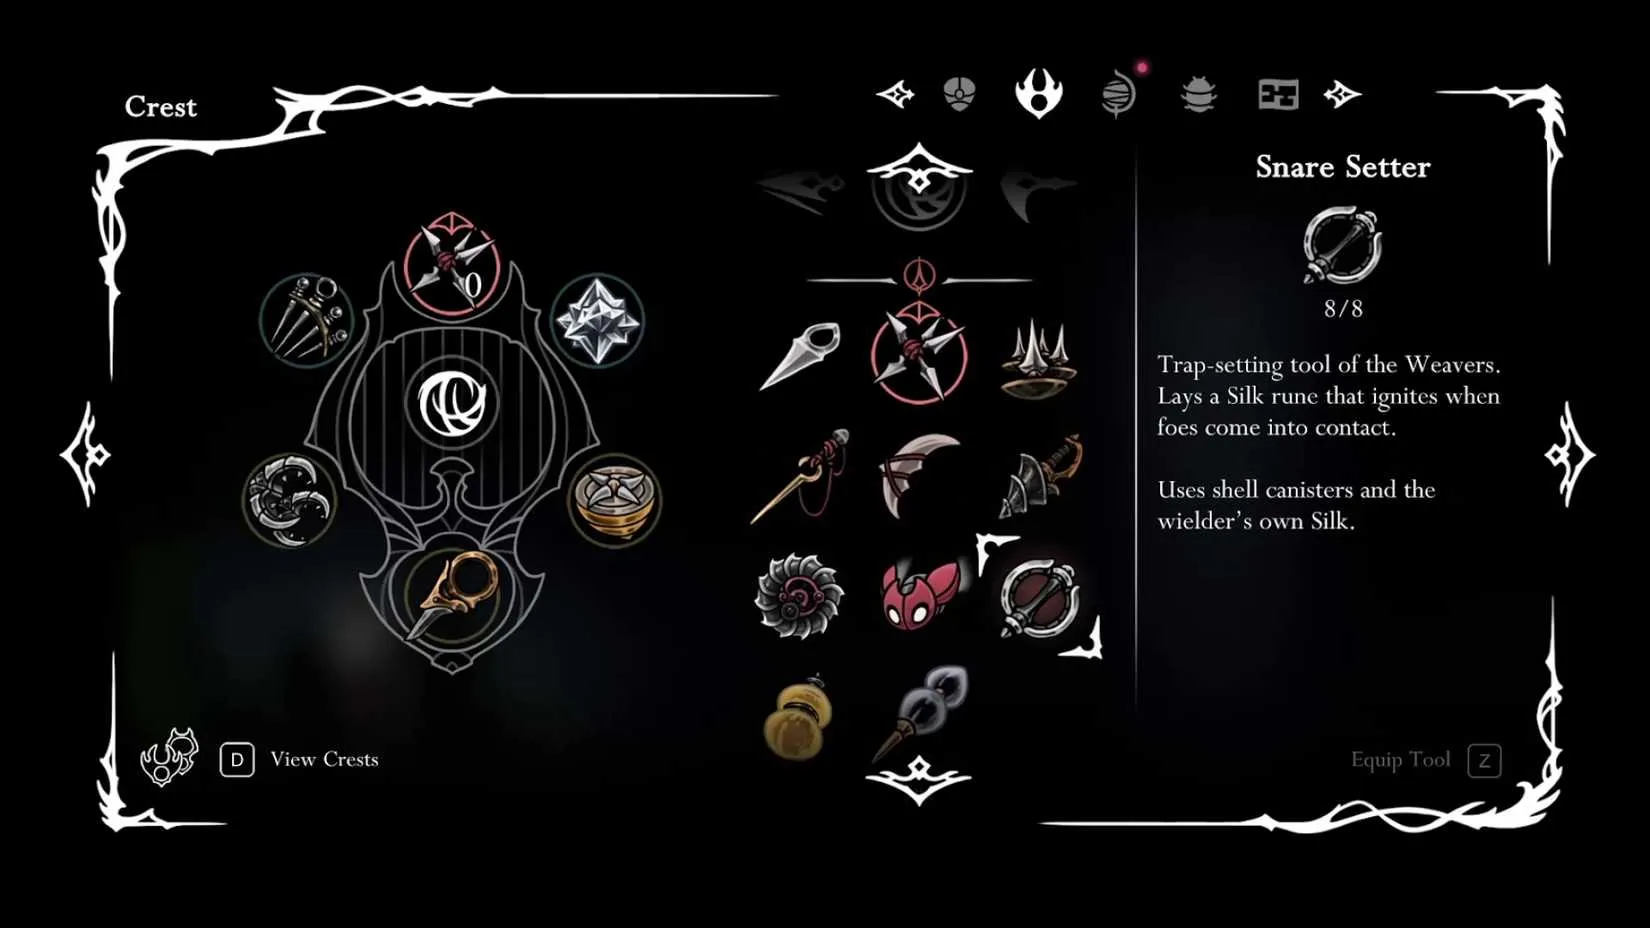
The Snare Setter is a Red Tool that places a medium-sized silk rune on the ground. When an enemy walks near it, the rune explodes and deals damage. It starts with eight charges by default, and it does not demand rare resources to refill; regular Shell Shards are enough. That makes it easy to restock at benches or vendors before a difficult encounter.
Detail
Information
Tool type
Red Tool
Location
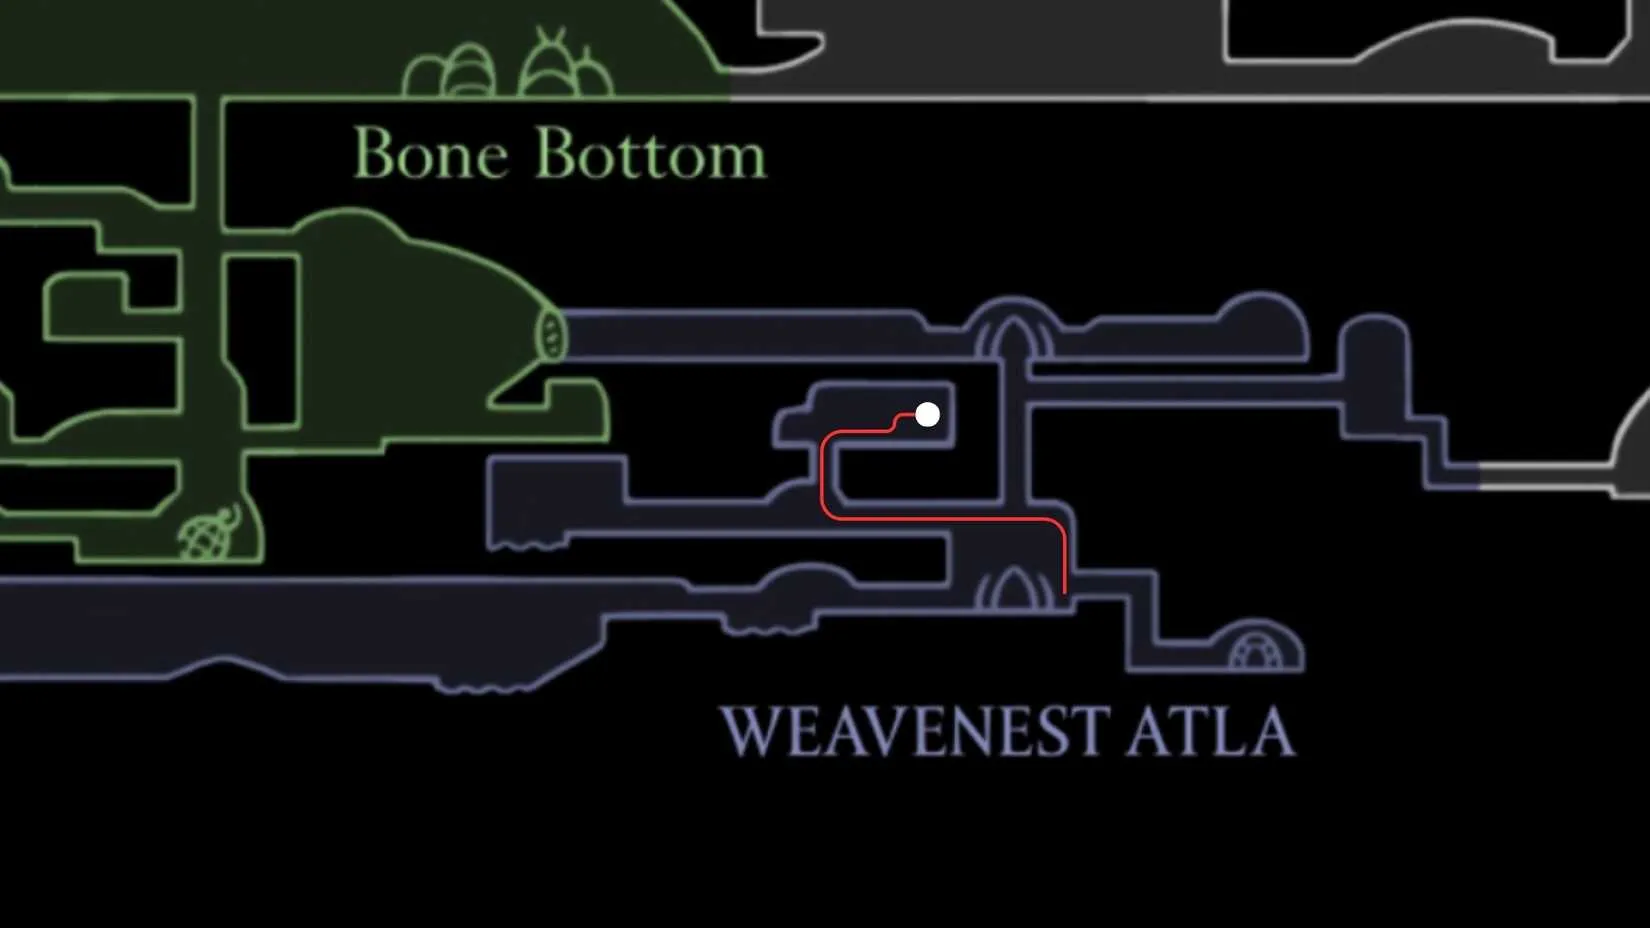
Hidden area inside Weavenest Atla
Access requirements
Needolin and Faydown Cloak
Default charges
8
Replenishment
Shell Shards
Best role
Boss arenas and zone control
?️ My Route Through Weavenest Atla
Weavenest Atla sits east of Moss Grotto, the starting region of Silksong. To get inside, I played the Needolin in front of the locked door. Once inside, the path to the Snare Setter is short but easy to fumble if you are not paying attention.
Enter Weavenest Atla and activate the teleporter to reach the lower level.
Use Cling Grip to climb the wall on the right.
Jump across the gap and enter the chamber to the left.
Walk left until you reach the water.
Use Cling Grip again to reach the top, then turn right.
Pick up the Snare Setter from the pedestal and add it to your inventory.
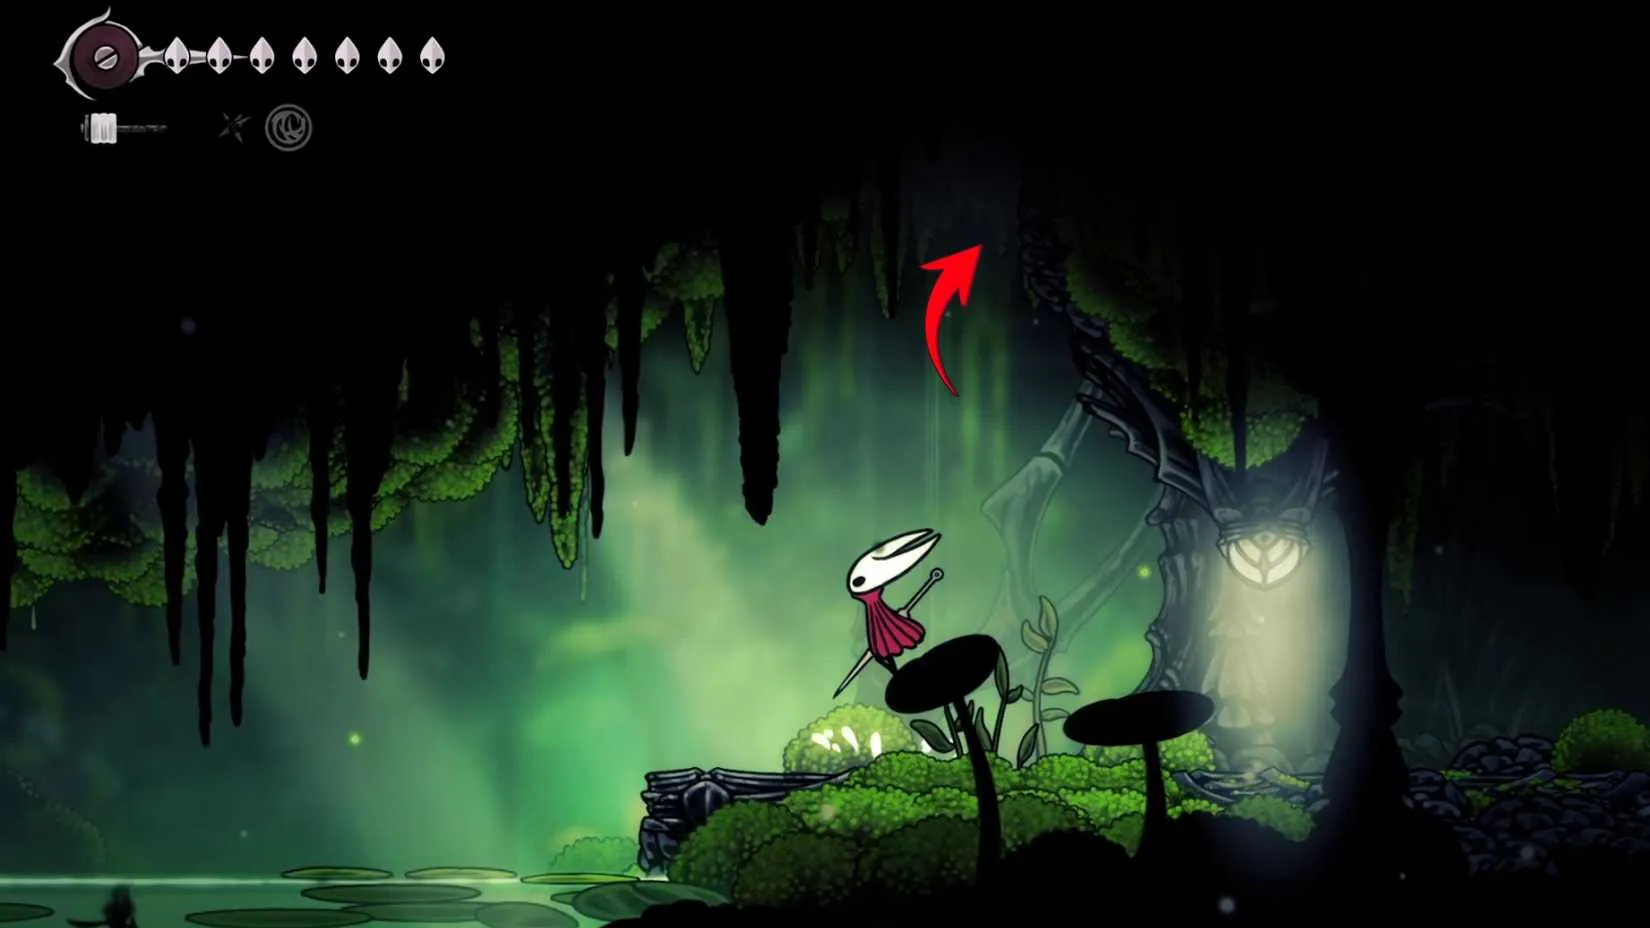
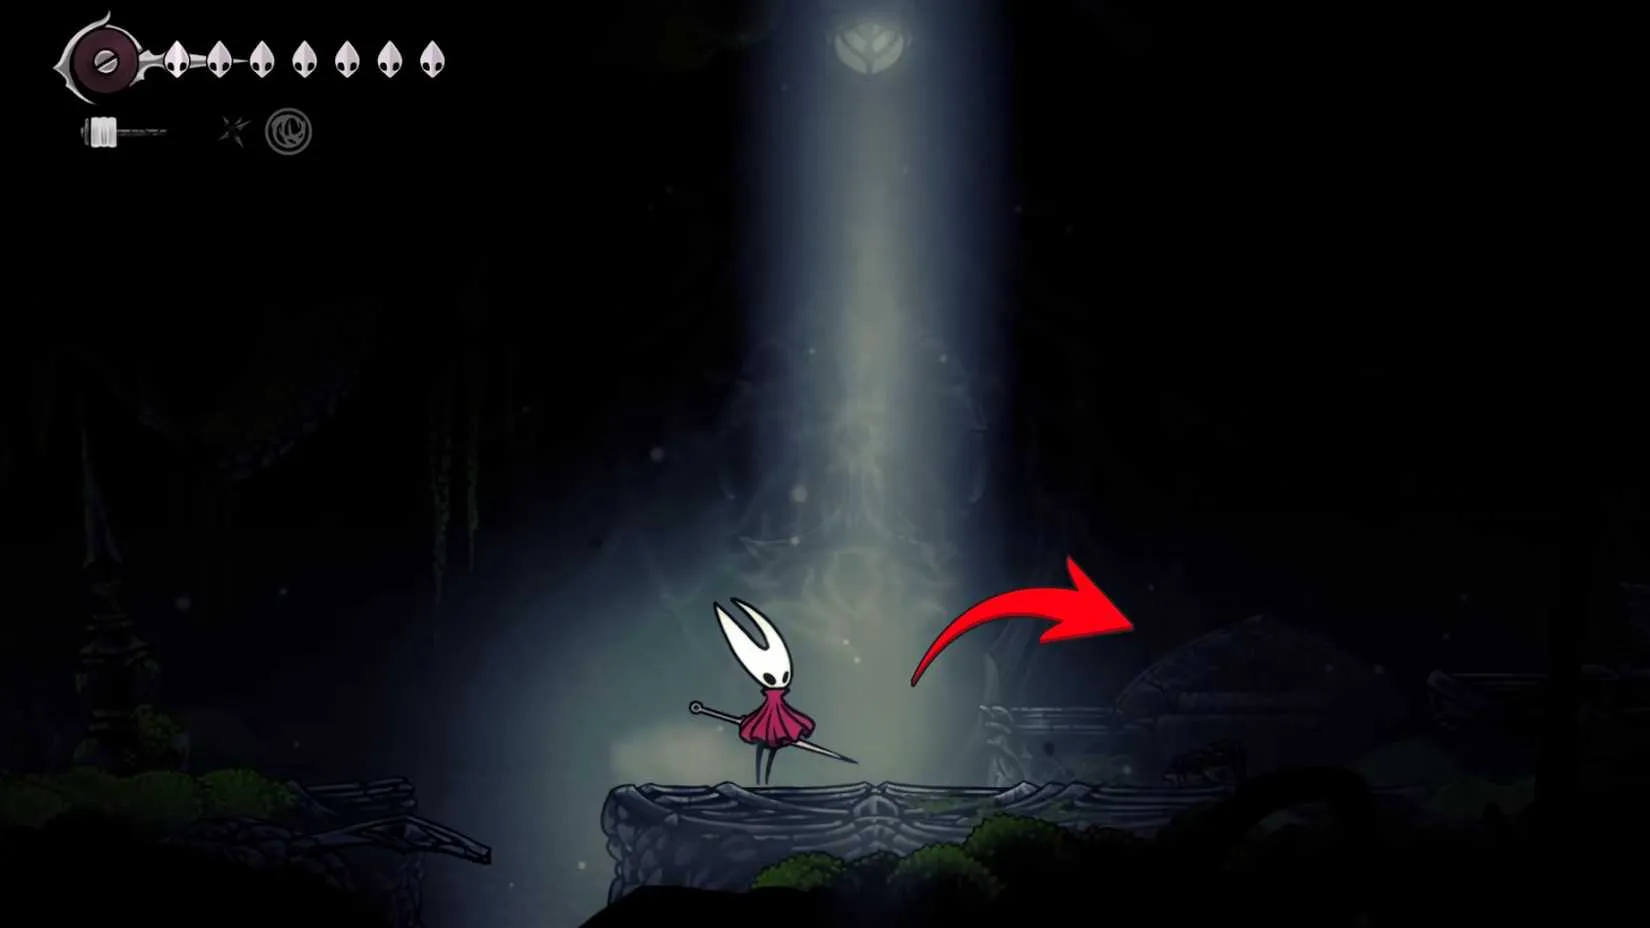
The first time I entered this hidden area, I was so focused on the tool that I nearly walked past two other upgrades. Do not make the same mistake. From the bottom right corner of Weavenest Atla, you can claim a Hunter Crest Upgrade. Below the Snare Setter's pedestal, you can also find a Spool Fragment, which increases your Silk capacity.

? How I Use the Snare Setter
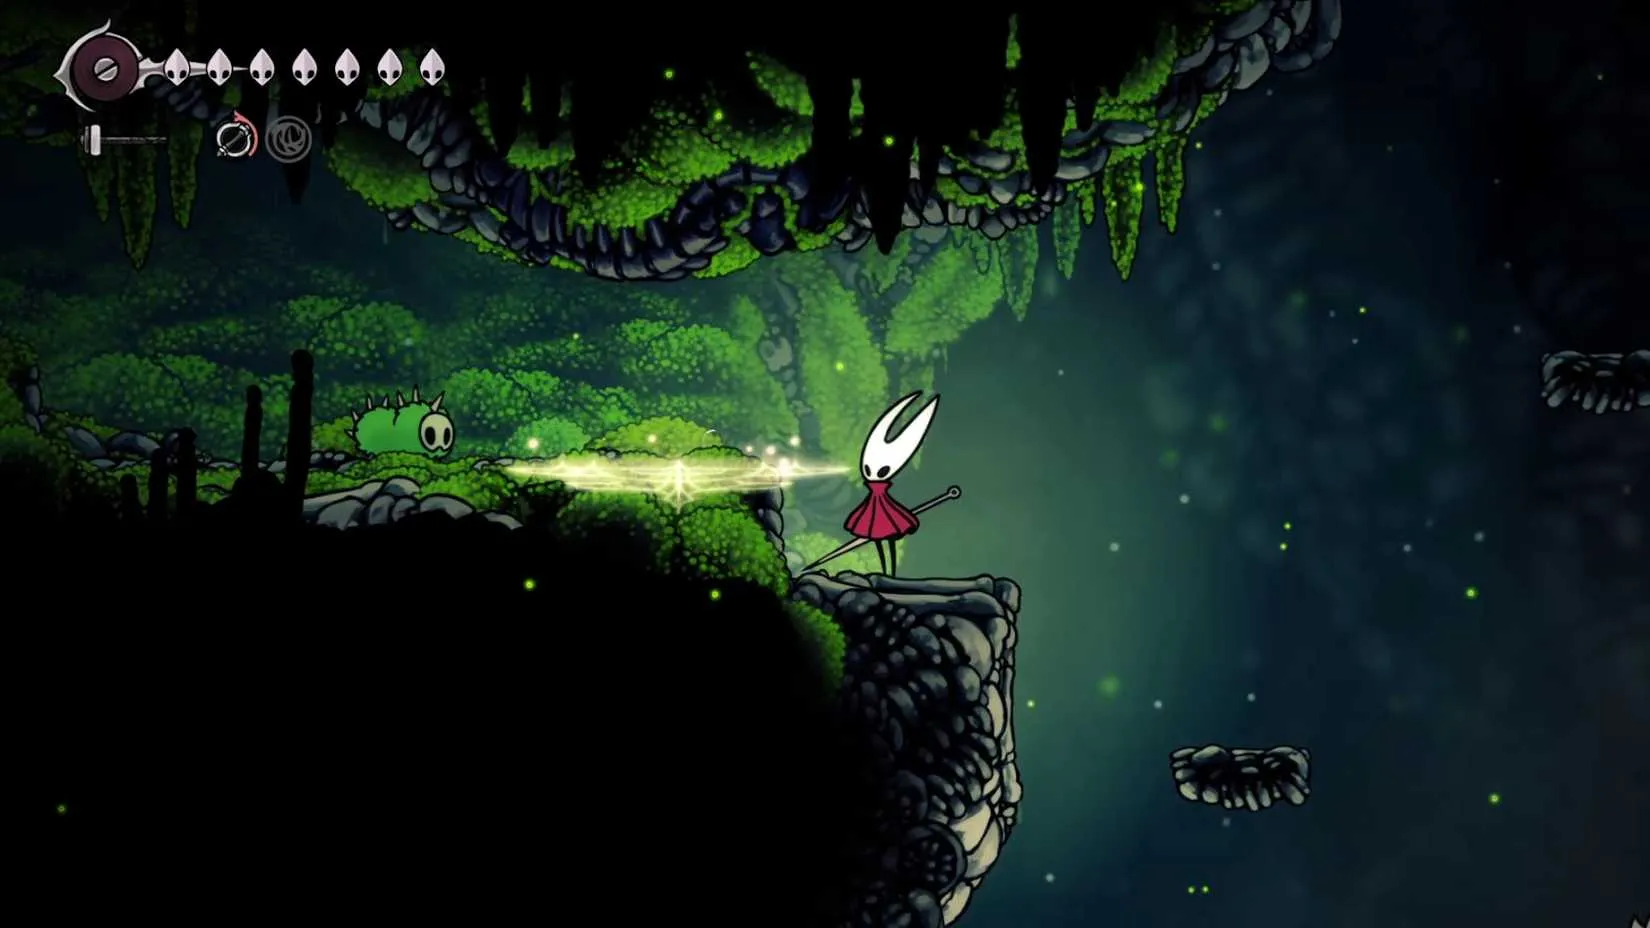
When I equip the Snare Setter, I treat it like a patient hunter's tool. I place runes along the ground before a boss charges, during a stagger window, or near arena edges where I expect the boss to dash. The rune explodes when an enemy comes close, so the damage happens without me needing to swing my Needle. That is valuable when a boss has a fast pattern and I want to keep my movement clean.
It works against normal enemies too, but I rarely rely on it for basic exploration. Against common foes, a quick Needle strike is faster and cleaner. The Snare Setter shines when the battlefield is chaotic, when a boss moves around a lot, or when I want to soften a target before committing to melee.
⚔️ Snare Setter vs Tacks
Functionally, the Snare Setter resembles the Tacks Tool, which works like caltrops. Both are ground-based traps, but they behave differently in boss fights. Tacks struggle to deal meaningful damage to bosses that move around constantly. The Snare Setter can still punish those mobile bosses because its rune explodes on proximity. The tradeoff is efficiency: the Snare Setter generally deals less damage per hit than other options, so it is not a pure damage tool. It is a control tool that adds pressure.
Tool
Trap style
Boss performance
Damage efficiency
Snare Setter
Silk rune that explodes near enemies
Strong against mobile bosses
Lower damage per hit
Tacks
Caltrops
Weak against highly mobile bosses
Better for stationary or small targets
? Practical Tips for 2026
?️ Place runes before a boss enters the arena or after a phase transition.
? Use Shell Shards to refill charges before long boss attempts.
? Revisit Moss Grotto and Weavenest Atla after getting the Faydown Cloak.
? Pair trap placement with safe Needle pokes rather than standing still.
?️ Do not ignore the Hunter Crest Upgrade and Spool Fragment in the same area.
?️ For normal enemies, save charges and use your Needle unless you are setting up a crowd.
In my current 2026 playthrough, the Snare Setter is not the flashiest Red Tool, but it is one of the most tactical. It rewards planning, map awareness, and a little patience. If you are willing to backtrack to Weavenest Atla with the Faydown Cloak, you will gain a trap that can turn a frantic boss arena into a field of your own making. For me, that is more than enough reason to keep it equipped.
Chasing every Tool and upgrade in Silksong means racking up a fair amount of playtime, and for many players that journey starts on PC. If you prefer to build your collection on Steam, keeping an eye on discounts can stretch your budget further, especially when DLC or bundled titles go on sale. That is where a reliable steam sale tracker like DealNest comes in handy, letting you follow price drops without refreshing store pages yourself.
Whether you are waiting for Silksong itself or filling your backlog with other metroidvanias to scratch the same itch, having a tool that watches the numbers for you means you never miss a good deal. It pairs nicely with the patient, planning-first mindset this whole guide has been about.
|
|
|
|
| Hollow Knight: Silksong - All Four Bilewater Bench Locations Revealed |
|
Napisano od: nordic921 - 09-26-2026, 01:26 PM - Forum: My Forum
- Bez odgovora
|
|
As of 2026, Hollow Knight: Silksong's Bilewater remains one of the most punishing and labyrinthine regions in Team Cherry's sequel. The area is defined by toxic pools, cramped corridors, and relentless enemies, making every bench a vital lifeline. Bilewater contains four benches in total. While most players will naturally stumble upon at least one during their first expedition, the remaining three are either tucked behind breakable walls or locked behind a boss encounter. This report breaks down every bench location so that players can secure fast travel, restore health, and reduce the sting of repeated deaths.
First Bench: Bell Beast Station Room
The first bench in Bilewater sits inside the same room as the area's Bell Beast station. Players who enter Bilewater from its main entrance will encounter signs that point directly toward this chamber, so it is difficult to miss under normal circumstances. The bench offers an early safe haven and a fast travel point, which is invaluable for anyone still learning the area's hazards.
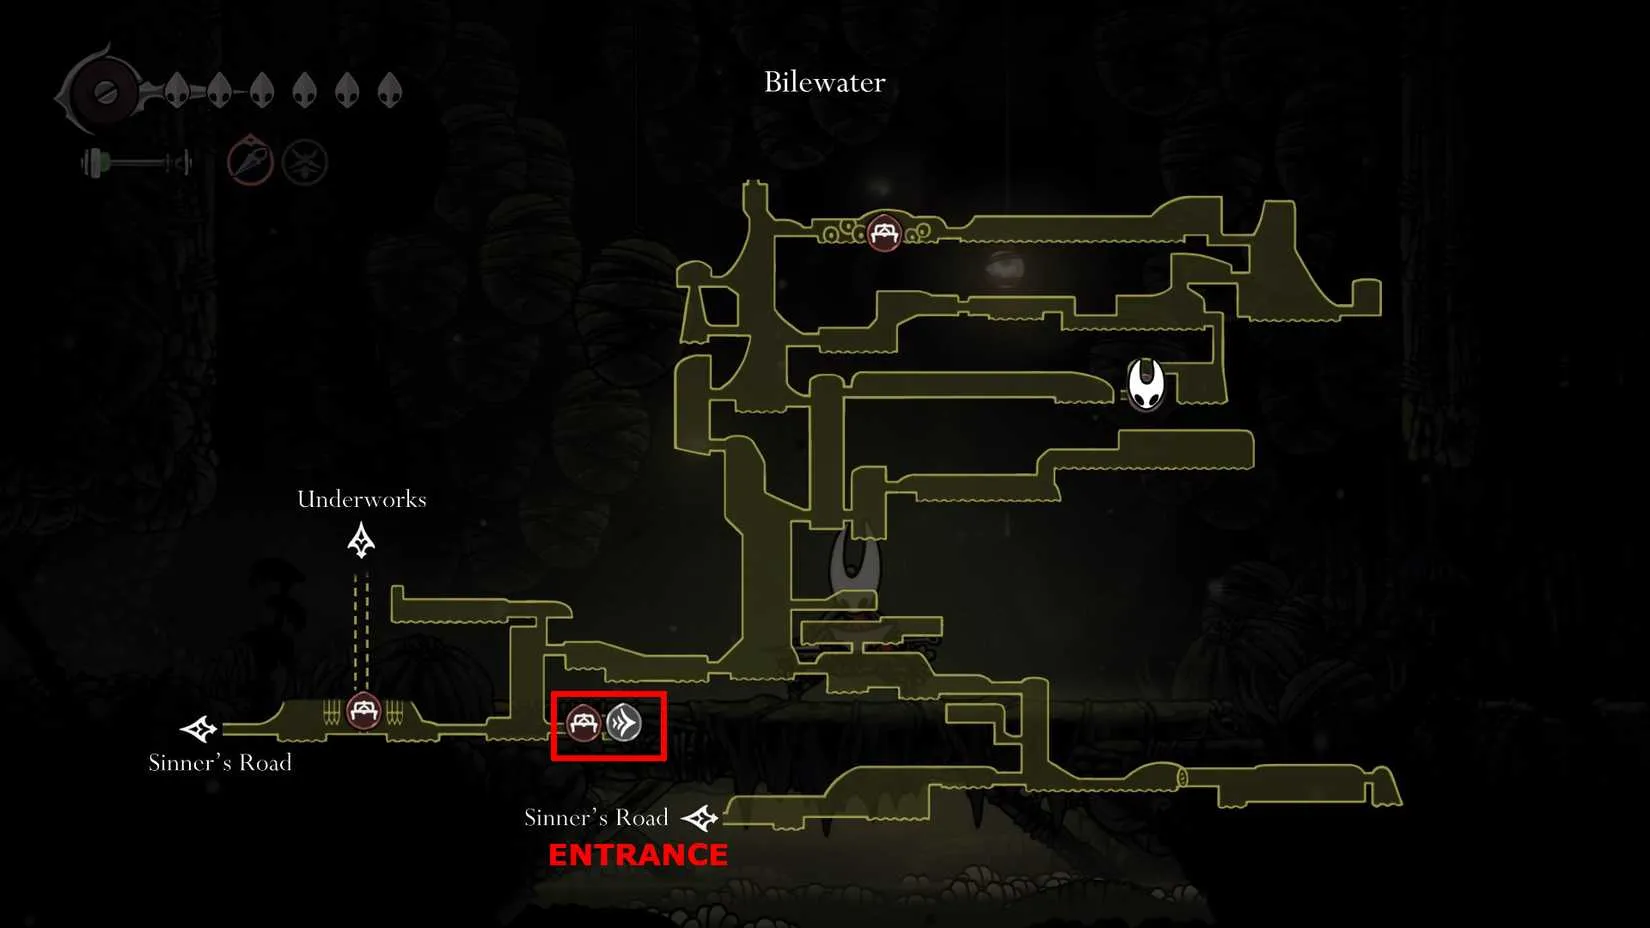
For players who somehow overlook it, the route from the entrance is straightforward. Following the signs leads to the Bell Beast station, and the bench is right there. Activating it early gives players a reliable respawn point before they push deeper into Bilewater's corrosive environment.
Second Bench: Exhaust Organ
The second bench is hidden in the Exhaust Organ, a structure located beyond the Mist. To reach it, players should exit the room containing the first bench and head left. They will soon encounter a breakable wall. Smashing through it opens the path into the Mist, a disorienting section where visibility is limited and navigation can be tricky.
At the end of the Mist, players will find a structure they can enter. This is the Exhaust Organ. Once inside, they should go up and to the left to activate the bench. Because the Mist can confuse players and the breakable wall is easy to pass by, this bench is often missed on a first run. It is worth the detour, however, as it provides a much-needed checkpoint before some of Bilewater's tougher encounters.
Third Bench: Hidden Near the Top
Bilewater's third bench is concealed near the top of the area. Reaching it requires players to smash through another breakable wall at a specific position. The wall is not marked with obvious fanfare, so players must either explore carefully or consult a map. Once the wall is broken, the route to the bench becomes clear.
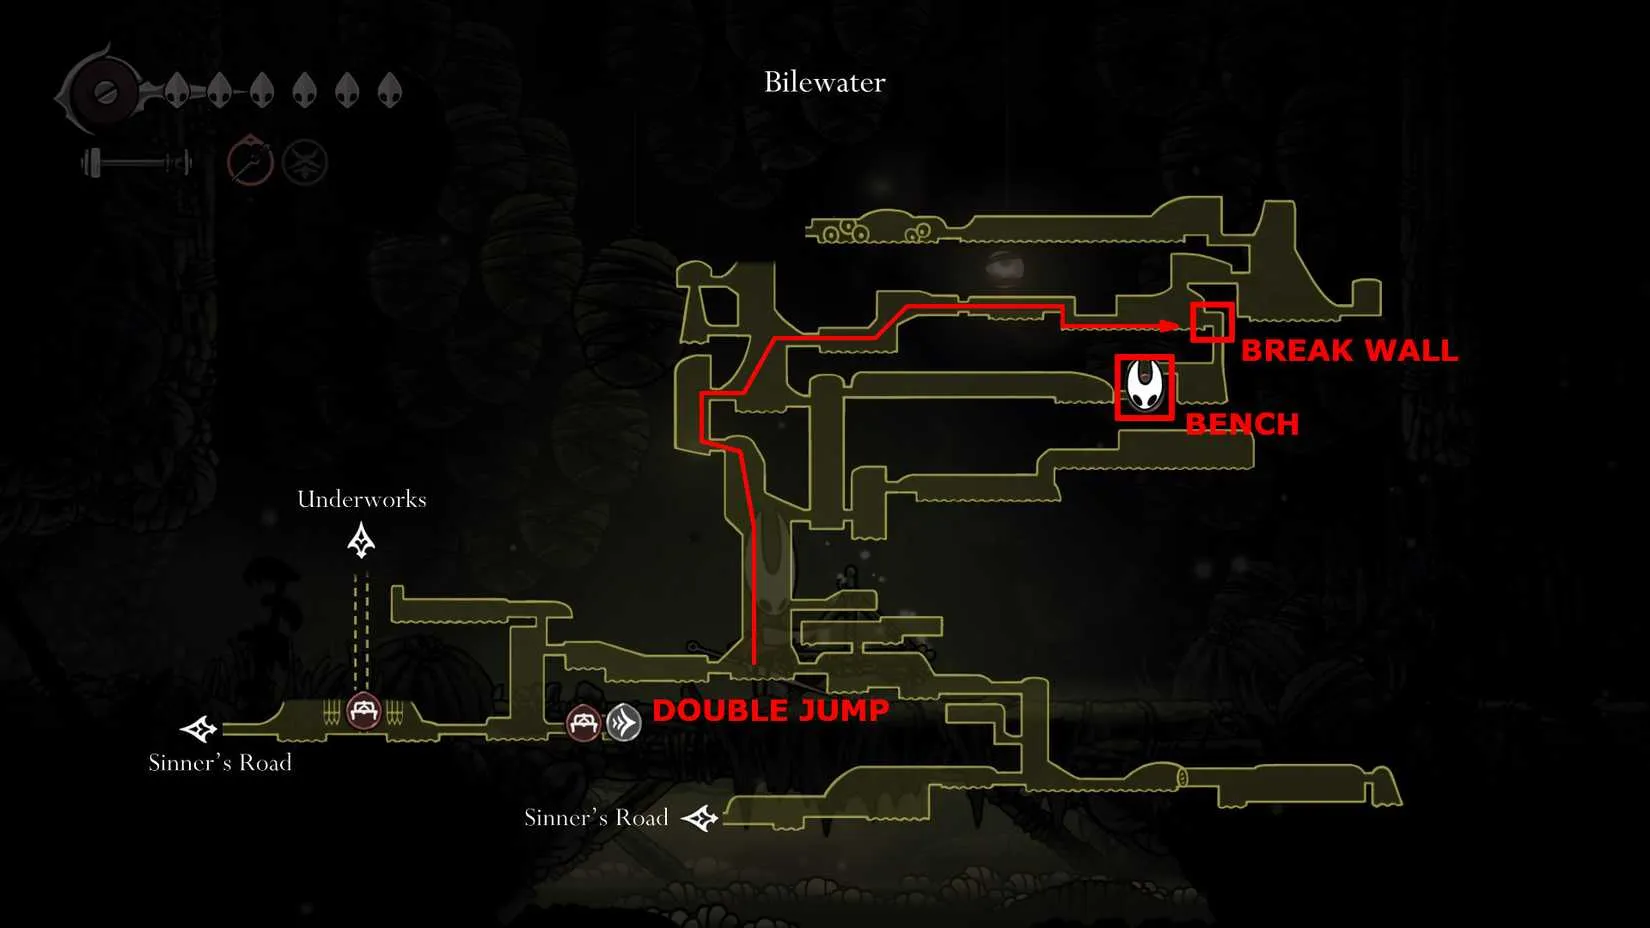
This bench is especially valuable because it shortens the runback to several late-area challenges. Players who rely only on the first two benches may find themselves repeating long, dangerous stretches after every mistake. Unlocking this hidden checkpoint can dramatically improve the pace of exploration and boss attempts.
Fourth Bench: Groal the Great Reward
The final bench in Bilewater becomes available after players defeat Groal the Great, the boss at the top of the area. This bench is not hidden in the same way as the others; it is a reward for overcoming one of Bilewater's toughest fights. Defeating Groal the Great grants access to the bench, giving players a safe point near the climax of the region.
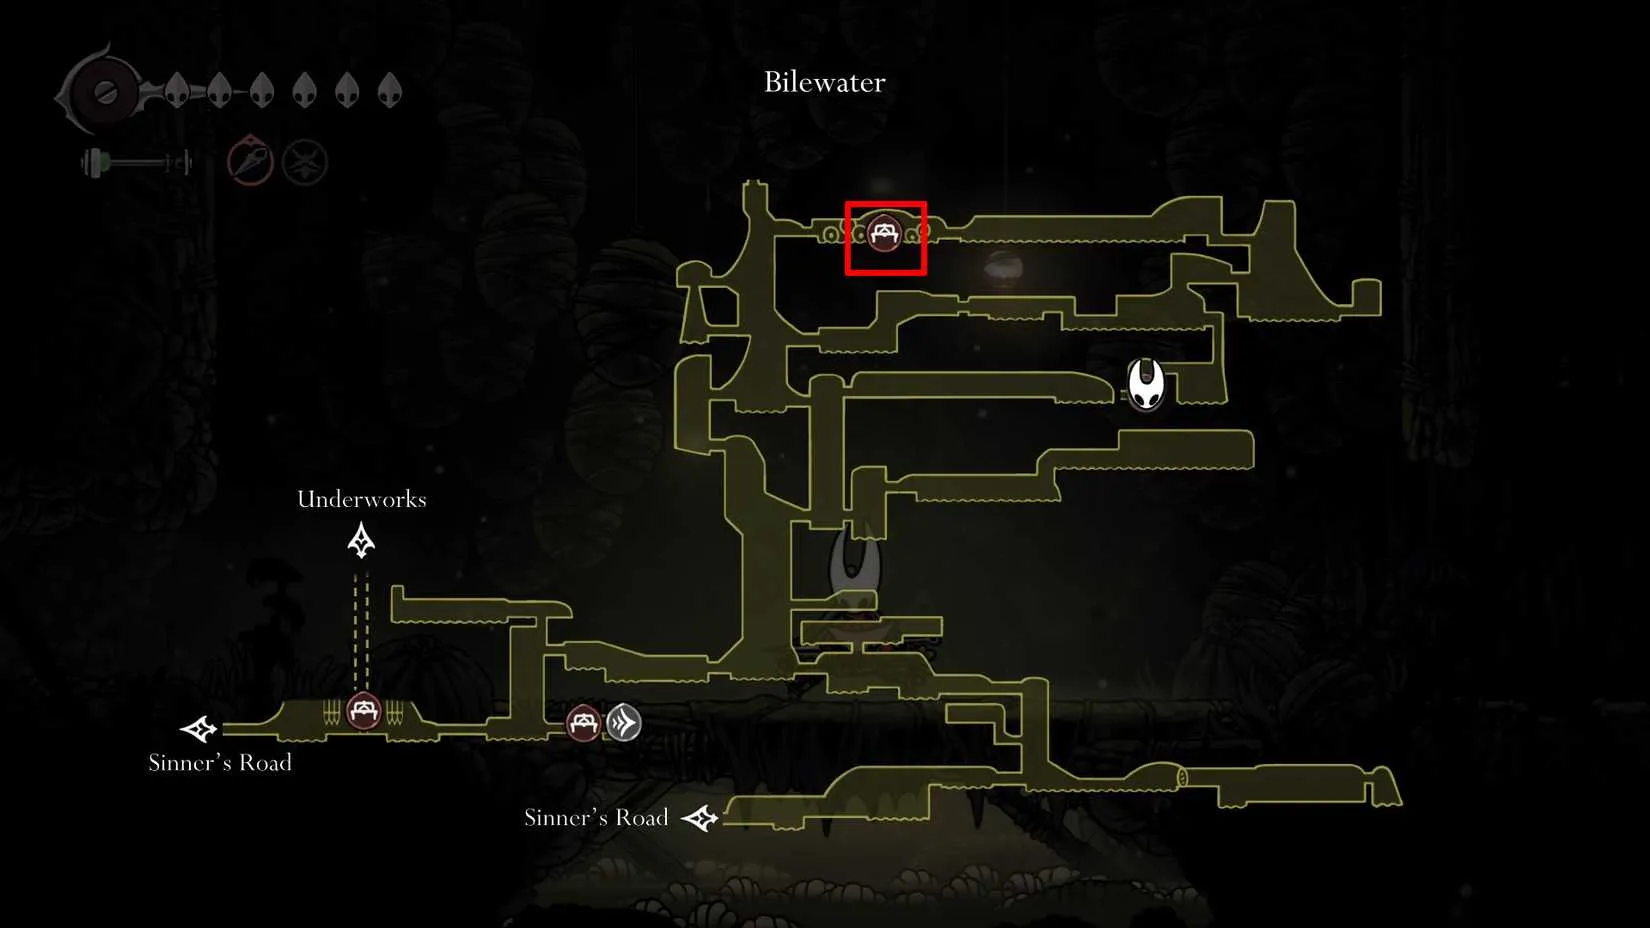
Because Groal the Great sits at the top of Bilewater, this bench is ideal for players who want to wrap up remaining objectives in the area or prepare for whatever comes next. It also serves as a symbolic milestone: reaching it means the worst of Bilewater's navigation is behind them.
Bilewater Bench Summary
Bench
Location
How to Reach
1
Bell Beast station room
Follow signs from the entrance
2
Exhaust Organ
Exit first bench room, go left, break wall, cross Mist, enter structure, go up-left
3
Near top of Bilewater
Break a hidden wall at the marked position
4
Top of Bilewater
Defeat Groal the Great
Practical Tips for Bilewater
? Mark suspicious walls: Breakable walls often look slightly different, but in Bilewater's gloom they are easy to miss.
?️ Rest often: Benches restore health and save progress, so activate every one as soon as it is found.
? Use Bell Beast travel: The first bench doubles as a station, making it a natural hub for returning to other regions.
? Plan boss attempts: The third and fourth benches reduce runbacks, which is critical when learning Groal the Great's patterns.
? Explore vertically: Bilewater hides routes above and below the main path, so players should check ledges and ceilings.
In 2026, Hollow Knight: Silksong continues to attract new players, and Bilewater remains a rite of passage. With four benches to find, the area rewards patience and thorough exploration. The first bench is nearly impossible to miss, the second hides behind the Mist and a breakable wall, the third sits near the top behind another breakable wall, and the fourth appears only after Groal the Great falls. By securing all four, players can turn Bilewater from a nightmare into a manageable, if still dangerous, stretch of Silksong's world.
For players who fall in love with Silksong's punishing exploration and want to try more games in the same vein, the hunt for the next great adventure never really ends. Between tracking down hidden benches and mastering tough boss patterns, it helps to keep an eye out for ways to expand your library without spending a fortune. That's where a resource like PC game discounts comes in handy, making it easier to pick up the titles that scratch the same Metroidvania itch without paying full price.
Whether you're chasing down every secret in Bilewater or planning your next challenge after Groal the Great finally falls, having a steady supply of affordable games means there's always something new waiting to be explored. DealNest can help you find those deals as you build out a collection worthy of any dedicated explorer.
|
|
|
|
| Silksong Speedruns: How Runners Are Breaking the Game in 2026 |
|
Napisano od: nordic921 - 09-26-2026, 09:39 AM - Forum: My Forum
- Bez odgovora
|
|
I still remember the first time I booted up Hollow Knight: Silksong. The gorgeous hand-drawn art, the haunting music, and the brutal difficulty that made me question my sanity. That was back in 2025, and nearly a year later, I'm still slowly making my way through the game, dying to the same bosses over and over. But while I'm struggling, a whole community of speedrunners has turned Silksong into their personal playground, and the records they're setting are nothing short of mind-boggling.

Back when the game first launched, it didn't even take a full week for speedrunners to start posting sub-two-hour runs. I remember reading about Onaku setting an any% record of 1:46:47, and just hours later, BlueSR smashed that with a blistering 1:26:20. I was still fumbling around the first area, and these people were already finishing the entire game in less time than it takes me to decide on a charm build. The official leaderboard wasn't even live until October 2025, but that didn't stop the community from pushing each other to insane limits.
Now, in 2026, the scene has only gotten crazier. The leaderboards are fully active, and the any% world record has been pushed well below the one-hour mark. I've watched streams where runners pull off pixel-perfect movements, abuse obscure glitches, and chain together boss fights like they're playing a rhythm game. BlueSR eventually achieved that deathless run he was gunning for, and the competition is fiercer than ever. It's like watching a completely different game from the one I'm playing.

What's fascinating is that Silksong actively rewards speedrunning, just like its predecessor. There are two achievements tied to finishing quickly: Speed Completion, for 100% completion in under 30 hours, and Speedrunner, for simply beating the game in under 5 hours. When the game first came out, both were achieved by well under 1% of players. Speedrunner sat at 0.1%, while Speed Completion was so rare it rounded to 0%. Even now, in 2026, those numbers haven't risen much—the game is just that punishing.
Here's a quick breakdown of the speed-related achievements and their rarity:
Achievement
Requirement
Completion Rate (2025)
Speedrunner
Finish in under 5 hours
0.1%
Speed Completion
100% in under 30 hours
~0%
Steel Soul
Finish in permadeath mode
~0%
And remember, Steel Soul mode itself is unlocked only after finishing the game normally or by using a well-known code. It's a permadeath challenge that makes every mistake fatal. The fact that some players are speedrunning that is both inspiring and terrifying.
To put things in perspective, the original Hollow Knight ended with an any% glitchless world record of 30:49. That's less than 31 minutes for a game that took me dozens of hours to complete. Silksong's current records make finishing in under 5 hours look like a leisurely stroll. And as runners develop new techniques and grow more familiar with the game's intricate systems, those times will only drop further.
As for me? I'm still chipping away at my 100% completion run. I've consulted guides, watched walkthroughs, and even tried a few speedrun strats myself—only to die spectacularly. The difficulty is no joke, and the idea of doing it all in under 30 hours feels impossible. But that's what makes the speedrunning community so impressive. They take a game that feels insurmountable and turn it into a science.
So while I'll probably never set a world record, I'll keep watching from the sidelines. Every new run is a reminder of what's possible when skill, dedication, and a little bit of madness come together. And who knows? Maybe one day I'll finally beat that third boss. ?♂️?
Watching all these runs has had an unexpected side effect: my wishlist keeps growing. Between Silksong, the original Hollow Knight, and a handful of other metroidvanias that streamers keep recommending mid-run, I've caught myself hunting for deals far more often than I'd like to admit. Chasing a 30-hour completion time is one thing—paying full price for every game in the genre is another budget entirely, especially when you want a copy on more than one platform.
That's the part of the hobby nobody talks about in a world record video. If you're the type who wants to follow along, run the same routes, or just see how the current records compare to your own attempts, it helps to keep an eye on game price comparison before you commit. DealNest makes that easy, pulling together listings across stores so you can spot a discount instead of blindly hitting the buy button. It won't shave minutes off your run, but it will leave a little more room in the wallet for the next challenge.
|
|
|
|
| Silksong Trobbio Boss Guide: How I Beat The Stage's Theatrical Menace |
|
Napisano od: nordic921 - 09-26-2026, 06:58 AM - Forum: My Forum
- Bez odgovora
|
|
I’ll be honest: I almost skipped Trobbio. In 2026, Hollow Knight: Silksong’s Act 2 is still packed with mandatory horrors, and an optional performer in The Stage felt like a vanity fight. But after finally cracking open the Stage Door above the Grand Bellway, I understood why Team Cherry teased this bug in pre-release trailers. Trobbio is not just a boss; he is a full theatrical production, complete with fireworks, trapdoors, and a death scene that deserves an audience.
Where Trobbio Is Hiding in Silksong
Trobbio waits relatively deep into Act 2, inside The Stage, a sub-area of the Choral Chambers within the Citadel. The fight is optional, but reaching it is not a straight line. To unlock Trobbio’s boss room, I had to get to the other side of the locked Stage Door, just above the Grand Bellway, and activate a lever.
Here is the route that finally worked for me:
Defeat the Clockwork Dancers.
Drop down into the Cogwork Core.
Navigate through the Whispering Vaults to find the right-side entrance to The Stage.
Jump up into the rafters.
Drop down on top of the golden lever and hit it.
Ride the shortcut back to the Choral Chambers.
Return to the Grand Bellway and sit on the bench.

That bench rest matters. It resets the room and gives you a clean approach to the Stage. If you skip it, you can still walk back, but the fight feels more chaotic when you enter with low health or missing tools.
How I Learned to Read Trobbio’s Flashy Moveset
Trobbio’s whole gimmick is spectacle. He throws explosive projectiles, creates explosive walls when he leaps under the stage, and tornadoes from side to side. The fireworks are not just decoration. They tell you where danger is about to spawn, and I died more than once because I watched Trobbio instead of the walls.
One important damage rule: all of Trobbio’s attacks deal two Masks of damage, but touching Trobbio himself only deals one Mask. That difference saved me repeatedly. If I could not avoid an explosive attack, I sometimes dodged into Trobbio just before the explosion or attack landed. The brief immunity after taking one Mask of damage prevented the explosion from finishing me off.
Do not try that trick during the tornado. When Trobbio is spinning from side to side, dodging into him is a bad idea. Parrying is also unreliable here; you will not get enough i-frames to avoid damage. I learned to run, jump, and wait out the tornado instead of trying to be clever.
Tools That Carried Me: Sting Shard and Curveclaw
I brought two Tools into this fight, and they changed everything.
Tool
Why it works
 Sting Shard
It can repeatedly damage Trobbio if he flies into it.
 Curveclaw
It lets me deal damage while flying, maintaining DPS more effectively.
I also started hitting the explosive projectiles away with my Needle. That sounds risky, but it is one of the best defensive habits in the fight. When Trobbio is underground, I positioned myself close to where the trapdoor would appear. The moment the door opened, I timed an attack and smacked the projectiles to the other side of the room. That almost guaranteed Hornet’s safety and gave me space to breathe.

The Grand Exit and the Claw Mirror Reward
After I dealt the final blow, Trobbio did not simply die. He made a grand exit. Fireworks exploded in the background as he bowed, danced around the room, thanked the crowd, got on one knee, and raised his arms while more fireworks appeared. Then he blew up in a non-damaging red explosion and dropped an item on the ground.
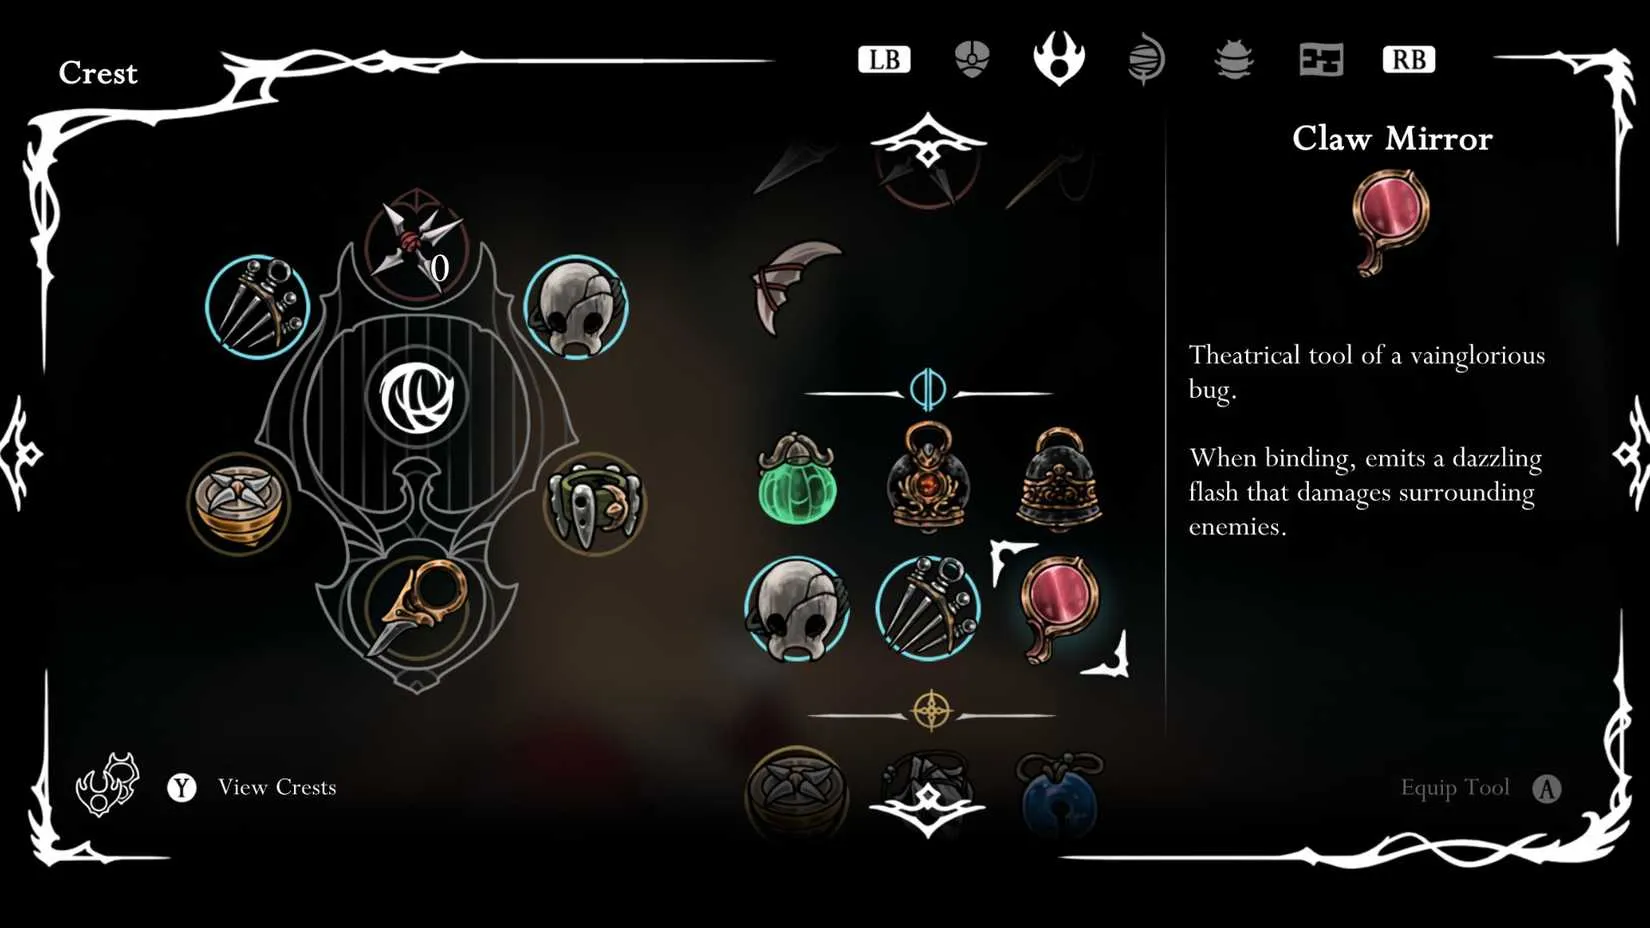
That item is the Claw Mirror Tool. It is a blue Tool described as the theatrical tool of a vainglorious bug. When Hornet uses the Bind skill to heal, the Claw Mirror creates dazzling light that damages nearby enemies. It is quite powerful, especially in crowded rooms, but it does not stop enemies from pushing through the damaging aura to hit Hornet and interrupt the heal. I treat it as bonus pressure, not a shield.
More important than the Claw Mirror, at least for my Act 2 cleanup, is the shortcut. Defeating Trobbio unlocks a path to the Whispering Vaults and the right side of the Underworks. That is huge for backtracking and completing Act 2 objectives. Without it, I would have to go all the way back to the top of the Whispering Vaults via the Songclave shortcut just to reach the bottom of this mandatory Act 2 area. With it, I can move through the Citadel far more efficiently.
Final Thoughts From a 2026 Silksong Player
Trobbio is optional, but he is one of the most memorable fights in Silksong’s second act. He demands patience, projectile awareness, and a willingness to dodge into danger when the math favors one Mask over two. If you are stuck, unlock the Stage Door, bring Sting Shard and Curveclaw, watch the fireworks, and treat the tornado with respect. Beat him, and you get a flashy Tool plus a shortcut that makes the rest of Act 2 feel less like a marathon. ?✨
Beating a boss like Trobbio tends to leave me wanting more of the same feeling — tight platforming, punishing but fair combat, and secrets tucked behind every wall. Silksong scratches that itch for a while, but it also sends me digging through my backlog and my wishlist for other metroidvanias that can carry me between big releases.
That search is where DealNest turned out to be genuinely useful. Rather than bouncing between storefronts and hoping a seasonal sale lines up with what I want, I check DealNest game deals to spot discounts on indie titles, DLC, and the occasional bigger release I would have otherwise passed on. It is a small habit, but it is the reason my library keeps growing without my wallet feeling it every time.
|
|
|
|
| Silksong Courier's Ration Delivery: My No-Hit Route Through Pharloom |
|
Napisano od: nordic921 - 09-25-2026, 04:27 PM - Forum: My Forum
- Bez odgovora
|
|
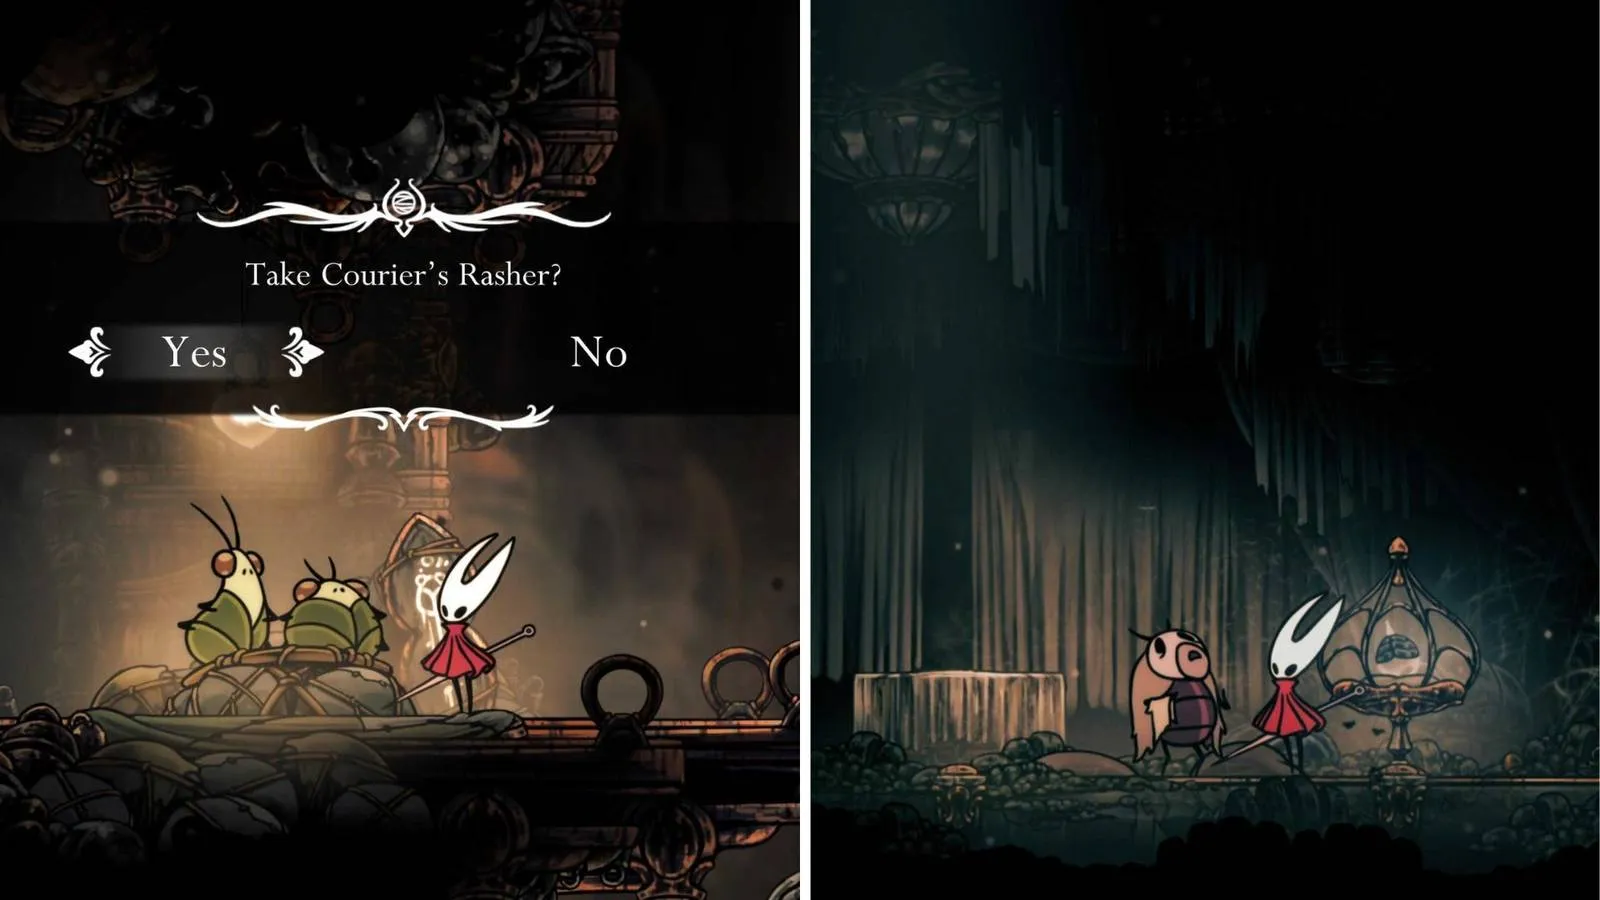
Deliveries in Hollow Knight: Silksong are absolutely brutal, and the Courier's Ration run is the one that made me want to throw my controller across the room. You are not just fighting bosses or arena battles; you are racing a timer while trying to keep fragile cargo from getting smashed to bits. After you finish the My Missing Brother quest and the earlier My Missing Courier questline in Bellhart, deliveries open up. The Courier's Ration is a tough but necessary delivery if you want to sharpen your pin, and it is part of the Great Taste of Pharloom quest. Even in 2026, after all the patches and hotfixes, this route still demands respect. So here is my first-person, no-nonsense guide to getting from A to B in one piece.
Before You Even Think About Running
You will get access to this delivery relatively early on, especially if you have been diligently doing side quests. But trust me, you are never going to make it without some key components in your moveset. Here is my must-have checklist:
Requirement
Why You Need It
Complete My Missing Courier, then My Missing Brother in Bellhart
This unlocks deliveries in the first place. No quest completion, no courier work.
Clawline
Without it, you cannot avoid enemies as easily. Grappling is your best friend.
Faydown Cloak
You need this to bypass the Grand Gate. No cloak, no delivery.
Silkspeed Anklets
Go to Far Fields and use your Needolin ability to get these. They make you lightning quick through each section.
At least two Silk Hearts
Otherwise you cannot charge up enough to run and grapple consistently.
Crest of the Reaper
Optional but recommended. It makes pogoing much easier and more consistent throughout the run.
If you are missing any of these, stop reading and go get them. I am serious. This delivery will chew you up and spit you out otherwise.
The Optimal Route: Shellwood to Choral Chambers
There are probably a dozen ways to reach the Choral Chamber's ruined restaurant, but this is the most consistent and easy-to-master route I have found. Follow it step by step, and you will get there with your cargo intact.
Shellwood bottom halls – Head through the lower halls of Shellwood. Avoid the floating and flying enemies with well-timed dashes and grapples. Run along here until you are in the area directly below the Bell Station.
White flower climb – Double jump and pogo up this area with the white flowers. Be careful not to get caught in the yellow mist of the flower bug enemies. If you do, use a quick grapple to get out of the smog.
Blasted Steps link – Head out past the Bell Station and up through the link to Blasted Steps. Avoid the sneaky spikes along the way. Once in Blasted Steps, your goal is the top right of the screen, but you actually need to go left first to eventually go right. Use double jumps and grapples to get up the initial sections.
Shield enemies – Watch out for the shield enemies that animate. The key is to wait for them to animate, then use a harpoon or pogo to get over them safely. You will encounter a few other enemies that animate soon after as you head right again. You can zoom past them before they animate. Once past them, head out to the right.
The drill fly ascent – This takes you into a larger area. Your goal is to get to the top as fast as possible. Move swiftly at the start, because hanging around will aggro the drill fly and they will follow you up. Use the walls and cages to ascend fast. There is a small portion in the middle where you need to glide left and land on a platform. Watch out for the enemy here, but they usually cower when they see you, allowing you to hop over them. Wall jump up and work back right. Avoid a few spike patches, rise to the top, then head right.
Last Judge runback – This begins the Last Judge boss runback you probably loathe but also know like the back of your hand. Do one dash jump followed by another to avoid the drill fly entirely. Use your grapple to double jump and skip a few sections in the middle. For the second section, jump and glide all the way to the second bell before pogoing and rising up. Then make the most of your double jump and grapple to make light work of this platforming section. Head out right toward The Grand Gate.
Grand Gate sprint – Keep sprinting until you are past the Last Judge room. After another screen at full sprint, look up and double jump to reach some see-saw platforms. Up top is a Spool Fragment, but you want to work your way to the highest platform on the right wall. There, reveal a hidden breakable wall that grants you access to Choral Chambers.
Hidden path into Choral Chambers – Through this hidden path, be careful not to unintentionally sprint into the spinning apparatus that immediately follows. Jump upwards to head into the Chambers. From here, you have two paths. The Citadel Spa path is arguably better because it is a lot safer, but the path to the right is a little bit faster. Gauge it by how good your item's condition is.
The faster right path – Assuming you take the quicker path, sprint right and avoid the trio of enemies up ahead with a well-timed grapple. Ascend upwards until you reach a sign pointing to the Ventrica Station. Head right again.
Lever and dark area – On the next screen, avoid another enemy trio and hit the lever to drop into a dark area. Avoid the enemy that pops up from the ground by not breaking your stride. Hop up on the higher platform and hit the lever to make it back out. Then do another grapple to avoid one more trio of enemies.
Vertical climb – Rise up this vertical screen, avoiding the various animating enemies on different platforms, to get to the highest exit on the left-hand side. Be swift, because if they animate and swarm, you are toast.
Last dangerous screen – This is your final danger zone. Avoid the pinhead bug as you rise. Ignore the two enemies on higher platforms as you rise through the shortcut previously triggered by a lever, and into the area on the right.
Finish line – To finish off, immediately hop through the hidden pathway directly above your head and sprint through the restaurant to talk to the NPC. Deliver the Courier's Ration, and this troublesome portion of the Great Taste of Pharloom quest is finally over.
Extra Tips to Keep Your Cargo in One Piece
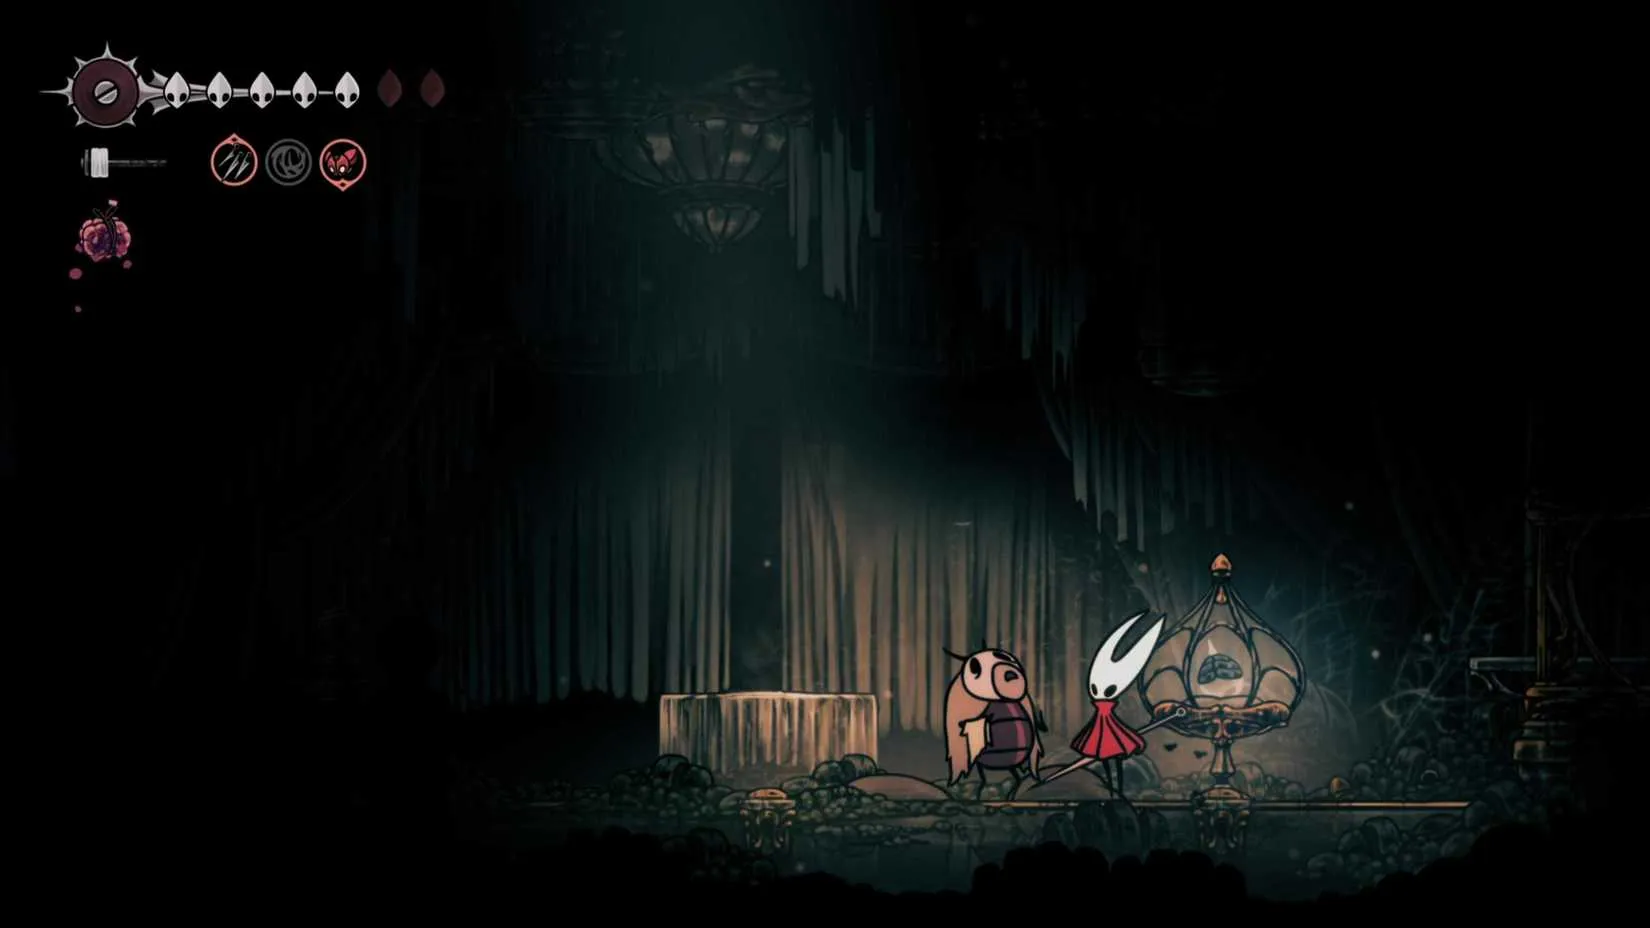
If you are still struggling to make it to your destination without the cargo getting banged up beyond recognition, try these extra tips:
?️ Use ranged tools or Thread Storm when you are in close quarters with multiple enemies. They help you find space to harpoon through.
❤️ One hit is fine. You can still quite comfortably make the delivery. No need to restart. But if you take two hits, it is quicker to kill yourself and restart from the Bellhart Bench.
? Practice individual sections. If a particular part is giving you trouble, just navigate that portion over and over until it is muscle memory.
?️ Use the Crest of the Reaper to make pogoing much easier and more consistent throughout the run.
?️ Open up all areas of the map. Specifically, the hidden pathway at the Grand Gate and the various lever-activated shortcuts in Choral Chambers. These make your life so much easier.
Deliveries in Silksong are no joke, but with the right setup and a bit of practice, the Courier's Ration becomes a satisfying sprint instead of a rage-inducing nightmare. Stay fast, stay calm, and for the love of Pharloom, do not get hit twice. Good luck out there.
If all this talk of Pharloom has you itching to jump in yourself, or if you are simply waiting for the next big metroidvania to sink your teeth into, it helps to keep an eye on where you pick up your games. Prices fluctuate constantly across storefronts, and buying directly without comparing can leave you paying noticeably more than you need to for the same title. A little patience and the right marketplace can stretch your gaming budget a lot further.
That is where DealNest comes in. The site gathers discounted offers in one place so you can compare before you commit, making it a handy stop for anyone hunting down the cheapest steam keys available. Whether you are stocking up on indie gems or grabbing a long-awaited sequel on release, a quick check there before checkout is a habit worth building.
|
|
|
|
| How I Beat Groal the Great in Silksong: A Painful 2026 Guide |
|
Napisano od: nordic921 - 09-25-2026, 02:28 PM - Forum: My Forum
- Bez odgovora
|
|
As a veteran Silksong player, I thought I had faced every nightmare the game could throw at me. Then I met Groal the Great. This giant frog boss, hidden high above the foul tunnels of Bilewater, is not just a test of skill—it's a test of patience. In 2026, with the game's community still sharing tips, I finally conquered this optional beast. Was it worth the dozens of deaths and the most punishing runback in the game? Let me tell you my story.
Getting to Groal: The Runback from Hell
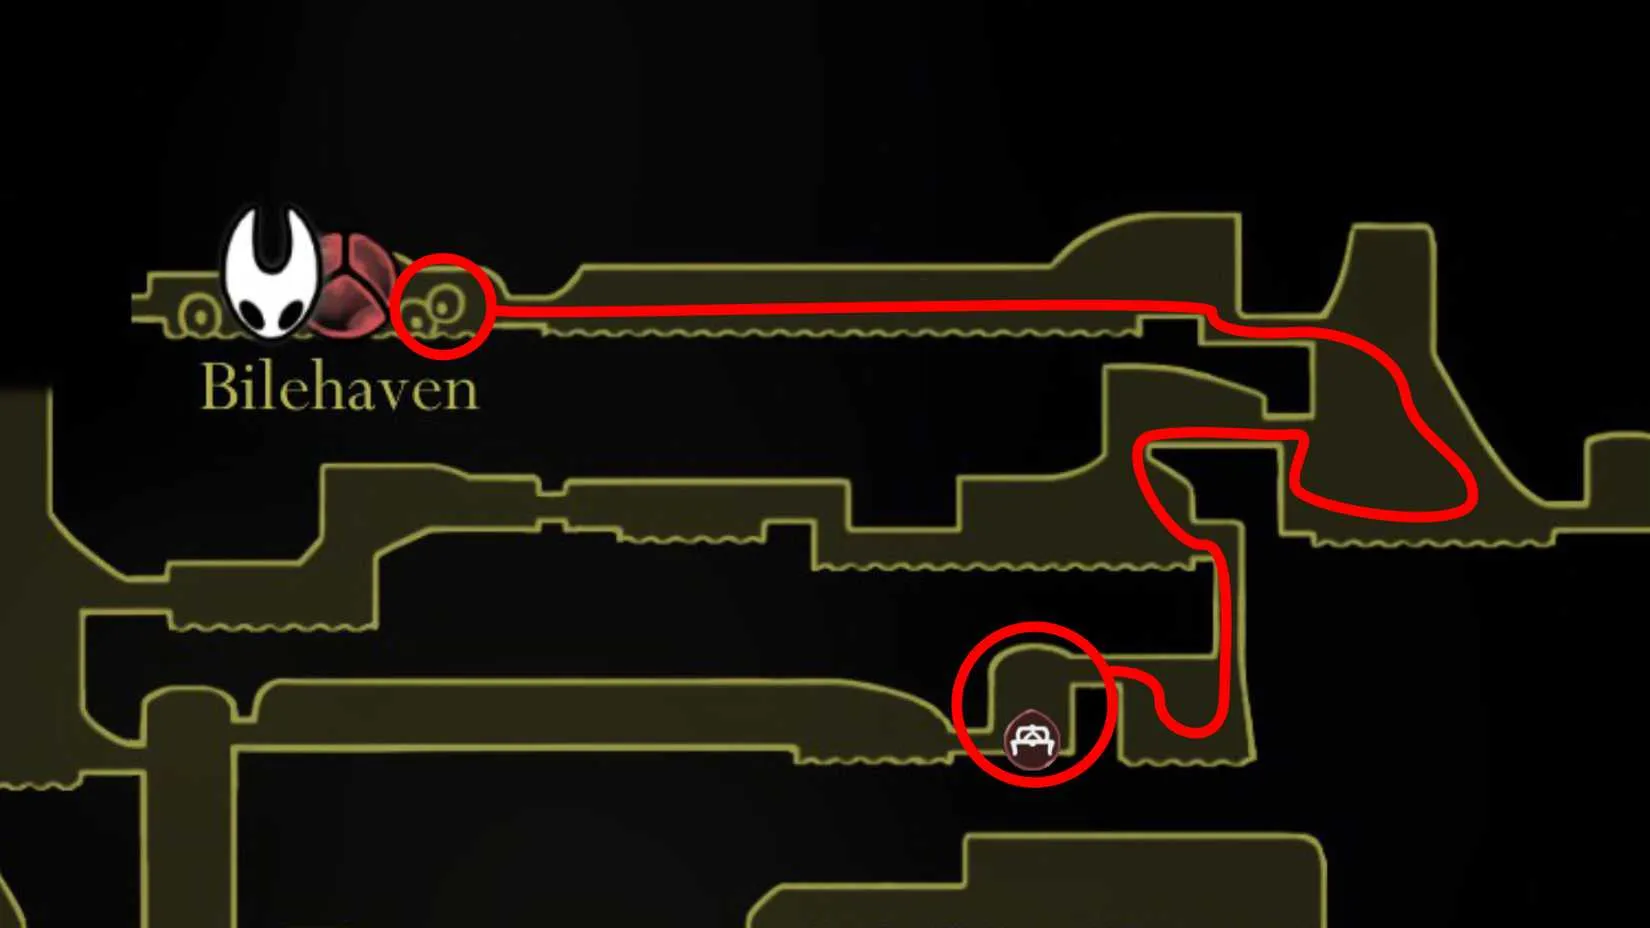
First, let's talk about the journey. Groal the Great lives in Bilehaven, at the very top of Bilewater. This zone is hidden within the Citadel, and you have two ways in: through Sinner's Road (via a hidden entrance above the Halfway Home) or through the Putrefied Ducts (from the Memorium zone). The Ducts route is shorter, but you won't unlock it until late in Act 2. I took the Sinner's Road path, and it was brutal.
Before you even think about this fight, do yourself a favor: get the Faydown Cloak from Mount Fay. This double jump ability is essential for both traversal and the boss fight. Without it, you're just frog food.
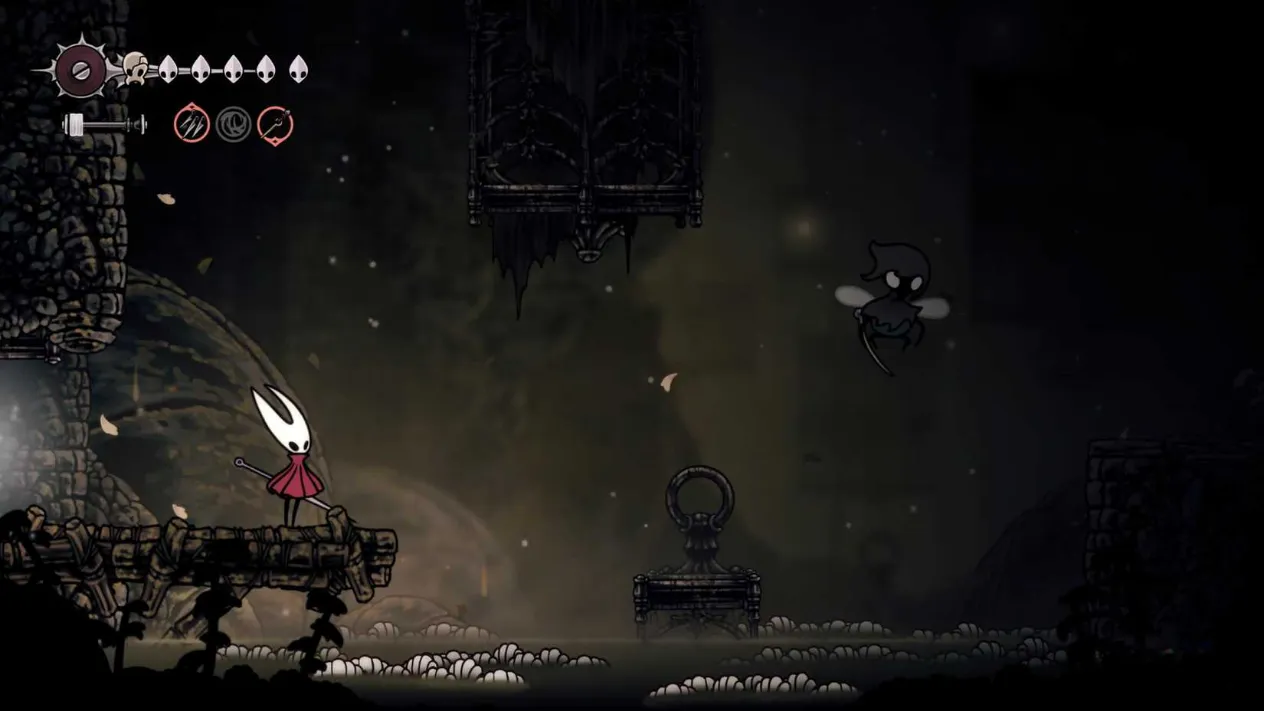
Bilewater is a poison-filled nightmare. I spent hours avoiding toxic pools and ambushes. Eventually, I reached a bench—yes, a real bench!—and sat down to prepare. From there, I ascended to Bilehaven. The key is to take no damage on the way up. Why? Because before Groal appears, you must survive six waves of enemies and spike traps. That's right, six. If you arrive with low HP or no Silk, you're done.
The Boss Fight: Tips and Cheeses
Now, the main event. Groal the Great is a massive frog with a variety of attacks. I died many times before I found a strategy that worked. Here's what I learned.
The Cheese Method
There's a way to cheese this fight, though it's risky. Instead of avoiding the poison pools at the bottom of the screen, top up your HP and dive straight into the poison. Then swim to the extreme left or right. Groal has a hard time hitting you there. You can leap in and out to attack. Just be careful during its Vengeful Spirit attack—it can still hit you in the water. Also, watch for particles in the water that indicate where enemies or the boss will surface.
Recommended Tools
The best tool for this fight, in my opinion, is the Sting Shard. You throw it, and it hovers in mid-air. When an enemy gets close, it explodes into shards, dealing multiple hits. It's perfect for the enemy waves and for Groal himself.
If you plan to pogo on top of the boss, keep your thumb on the jump input. Use the Faydown Cloak to double jump when Groal rises or dives. The boss jumps slightly before diving, so be ready.
Attack Patterns and Counters
Here's a quick table I wish I had when I started:
Attack
What Groal Does
How I Countered
Vengeful Spirit
Shoots a projectile
Dodge sideways; don't stay in poison
Dive
Flies up then dives down
Double jump with Faydown Cloak
Spit
Aims to the side
Heal above or below the boss
Surface
Particles appear in water
Watch for ambush, move away
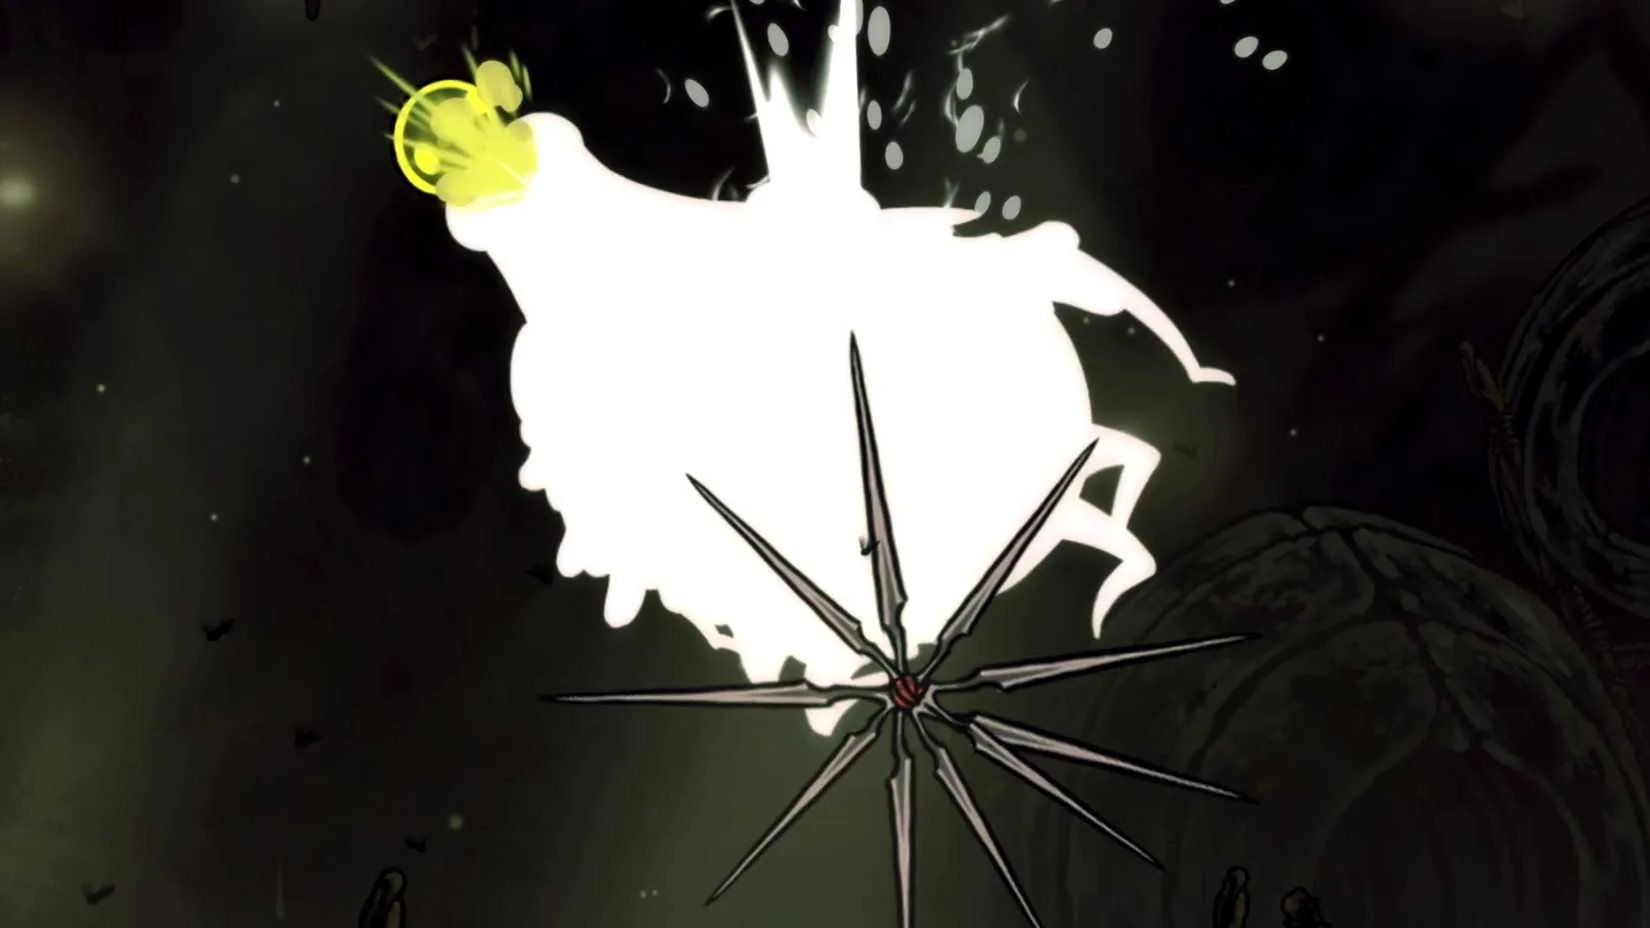
The best times to Bind and heal are immediately after Groal dives into the pools or during its spit animation. After it dives, it won't resurface for a few seconds. When spitting, it aims exclusively to the side, so you can heal if you're above or below.
What Do You Get for Beating Groal?
After many attempts, I finally defeated Groal the Great. Was the reward worth it? Let's see.
First, you unlock access to the rest of Bilehaven to the left. This gives you an easy path into the Putrefied Ducts zone, which contains an important progression item. Go left from the boss arena and enter a boggy hut to find the Seeker's Soul. This key item is required to enter Act 3, which is technically optional but essential for completionists.
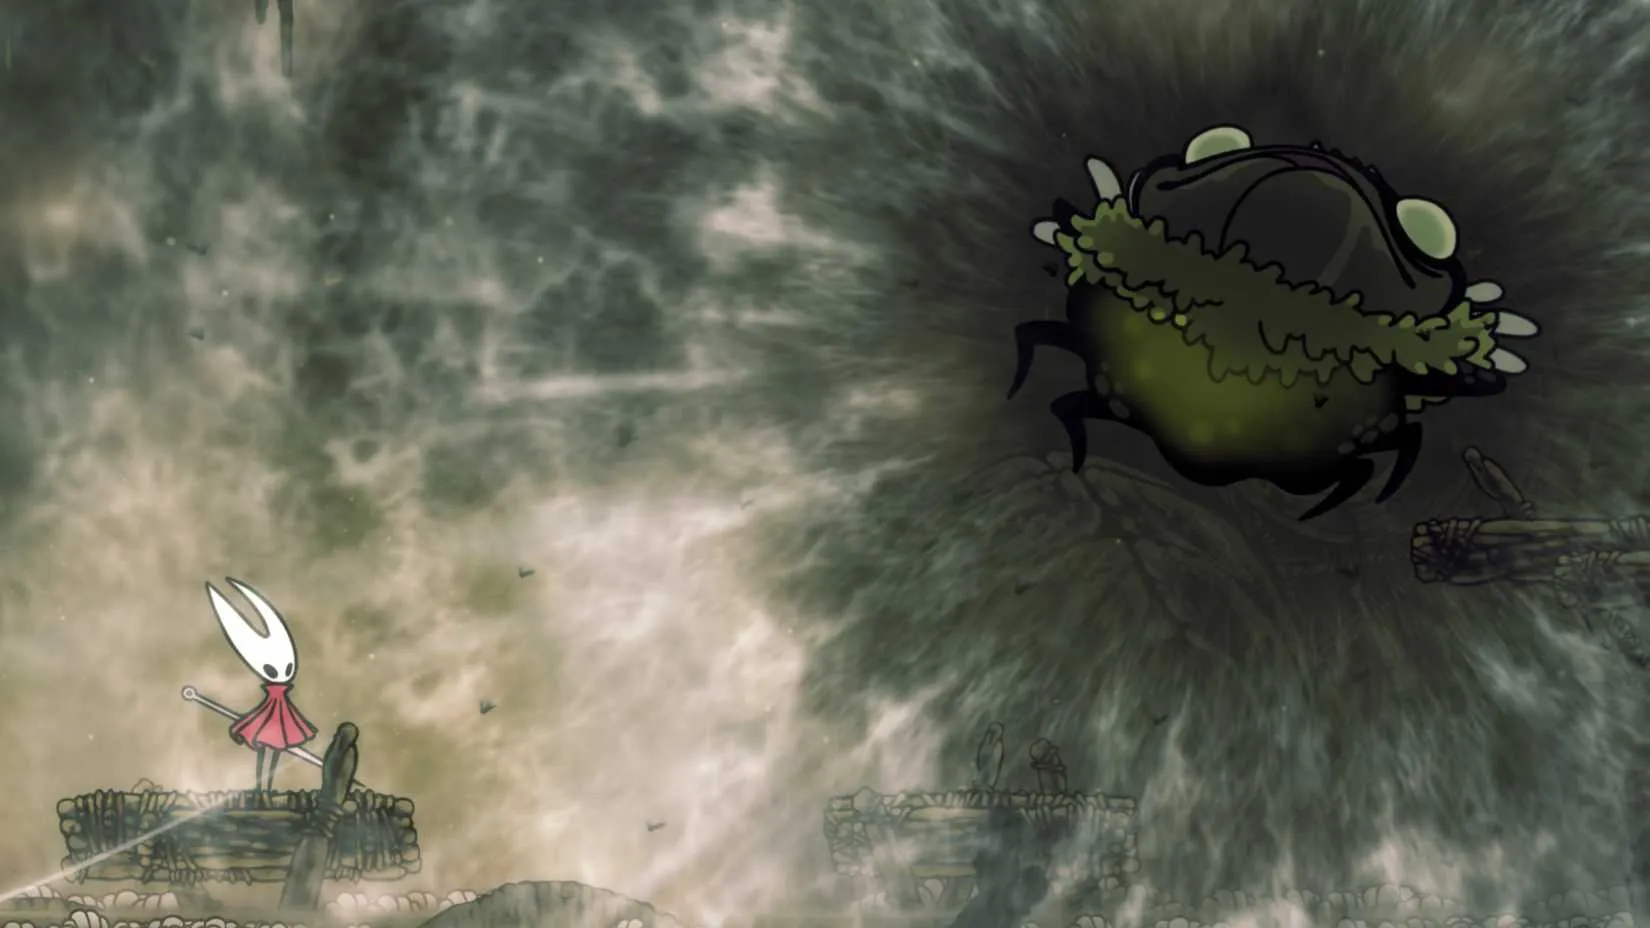
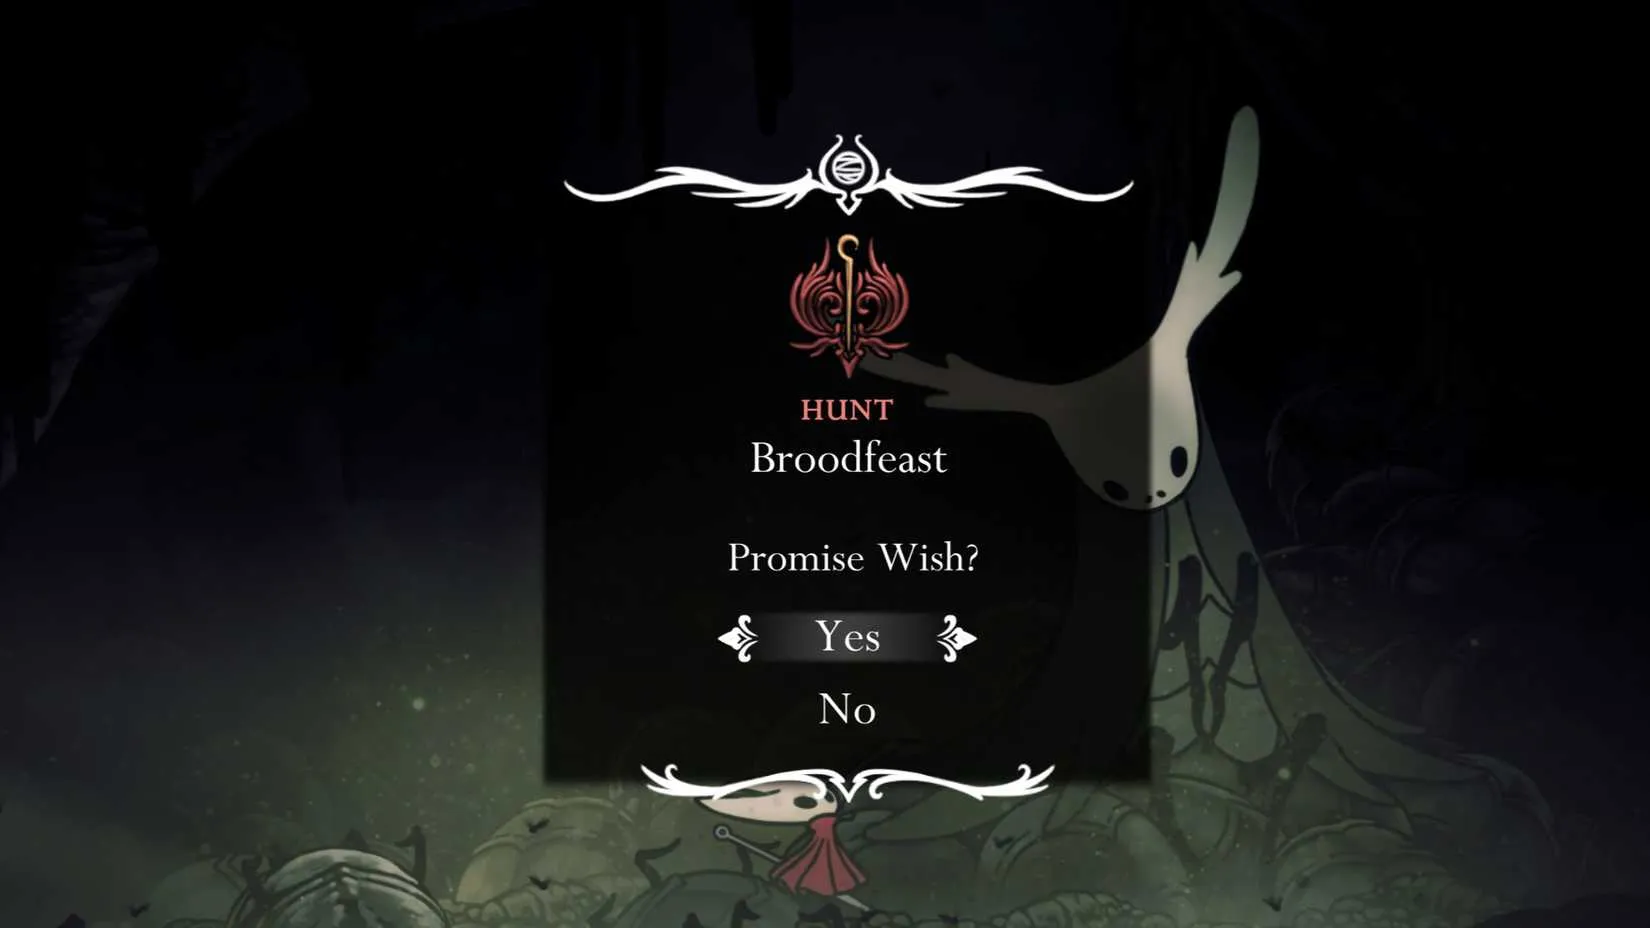
Exit the hut, continue left across a pit of spikes, and unlock a shortcut down to the bottom of Bilewater. But take the upward path first. This leads into the Putrefied Ducts, where you can find the Key of Apostate (used in The Slab). Explore a bit more, and you'll meet The Huntress, who asks Hornet to gather organs of various enemies using specific tools for the Broodfeast quest.
Final Thoughts
So, would I do it again? Maybe not for fun, but the Seeker's Soul made it necessary for my Act 3 run. Groal the Great is a brutal but memorable boss. The runback is painful, the enemy waves are annoying, but the satisfaction of victory is real. If you're struggling, take my advice: get the Faydown Cloak, bring Sting Shards, and don't be afraid to cheese it. Good luck, and may your Silk be plentiful. ??
After a boss like Groal, I'm usually ready for a break—or at least a change of pace. And if you're anything like me, you're probably juggling a wishlist of games you'd love to play next without paying full price.
That's where DealNest comes in. It's a game price tracker that pulls together deals from different stores, so you can see if that game you've been eyeing is finally on sale. It takes the guesswork out of waiting for a discount, and it's a handy tool for anyone who games on a budget.
|
|
|
|
|


